
This article is part of a 3-part series about Remote Desktop Services.
Deploying RDS
It's time to deploy RDS on our server running Windows Server 2012. At this point, it's assumed that you have a Windows Server 2012 server running which is either joined to a domain or running a DC itself.
In order to begin, open the Server Manager, click "Manage" in the upper right corner, and click "Add Roles and Features". This will open up the "Add Roles and Features wizard". Skip the default page.
If you are familiar with the installation process of roles on Windows Server, make sure to not click "Role-based or feature-based installation", as we will be using the "Remote Desktop Services installation" option this time. This will install required roles and features in order to successfully deploy RDS on your server. Click "Next" once selected.
There is a possibility you receive the following error message:
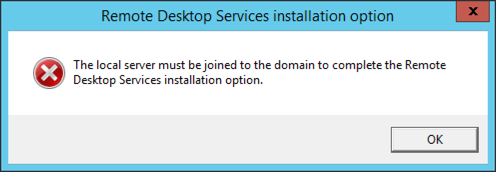
This indicates that your server is not joined to a domain yet. Verify it is, and if not, try to rejoin the domain. Otherwise, for testing purposes, install Active Directory Domain Services on the local server. If you want to know how to install Active Directory Domain Services, read the guide Getting Started with Active Directory. This will go through the basics of instilling Active Directory Domain Services, and managing an Active Directory installation. After promoting your server to a domain controller or joining it to a domain, try installing RDS again.
In the process of installing Active Directory Domain Services and promoting a server to domain controller, your server will be restarted once. The installation will happen regularly fast, as Vultr uses SSD drives. Log back in to your server after the restart.
Once verifying that you are able to install RDS, go back to the wizard and select the "Remote Desktop Services installation" option. When asked which deployment type you want to use, this is in most cases "Quick Start", so select that and click "Next". As for the deployment scenario, we will not be using RDS with a virtual machine-based desktop deployment, but with a session-based desktop deployment, so select that option and click "Next".
In the next step, you will be asked on which servers to install RDS. You want to add the same server every time, as we will be using a single server for the whole RDS deployment. Simply use the button in the middle to add your server and click "Next". After doing this, you will see an overview of what we're going to install:
- RD Connection Broker
- RD Web Access
- RD Session Host
Check "Restart the destination server automatically if required", and click "Deploy". While deploying RDS, the server will restart so take that into account if this is a server that's actively used. When the server is restarted, you will need to login to RDP with the same account you started the installation with, otherwise it will not be completed. Because RDS is relatively heavy, it might take some time to install. Be prepared to wait about 15 minutes before being able to continue.
Everything, from the RDS role itself, to RemoteApp, will be deployed and setup now. As soon as all three items are marked as "Succeeded", we can configure RDS! Click "Close" and dismiss the message you might get about RDS stopping to work after 119 days. This occurs because RDS is unlicensed, worry not though as we will take a look at RDS licensing later in this doc.
Continue to: Part 3: Configuration
No comments yet.