Introduction
This guide explains how to add, grow, and shrink partitions of a Vultr cloud server with GParted, a graphical partition editor. If you have upgraded your cloud server with a larger disk or need to expand a partition while preserving data, follow these steps. A cloud server instance is sometimes called a Virtual Private Server or VPS.
This guide temporarily boots your cloud server with the SystemRescue x64 ISO to run GParted, which works with a majority of operating systems.
1. Make a Backup
⚠ NOTE: These operations make destructive changes to the cloud server's file system. You can lose data if you make a mistake following these directions. Make a snapshot of the server before performing any of these steps. If your data is critical, please test the snapshot before proceeding. Deploy a new test instance with the snapshot, then verify the test instance boots and has the correct data.
2. Boot SystemRescue
- Navigate to your cloud server information page.
- Click the Settings tab.
- Click Custom ISO on the left menu.
- Select SystemRescue from the ISO Library drop-down.
- Click Attach ISO and Reboot.
3. Launch GParted
Open the web console from the server information page.
Type Enter to select the default, Boot SystemRescue using default options.
Enter
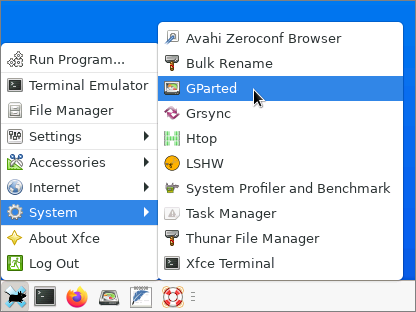
startxat the root prompt.When the graphical desktop appears, navigate to System > GParted.
Check a Partition
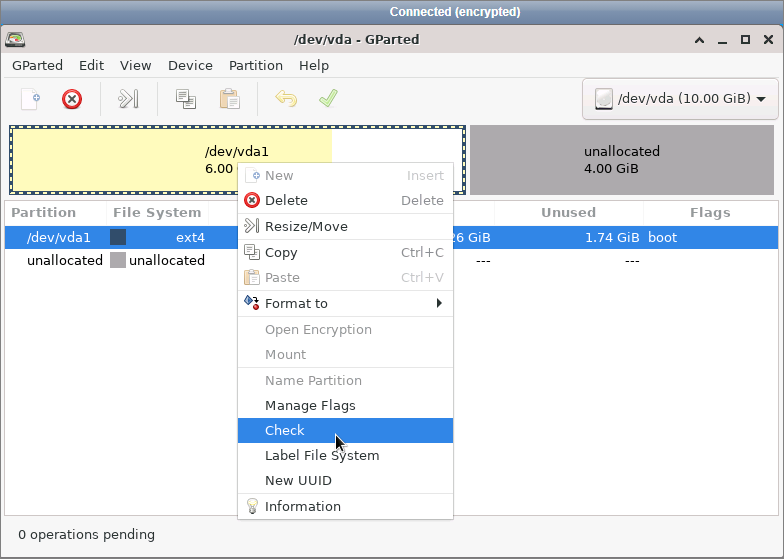
Before making changes, check the partition for errors. Right-click on the partition and select Check, which adds the operation to the pending queue.
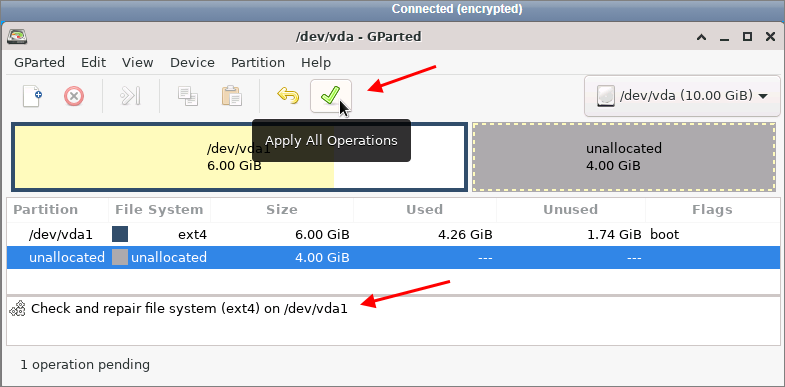
To run the check, click the Apply All Operations icon in the toolbar. Click Apply on the pop-up confirmation dialog.
Grow, Shrink, or Move a Partition
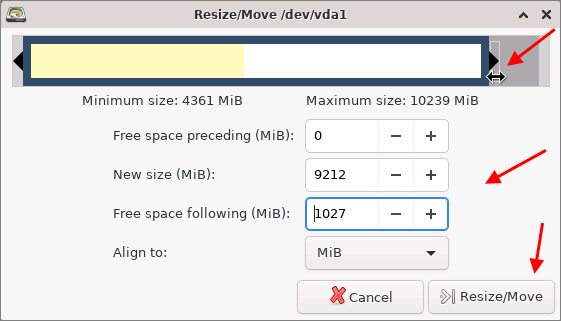
Right-click on the partition you want to modify. Choose Resize/Move.

Adjust the partition by dragging the size handles, or adjust the size fields, then click Resize/Move, which adds the operation to the pending queue. Next, click the Apply All Operations icon to resize the partition.
Add a Partition
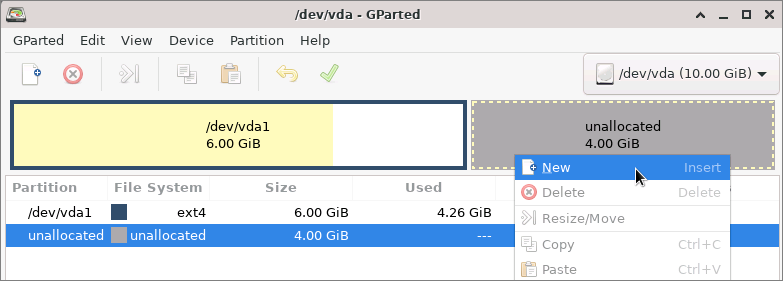
Right-click an unallocated area and choose New.
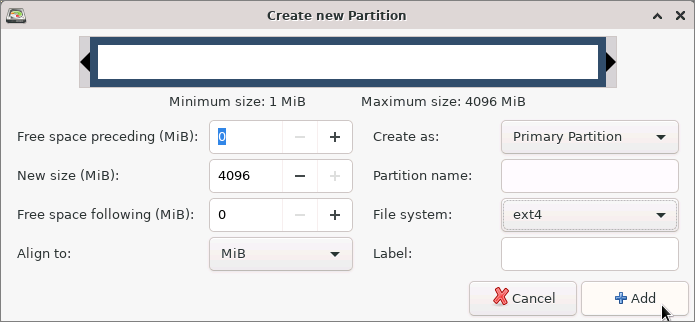
Enter the partition information, then click Add to add the operation to the pending queue. Next, click the Apply All Operations icon to resize the partition.
Detach and Reboot
When all operations are complete, detach the ISO and reboot the server. Navigate to the server information page and click Remove ISO.
Next Steps
If you added or removed partitions, you may need to adjust the mount points in /etc/fstab. Refer to the fstab documentation or the documentation specific to your distribution.
No comments yet.