
Vultr Marketplace Tips for Readme and App Instructions

If you are new to the Vultr Marketplace, please see the documentation overview to get started.
Introduction
When publishing a Vultr Marketplace App, the Readme and App Instructions are the first thing many customers see when browsing your app. It's essential to format these two Markdown documents properly for a good first impression.
This guide has tips and examples of Markdown formatting to assist you when publishing your app. You can find more recommendations about technical writing, Markdown, and Vultr's preferred style in our Style Guide and Markdown Tutorial.
Readme vs. App Instructions
You'll find the Readme editor on the General tab in the Marketplace. Customers see the Readme on your app's landing page. It should contain general marketing information about your application.
The App Instructions tab in the Marketplace is where you edit the instructions a customer needs after they deploy your app, including any application variables you've defined.
We have short examples of each further on in this guide.
Headings
Headings make your instructions easier to digest by separating logical sections. We suggest starting with Heading level 2, which looks like this:
## This is a Second-Level HeadingHeading 3 uses three hash marks as shown:
### This is Heading ThreeVultr supports heading levels 2 through 6.
Images and Screenshots
You can upload images and screenshots with copy-paste, drag-and-drop, or by clicking Insert Image in the toolbar.

Bullet Points and Numbered Lists
Bullet points are helpful when there are three or more items that do not have any particular order. Use asterisks to make bullet points. Example:
* Item
* Item
* Item
When rendered, you'll see:
- Item
- Item
- Item
Numbered lists are helpful when the customer must take steps in sequence. Use 1. to create numbered lists. Example:
1. The First step.
1. The Second step.
1. The Third step.
When rendered, you'll see:
- The First step.
- The Second step.
- The Third step.
You could also number your steps in Markdown as 1. 2. 3., but it's more convenient to use 1. 1. 1. if you need to insert items or reorder the list later. Markdown will handle the numbering in the output automatically for you.
Variables
Use the variables to make your App Instructions easier for customers. You can read more about App Variables here.
You could replace instructions like this:
When your app has finished deploying, type the IP address in your browser address bar....with a direct link including the IP address variable:
When your app has finished deploying, [click here to get started](https://{{ip}}/).Tables
Consider including tables as appropriate. See our guide to tables in Vultr-flavored Markdown.
If your app has two versions and you need a feature comparison chart, you could write it like this:
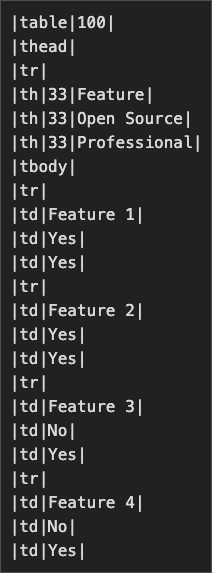
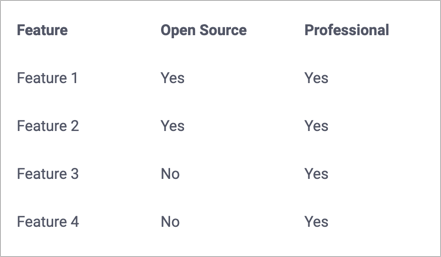
When rendered, the table looks like this:
Inline Code
Use backticks to show inline code. Anything in backticks is escaped from Markdown formatting. See our note about escaping App variables here.
Example:
This is `inline code`.Result:
This is inline code.
Code Blocks
Indent code blocks with four spaces. Use code blocks when you need to express something in a mono-spaced font without Markdown formatting.
Example Readme
Here's an example Readme to use as a starting template.
## About MyApp
MyApp is a groundbreaking app that does something special. As soon as you click deploy, the Vultr cloud orchestration takes over and spins up your instance in your desired data center.
### Point-and-Click Management
MyApp has a user-friendly management interface where you can manage:
* Email accounts
* Databases
* Security settings
* Passwords
Here's an example screenshot:

[Learn more about MyApp](https://www.example.com/about/myapp).Example App Instructions
Assuming your application defines the variables web_pass and db_pass, your instructions might look like this:
# Example Application

Your application is ready!

* Your server's IP address is: {{ip}}.
* The root password is: `{{root_password}}`.

Connect to your web server at [**https://{{ip}}/**](https://{{ip}}/).

* Your webserver username is: **demo**.
* Your webserver password is: `{{web_pass}}`.

The MySQL root password is: `{{db_pass}}`.
Learn more in the Vultr Marketplace Application Instructions guide.
More Information
This guide is part of the Vultr Marketplace documentation. Please see the documentation overview for more information.