

Introduction
AI Content Generation (AICG) is at the forefront of a technological revolution, and has attracted attention in both industrial and academic implementations. AICG leverages the power of advanced AI algorithms such as machine learning and deep learning to create artistic and multimedia content. Stable Diffusion is one of the key players offering AI image generation models via text-to-image, image-to-image, in-painting, out-painting, and up-scaling.
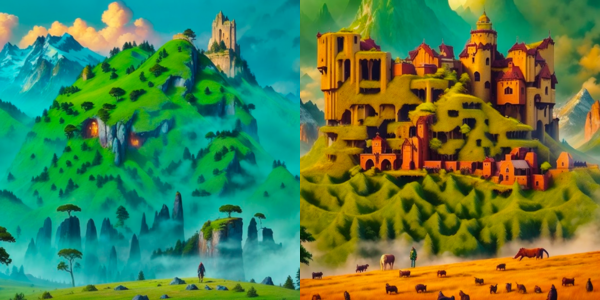
Using Stable Diffusion to style customized QR codes is an achievable task that implements AICG. This article explains how to embed QR Codes into AI-Generated Images using a Vultr Cloud GPU server. When complete, you should be able to embed invisible QR Codes into images you can scan using a mobile device.
Prerequisites
Before you begin:
Deploy a Ubuntu A100 Cloud GPU Server with at least:
- 1/3 GPU
- 20 GB GPU RAM
- 3 vCPUs
- 30 GB memory
Use SSH to access the server as a non-root user with sudo privileges.
Update the Python Pip package manager.
$ pip install --upgrade pip
Install Python Dependencies
Create a new directory in your user home to store generated images to.
$ mkdir ~/imagesUsing
wgetdownload a demo base image to the directory to enable the images pipeline later in this article.$ wget https://i.imgur.com/7WNWaen.png ~/imagesInstall the
pyTorchpackage required by Stable Diffusion.$ pip install torch==2.0.1Install
pyqrcodeto generate the standard QR code used incontrolnetwhen generating images.$ pip install pyqrcode==1.2.1Install
diffusersto enable full Stable Diffusion functionality.$ pip install diffusers==0.18.2Install
pillowfor basic image operations such as loading into memory, resizing, and writing back into disk.$ pip install Pillow==10.0.0Install
transformers,xformers,accelerate, andpypngpackages.$ pip install transformers xformers accelerate pypngTo verify that all packages are available, open the Python shell.
$ python3Import Python libraries line by line.
 >>> import io
 >>> import torch
 >>> import pyqrcode
 >>> from PIL import Image
 >>> from diffusers import StableDiffusionControlNetPipeline, ControlNetModel, UniPCMultistepScheduler
If all necessary dependencies are available on your server, no errors should display when importing these libraries. When successful, start generating QR codes in the Python shell.
Generate a Standard QR Code
In your Python Shell, create a qr object using pyqrcode, and set the correction levels to enable a maximum of 30% data loss tolerance by setting it as H in the following steps.
Define
qr_data. Replaceexample.comwith the target URL to include in your QR code.>>> qr_data = "https://www.example.com"Create a new
qrobject.>>> qrobject = pyqrcode.create(qr_data, error="H")Load a QR code image into the memory buffer.
 >>> buffer = io.BytesIO()
 >>> qrobject.png(buffer)
Resize the QR code to a favorable size for control net usage.
>>> control_image = Image.open(buffer).resize((768, 768))The above command resized the output width and height to
768respectively. Applying a higher resolution generates a more readable image, but increases slows the generation speed.768is an experimentally optimal parameter for the QR code image generation task.
Create a Stable Diffusion Pipeline with control_net
Define the base Stable Diffusion model path.
>>> sd_model_path = "danbrown/RevAnimated-v1-2-2"The images in this article use the Rev Animated Hugging Face model. Using different models generates images in different styles.
Define the control net model path.
>>> controlnet_model_path = "monster-labs/control_v1p_sd15_qrcode_monster"The images in this article as well use the QRcode monster model.
Load the control net model.
>>> controlnet = ControlNetModel.from_pretrained(controlnet_model_path, torch_dtype=torch.float16)Create the Stable Diffusion pipeline
 >>> pipe = StableDiffusionControlNetPipeline.from_pretrained(
         sd_model_path,
         controlnet=controlnet,
         torch_dtype=torch.float16,
     ).to("cuda")
Set Up Pipeline Parameters
To lower GPU memory usage and speed up the generation process, enable memory-efficient attention from xFormers.
 >>> pipe.enable_xformers_memory_efficient_attention()
 >>> pipe.enable_attention_slicing()
To further reduce GPU memory usage with a low impact on image generation performance, offload all models to the CPU.
>>> pipe.enable_model_cpu_offload()Declare pipeline scheduler.
>>> pipe.scheduler = UniPCMultistepScheduler.from_config(pipe.scheduler.config)The above directive defines the method for iteratively adding noise to an image or for updating a sample based on model outputs. While the UniPC scheduler is the fastest as used in this article, you can use other available schedulers with different algorithms fromthe diffusers Hugging Face page.
Generate the Image
Define the prompt.
>>> prompt = ["Masterpiece", "best quality", "high res", "ultra-detailed", "no humans", "lush green mountains", "winding rivers", "misty atmosphere", "verdant trees", "deep forest", "wisps of light", "verdant green", "A picturesque scene of a waterfall cascading down a high cliff amongst lush greenery"]Define the negative prompt.
>>> negative_prompt = ["art piece", "worst quality", "large head", "extra digits", "easynegative", "humans", "hills", "river", "young forest", "light rays", "verdant blue", "animals", " picture of a lake"]The more detailed the prompt is, the better the generated images could be. Depending on the Stable Diffusion models in use, the sensitivity to the prompt and negative prompt can be different.
To refine more prompts, make sure both the
prompt, andnegative_promptbatch sizes match. For example, if you apply 4 prompts, add the same amount in the negative.Start image generation.
 >>> images = pipe(
         prompt=prompt,
         negative_prompt=negative_prompt,
         guidance_scale=7.0,
         controlnet_conditioning_scale=1.6,
     ).images
In the above directive,
guidance_scaleandcontrolnet_conditioning_scaleare the most important parameters. Specifically,guidance_scale controlshow strict the diffusion process needs to follow the given prompts. The default value is7, and offers a good balance between creative freedom and following your direction.controlnet_conditioning_scalecontrols how the QR code appears in the generated image. The1.6value is an experimentally practical value to generate QR code readable images for mobile devices, while keeping it invisible to human eyes as much as possible.It's not guaranteed that every run would generate a readable image even with the same parameter setting. This is because the random seed would lead to different images. It's recommended to try running the image generation command multiple times and use your mobile phone to check if the invisible QR code reads correctly, and the generated image matches your expectations.
Write the generated image to a local path as below:
 >>> for idx, image in enumerate(images):
         image.save(f"/home/example-user/images/{str(idx)}.png")
The above directive writes the generated images to a PNG file in your predefined directory. For example, the
/home/example-user/imagesdirectory you created earlier.When successful, exit the Python shell.
>>> exit ()Verify that a new image is available in your
imagesdirectory.$ ls ~/imagesOutput:
0.png 1.png 2.png 3.png 7WNWaen.png
Optional: Run Python code in a Program File
In the above sections, you implemented declarations directly in the Python shell, to use a single file to generate the output, follow the steps below.
In your home directory, create a new Python file, for example,
qrcode.py.$ touch qrcode.pyUsing a text editor such as
Nano, edit the file.$ nano qrcode.pyAdd the following code to the file.
 import io
 import torch
 import pyqrcode
 from PIL import Image
 from diffusers import StableDiffusionControlNetPipeline, ControlNetModel, UniPCMultistepScheduler

 qr_data = "https://www.example.com"
 qrobject = pyqrcode.create(qr_data, error="H")
 buffer = io.BytesIO()
 qrobject.png(buffer)
 control_image = Image.open(buffer).resize((768, 768))
 sd_model_path = "danbrown/RevAnimated-v1-2-2"
 controlnet_model_path = "monster-labs/control_v1p_sd15_qrcode_monster"

 controlnet = ControlNetModel.from_pretrained(controlnet_model_path, torch_dtype=torch.float16)

 pipe = StableDiffusionControlNetPipeline.from_pretrained(
                 sd_model_path,
                 controlnet=controlnet,
                 torch_dtype=torch.float16,
             ).to("cuda")

 pipe.enable_xformers_memory_efficient_attention()
 pipe.enable_attention_slicing()

 pipe.enable_model_cpu_offload()
 pipe.scheduler = UniPCMultistepScheduler.from_config(pipe.scheduler.config)

 prompt = ["Masterpiece", "best quality", "high res", "ultra-detailed", "no humans", "lush green mountains", "winding rivers", "misty atmosphere", "verdant trees", "deep forest", "wisps of light", "verdant green", "A picturesque scene of a waterfall cascading down a high cliff amongst lush greenery"]

 negative_prompt = ["art piece", "worst quality", "large head", "extra digits", "easynegative", "humans", "hills", "river", "young forest", "light rays", "verdant blue", "animals", " picture of a lake"]

 input_image = Image.open("/home/example-user/images/7WNWaen.png")

 images = pipe(
                 image=input_image,
                 prompt=prompt,
                 negative_prompt=negative_prompt,
                 guidance_scale=7.0,
                 controlnet_conditioning_scale=1.6,
             ).images

 for idx, image in enumerate(images):
                 image.save(f"/home/example-user/images/{str(idx)}.png")
Save and close the file.
Run the program.
$ python3 qrcode.pyVerify that generated images are available in your target directory.
$ ls ~/images
Download the Generated Images
In this section, use sftp to securely download the remote files to your local computer as described in the steps below.
Open a new terminal or command prompt session on your computer, and establish an SFTP connection to the server.
$ sftp example-user@SERVER-IPReplace
example-user, andSERVER-IPwith your actual server details.Navigate to the
imagesdirectory.sftp> cd imagesList files in the directory.
sftp> lsGet generated images by name. For example,
1.png.sftp> get 1.pngThe above command downloads the image
1.pngto your computer's working directory.Open a new file explorer window, find the downloaded file, and open the image in your image viewer application.
Scan the image using your mobile device's QR code reader. Verify that the image reads successfully.

Depending on your mobile device type, keep a distance between the Image and the device to successfully scan the Invisible QR Code.
Conclusion
In this article, you embedded QR Codes to AI-generated images using Stable Diffusion on a Ubuntu 22.04 Vultr Cloud GPU server. The generated stylish image is a fancy way of distributing QR codes in various business scenarios.
Next Steps
For more Cloud GPU implementations, please visit the following resources:
No comments yet.