
How to Build a Whisper.cpp Container Image
Introduction
Whisper.cpp is a high-performance and lightweight inference of the OpenAI Whisper automatic speech recognition (ASR) model. It offers plain C/C++ implementations without dependency packages and performs speech recognition with support for both CPU and GPU-based systems.
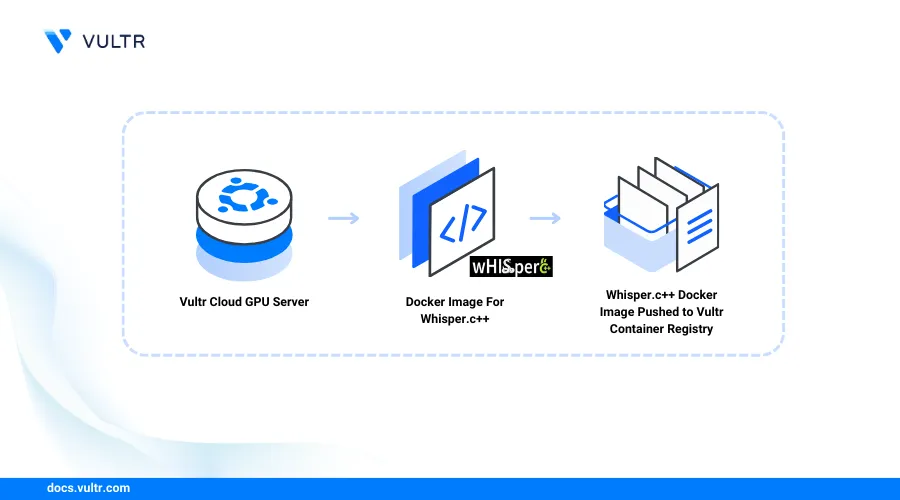
This article explains how to build a Whisper.cpp container image and publish it to a Vultr Container Registry.
Prerequisites
Before you begin:
Deploy an instance using Vultr's GPU Marketplace App
Access the server using SSH.
Start the Docker service.
console$ sudo systemctl start docker
Add the non-root user to the Docker group. For example,
linuxuser.console$ sudo usermod -aG docker linuxuser
Switch to the user:
console$ su - linuxuser
Set Up the Server
Create a new directory to store your Whisper C++ project files.
console$ mkdir whisper-project
Switch to the directory.
console$ cd whisper-project
Clone the Whisper.cpp project repository using Git.
console$ git clone https://github.com/ggerganov/whisper.cpp
List all directory files and verify that a new
whisper.cppdirectory is available.console$ lsOutput:
whisper.cppSwitch to the project directory.
console$ cd whisper.cpp
List all hidden files and verify that a
.devopsdirectory is available.console$ ls -a
Output:
. .devops cmake examples ggml-backend.h ggml-cuda ggml-impl.h ggml-metal.m ggml-quants.c ggml-vulkan.h .gitmodules models .......The
.devopsdirectory includes the following Dockerfile resources:main.Dockerfile: Contains the build context for CPU systems.main-cuda.Dockerfile: Contains the build context for GPU systems.
Use the above resources in the next sections to build a CPU or GPU system container image.
Build a Whisper.cpp Container Image for CPU Systems
Follow the steps below to build a Whisper.cpp container image using the main.Dockerfile that contains all necessary dependencies for CPU-based systems.
Copy the
main.Dockerfilefrom the.devopsdirectory to the mainwhisper.cppproject directory.console$ cp .devops/main.Dockerfile .
Build a new container image using
main.Dockerfilewith all files in the project directory. Replacewhisper-imagewith your desired image name.console$ docker build -f main.Dockerfile -t whisper-image .
Wait for the build process to complete. When successful, your output should look like the one below.
[+] Building 117.7s (12/12) FINISHED                                                                                                                                                                                 docker:default
 => [internal] load build definition from main.Dockerfile                                                                                                                                                                      0.0s
 => => transferring dockerfile: 446B                                                                                                                                                                                           0.0s
 => [internal] load metadata for docker.io/library/ubuntu:22.04                                                                                                                                                                3.1s
 => [internal] load .dockerignore
View all Docker images on the server and verify that the new
whisper-imageis available.console$ docker images
Output:
REPOSITORY      TAG       IMAGE ID       CREATED         SIZE
whisper-image   latest    d54bd7163db5   4 minutes ago   608MB
Build a Whisper.cpp Container Image for GPU Systems
The Whisper.cpp main-cuda.Dockerfile resource contains the build context for GPU systems compatible with the latest NVIDIA CUDA drivers. Follow the steps below to build a Whisper.cpp container image compatible with NVIDIA GPU systems.
Copy
main-cuda.Dockerfileto the main project directory.console$ cp .devops/main-cuda.Dockerfile .
Build a new container image
whisper-gpu-imageusing themain-cuda.Dockerfilewith all files in the working project directory.console$ docker build -f main-cuda.Dockerfile -t whisper-gpu-image .
View all Docker images on the server and verify that the new Whisper.cpp GPU image is available.
console$ docker images
Output:
REPOSITORY          TAG       IMAGE ID       CREATED          SIZE
whisper-gpu-image   latest    47be5b1566fd   31 seconds ago   2.76GB
To run the whisper.cpp GPU container image, verify that your target host includes the minimum or higher CUDA version referenced by the
ARG CUDA_VERSION=directive within themain-cuda.Dockerfile. Run the following command to verify the target CUDA version.console$ cat main-cuda.Dockerfile | grep CUDA_VERSION=
Output:
ARG CUDA_VERSION=12.3.1
Upload the Whisper.cpp Container Image to the Vultr Container Registry
Open the Vultr Console.
Click Products and select Container Registry on the main navigation menu.
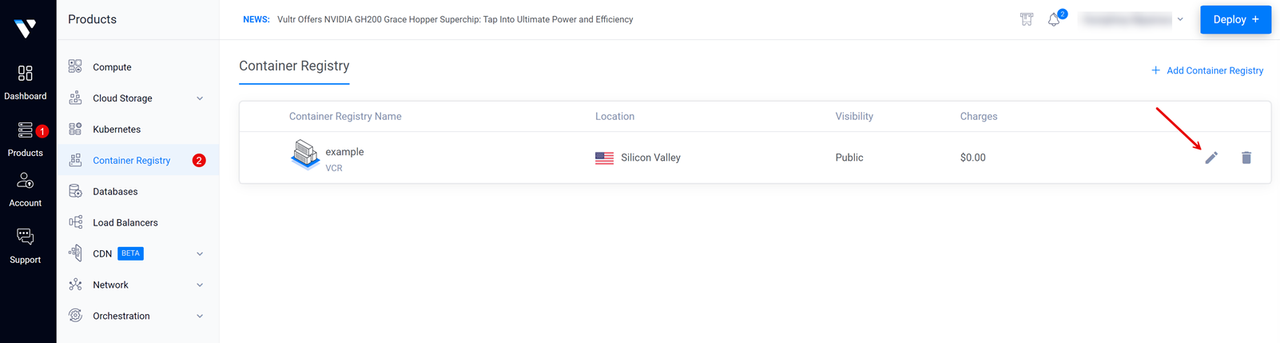
Click your target Vultr Container Registry to open the management panel and view the registry access credentials.
Copy the Registry URL value, Username, and API Key to use when accessing the registry.
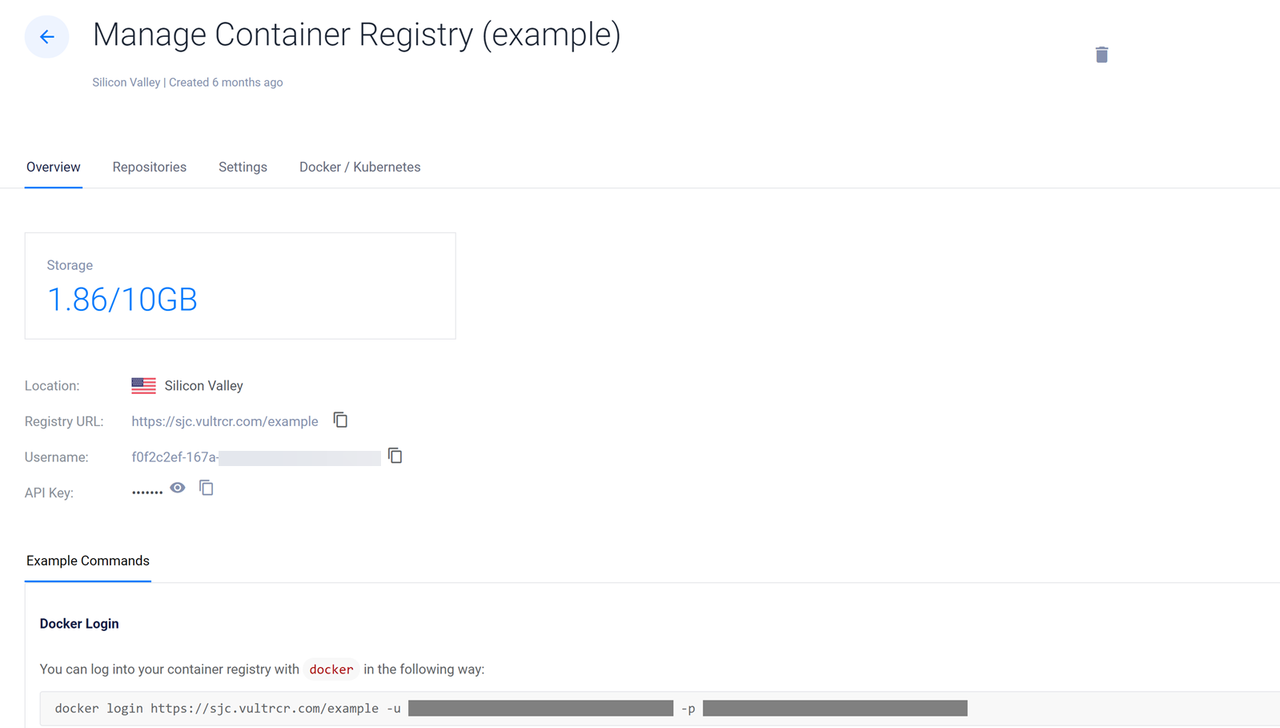
Switch to your server terminal session and log in to your Vultr Container Registry. Replace
exampleregistry,exampleuser,registry-passwordwith your actual registry details.console$ docker login https://sjc.vultrcr.com/exampleregistry -u exampleuser -p registry-password
Tag the whisper.cpp container image with your desired Vultr Container Registry tag. For example,
sjc.vultrcr.com/exampleregistry/whisper-gpu-image.console$ docker tag whisper-gpu-image sjc.vultrcr.com/exampleregistry/whisper-gpu-image
View all Docker images on the server and verify that the new tagged image is available.
console$ docker images
Output:
REPOSITORY                                  TAG       IMAGE ID       CREATED          SIZE
whisper-gpu-image                           latest    47be5b1566fd   6 minutes ago    2.76GB
sjc.vultrcr.com/exampleregistry/whisper-gpu-image   latest    47be5b1566fd   6 minutes ago    2.76GB
Push the tagged image to your Vultr Container Registry.
console$ docker push sjc.vultrcr.com/exampleregistry/whisper-gpu-image
When successful, your output should be similar to the one below:
The push refers to repository [sjc.vultrcr.com/exampleregistry/whisper-gpu-image]
a42c530a140b: Pushed
445c20a8fa7a: Pushed
8ceb9643fb36: Pushed
latest: digest: sha256:70645eed0095268b6c11b051083cb83c41c1991dc088b0d0485ccc50aa4cf4af size: 2838
Open your Vultr Container Registry management panel and click Repositories on the top navigation bar to verify that the new repository is available.
