
Introduction
Audio Speech Recognition (ASR) is a pivotal technology that has transformed the way of interaction in the digital world. At its core, ASR allows you to create applications that understand and transcribe human languages into text. Developed applications make use of voice commands to perform transcription and translation tasks, most notably, voice assistant tools use audio speech recognition to generate results.
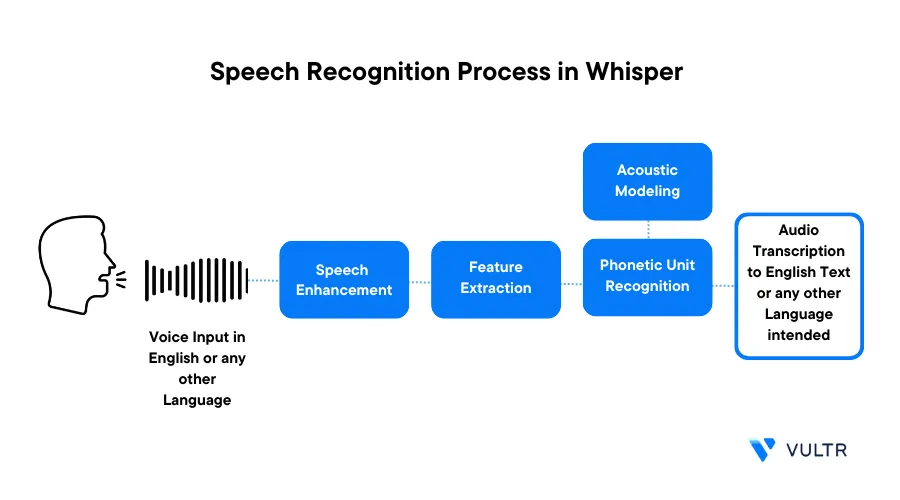
Whisper is an open-source large neural network model that approaches human-level robustness and accuracy in audio speech recognition for multiple languages. When using Whisper on a Vultr Cloud GPU instance, it is practical to build a high-performance automatic speech recognition system.
This article explains how to build an automatic speech recognition system on a Vultr Cloud GPU server.
Prerequisites
Before you begin:
Deploy a Debian server with at least
- 1/7 GPU
- 10GB GPU RAM
- 2 vCPU
- 15GB memory
Using SSH, access the server
Create a non-root user with sudo privileges
Switch to the user account
$ su example_user
Set Up the Server
To perform audio speech recognition tasks, install the necessary dependencies required by the Whisper model. In addition, set up a development environment such as Jupyter Notebook to run Python codes as described in the steps below.
Install the FFmpeg media processing package
$ sudo apt install ffmpegInstall the Python virtual environment package
$ sudo apt install python3-venvCreate a new Python virtual environment
$ python3 -m venv audio-envActivate the virtual environment
$ source audio-env/bin/activateUpdate the Pip package manager
$ pip install --upgrade pipUsing
pip, install thePyTorch,transformers, anddatasetspackages$ pip install torch transformers datasets*
torch: Installs the latest PyTorch versiontransformers: Provides thousands of pre-trained models to perform various multi modal tasks on text, vision, and audiodatasets: Provides efficient data pre-processing for audio data
Install Jupyter Notebook
$ pip install notebookAllow the Jupyter Notebook port
8888through the firewall$ sudo ufw allow 8888/tcpStart Jupyter Notebook
$ jupyter notebook --ip=0.0.0.0The above command starts a Jupyter Notebook session that listens for incoming connections on all network interfaces. If the above command fails to run, stop your SSH session, and re-establish a connection to the server.
When successful, an access token displays in your output like the one below:
 [I 2023-09-06 02:43:28.807 ServerApp] jupyterlab | extension was successfully loaded.
 [I 2023-09-06 02:43:28.809 ServerApp] notebook | extension was successfully loaded.
 [I 2023-09-06 02:43:28.809 ServerApp] Serving notebooks from local directory: /root
 [I 2023-09-06 02:43:28.809 ServerApp] Jupyter Server 2.7.3 is running at:
 [I 2023-09-06 02:43:28.809 ServerApp] http://HOSTNAME:8888/tree?token=639d5e7a34b146eb1b61aa44c419334cc0ede8e8b02e15e6
 [I 2023-09-06 02:43:28.809 ServerApp]     http://127.0.0.1:8888/tree?token=639d5e7a34b146eb1b61aa44c419334cc0ede8e8b02e15e6
 [I 2023-09-06 02:43:28.809 ServerApp] Use Control-C to stop this server and shut down all kernels (twice to skip confirmation).
 [W 2023-09-06 02:43:28.812 ServerApp] No web browser found: Error('could not locate runnable browser').
 [C 2023-09-06 02:43:28.812 ServerApp]

     To access the server, open this file in a browser:
         file:///example_user/.local/share/jupyter/runtime/jpserver-10747-open.html
     Or copy and paste one of these URLs:
         http://HOSTNAME:8888/tree?token=639d5e7a34b146eb1b61aa44c419334cc0ede8e8b02e15e6
         http://127.0.0.1:8888/tree?token=639d5e7a34b146eb1b61aa44c419334cc0ede8e8b02e15e6
Using a web browser such as Firefox, access the Jupyter Notebook using your access token
http://SERVER_IP_HERE:8888/tree?token=TOKEN_HERE
Transcribe Speech in English
Within the Jupyter interface, click
Newand select Notebook from the dropdown listWhen prompted, click Select to create a new
Python3Kernel fileIn the new code cell, update Jupyter and Ipywidgets
!pip install --upgrade jupyter ipywidgetsImport the required libraries
 import requests
 import json
 from transformers import pipeline
 from datasets.arrow_dataset import Dataset
 from IPython.display import Audio
Define a function to load the sample audio file from a URL
 def load_wav(url):
     local_path = "test.wav"
     with open(local_path, "wb") as a:
         resp = requests.get(url)
         a.write(resp.content)
     ds = Dataset.from_dict({"audio": [local_path]})
     return ds[0]["audio"]
Load a sample audio file with the speech in English
 url_en = "https://www.signalogic.com/melp/EngSamples/Orig/female.wav"
 sample = load_wav(url_en)
The above code uses public speech audio samples. Replace the link with your desired audio file or stream link to use for speech recognition
Verify and play the loaded Audio in your session
Audio(sample)Create the auto speech recognition pipeline
 pipe = pipeline(
     "automatic-speech-recognition",
     model="openai/whisper-large-v2",
     chunk_length_s=30,
     device="cuda",
 )
In the above code:
model: Determines the specific Whisper model to use. The code usesopenai/whisper-large-v2for the best possible performance on the recognition accuracy and robustnesschunk_length_s: Enables the audio chunking algorithm to split the long audio into smaller pieces for processing because the Whisper model works on audio samples with a duration of up to 30 seconds
Run the audio recognition task
 prediction = pipe(sample, batch_size=8, return_timestamps=True)["chunks"]
 print(json.dumps(prediction, sort_keys=True, indent=4))
For the example audio file used in this article, your output should look like the one below:
 [
     {
         "text": " Perhaps this is what gives the Aborigine his odd air of dignity.",
         "timestamp": [
             0.0,
             3.48
         ]
     },
     {
         "text": " Turbulent tides rose as much as fifty feet.",
         "timestamp": [
             3.48,
             6.04
         ]
     },
    …
 ]
Transcribe Speech in a Different Language
Load a new sample audio file with French speech
frurl_fr = "https://www.signalogic.com/melp/FrenchSamples/Orig/f_m.wav" sample = load_wav(url_fr) Audio(sample)Create the French transcribe pipeline
 pipe = None
 pipe = pipeline(
     "automatic-speech-recognition",
     model="openai/whisper-large-v2",
     chunk_length_s=30,
     device="cuda",
     generate_kwargs={"language":"french","task": "transcribe"},
 )
Verify that your target language
frenchis available in thegenerate_kwargsparameterRun the audio transcribe for French Speech
 prediction = pipe(sample, batch_size=8, return_timestamps=True)["chunks"]
 print(json.dumps(prediction, sort_keys=True, indent=4))
Your output should look like the one below:
 [
     {
         "text": " La bise et le soleil se disputaient, chacun assurait qu'il \u00e9tait le plus fort,",
         "timestamp": [
             0.0,
             5.0
         ]
     },
     {
         "text": " quand ils virent un voyageur s'avancer envelopp\u00e9 dans son manteau.",
         "timestamp": [
             5.0,
             9.0
         ]
     },
     …
 ]
Translate Speech from a Different Language to English Text
To perform translation, change the French task from
transcribetotranslateand enable audio recognitionpipe = None pipe = pipeline( "automatic-speech-recognition", model="openai/whisper-large-v2", chunk_length_s=30, device="cuda", generate_kwargs={"language":"french","task": "translate"}, )Run the audio translation
 prediction = pipe(sample, batch_size=8, return_timestamps=True)["chunks"]
 print(json.dumps(prediction, sort_keys=True, indent=4))
Your translation output should look like the one below:
 [
     {
         "text": " The abyss and the sun were at war.",
         "timestamp": [
             0.0,
             2.0
         ]
     },
     {
         "text": " Each one assured that he was the strongest",
         "timestamp": [
             2.0,
             5.0
         ]
     },
     …
 ]
Conclusion
In this article, you built an automatic speech recognition system on a Vultr Cloud GPU server. You applied both English and different language sources using the Whisper model to generate results. The accuracy of speech recognition and translation allows you to achieve high-quality results without any additional fine-tuning. For more information about Whisper, visit the official research page.
Next Steps
To implement more solutions on your Vultr Cloud GPU Server, visit the following resources:
No comments yet.