
How to Deploy Qdrant – Open-Source Vector Database for AI Applications
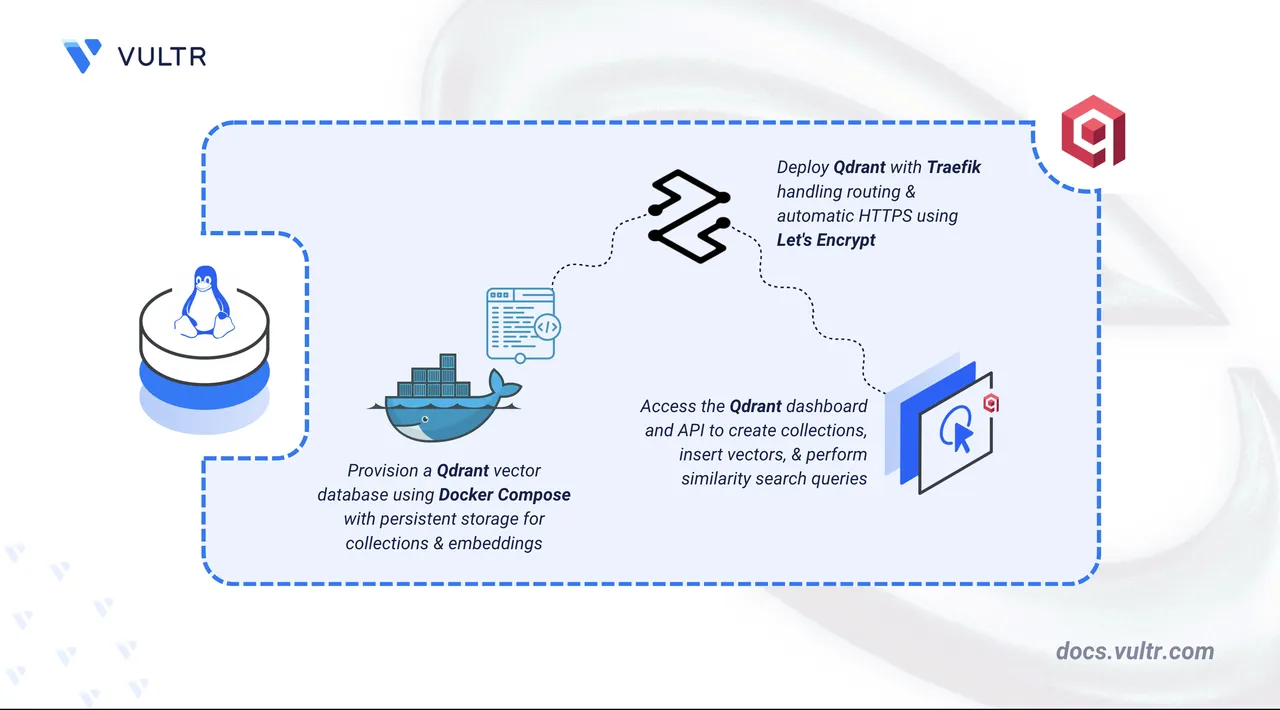
Qdrant is an open-source vector database built for storing and searching high-dimensional embeddings. It enables applications to retrieve results based on semantic similarity rather than exact keyword matches. Qdrant is commonly used in semantic search systems, retrieval-augmented generation (RAG) pipelines, recommendation engines, and AI-powered applications that rely on similarity search to surface relevant results from large datasets.
This article explains how to deploy Qdrant on a Linux server using Docker Compose, configure Traefik for automatic HTTPS with Let's Encrypt, secure access using an API key, and verify the deployment using similarity search operations.
Prerequisites
Before you begin, you need to:
- Have access to a Linux-based server with at least 2 CPU cores and 8 GB of RAM as a non-root user with sudo privileges.
- Install Docker and Docker Compose.
- Create a DNS A record pointing to your server's IP address (for example,
qdrant.example.com).
Set Up the Directory Structure and Environment Variables
Qdrant requires a directory for persistent vector storage. Without persistent storage, collections, embeddings, and indexes are lost when the container restarts.
Create the project directory with a subdirectory for storage.
console$ mkdir -p ~/qdrant/data
data: Stores Qdrant collections, vector embeddings, and indexes.
Navigate to the project directory.
console$ cd ~/qdrant
Generate a strong API key.
console$ openssl rand -hex 32
Copy the output to use in the next step.
Create the environment file.
console$ nano .env
Add the following environment variables:
iniDOMAIN=qdrant.example.com LETSENCRYPT_EMAIL=admin@example.com QDRANT_API_KEY=PASTE_GENERATED_KEY_HERE
Replace:
qdrant.example.comwith your registered domain.admin@example.comwith your email address for Let's Encrypt notifications.PASTE_GENERATED_KEY_HEREwith the API key you generated in the previous step.
Save and close the file.
Deploy with Docker Compose
The deployment uses Traefik as a reverse proxy for HTTPS termination and the Qdrant container for vector storage and similarity search. This configuration is based on the official Qdrant Docker deployment.
Create the Docker Compose file.
console$ nano docker-compose.yaml
Add the following manifest. Check the Qdrant releases page for the latest stable version and replace
v1.17.1accordingly.yamlservices: traefik: image: traefik:v3.6 container_name: traefik command: - "--providers.docker=true" - "--providers.docker.exposedbydefault=false" - "--api.dashboard=false" - "--entrypoints.web.address=:80" - "--entrypoints.websecure.address=:443" - "--entrypoints.web.http.redirections.entrypoint.to=websecure" - "--entrypoints.web.http.redirections.entrypoint.scheme=https" - "--certificatesresolvers.letsencrypt.acme.httpchallenge=true" - "--certificatesresolvers.letsencrypt.acme.httpchallenge.entrypoint=web" - "--certificatesresolvers.letsencrypt.acme.email=${LETSENCRYPT_EMAIL}" - "--certificatesresolvers.letsencrypt.acme.storage=/letsencrypt/acme.json" ports: - "80:80" - "443:443" volumes: - "./letsencrypt:/letsencrypt" - "/var/run/docker.sock:/var/run/docker.sock:ro" restart: unless-stopped qdrant: image: qdrant/qdrant:v1.17.1 container_name: qdrant expose: - "6333" volumes: - "./data:/qdrant/storage" environment: QDRANT__SERVICE__API_KEY: "${QDRANT_API_KEY}" labels: - "traefik.enable=true" - "traefik.http.routers.qdrant.rule=Host(`${DOMAIN}`)" - "traefik.http.routers.qdrant.entrypoints=websecure" - "traefik.http.routers.qdrant.tls.certresolver=letsencrypt" - "traefik.http.services.qdrant.loadbalancer.server.port=6333" restart: unless-stopped
Save and close the file.
In the above manifest:
services: Defines two containers that Docker Compose manages:traefik: Functions as the reverse proxy and TLS termination point.qdrant: Runs the vector database service.
image: Specifies the container image for each service. Theqdrant/qdrant:v1.17.1image includes the API and storage engine.volumes:- The
./letsencryptbind mount retains TLS certificates between container restarts. - The
./databind mount preserves vector collections and indexes. - The Docker socket allows Traefik to dynamically detect and route traffic to the Qdrant service.
- The
environment(Qdrant):QDRANT__SERVICE__API_KEY: Configures the API key required for authenticated API requests.
labels(Qdrant): Registers the container with Traefik for HTTPS routing based on the domain name.restart: unless-stopped: Ensures containers recover automatically after failures or restarts.
Launch the containers.
console$ docker compose up -d
Verify that both services are running.
console$ docker compose ps
The output displays two running containers with Traefik listening on ports 80 and 443 and Qdrant making port 6333 available internally to the Docker network.
Check the service logs for any errors.
console$ docker compose logs --tail=50
The output shows Qdrant initialization messages confirming storage is loaded and the API is listening on port 6333.
For more information on managing a Docker Compose stack, see the How to Use Docker Compose article.
Access and Configure Qdrant
Qdrant provides a web dashboard and REST API for managing vector collections, embeddings, and similarity queries. The API key set in the .env file controls access to all endpoints.
Open your web browser and navigate to the Qdrant dashboard, replacing
qdrant.example.comwith your configured domain.https://qdrant.example.com/dashboardWhen prompted, enter the API key you created and stored in the
.envfile to access the dashboard.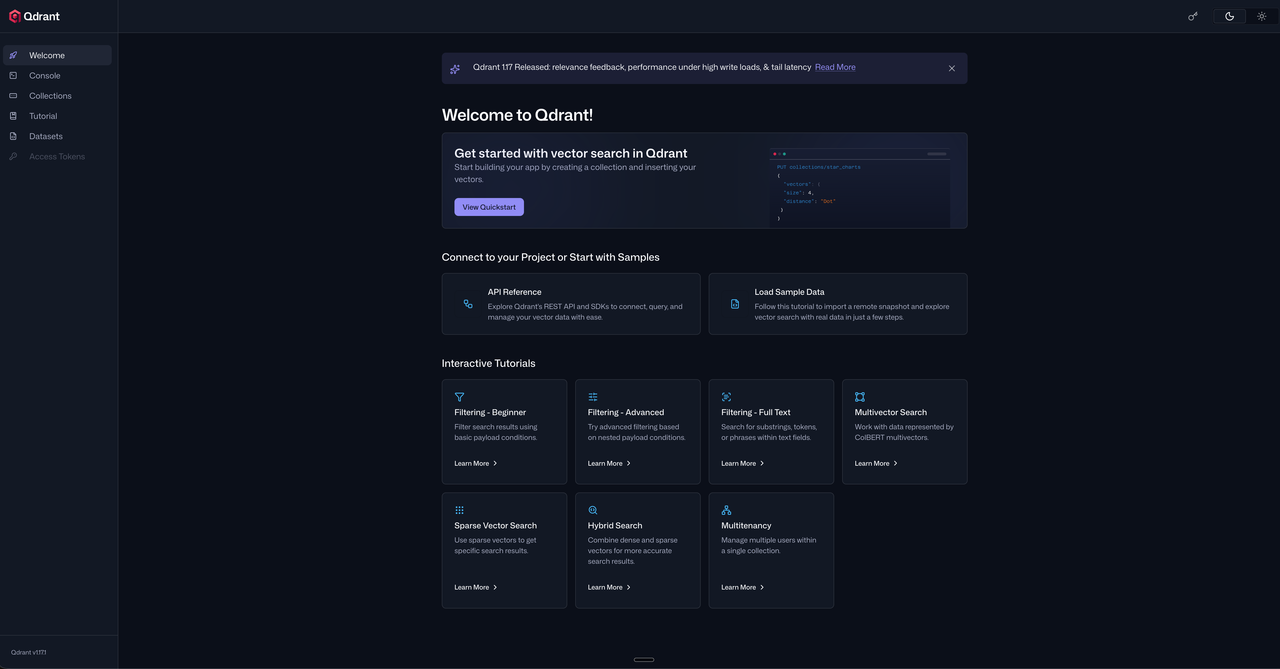
Verify that the service is healthy using the
/readyzendpoint.console$ curl https://qdrant.example.com/readyz
Output:
all shards are ready
Create a Sample Collection and Run a Similarity Search
Verify that the service is operational by creating a collection, inserting sample vectors, and running a similarity search. These steps confirm that the API is accessible, authentication is working, and vector indexing is functioning correctly over HTTPS. Collections organize vectors and define how similarity is measured between them.
qdrant.example.com with your domain in all commands of this section.
Set the API key as a shell variable. Replace
YOUR_API_KEYwith the value from your.envfile.console$ export QDRANT_API_KEY=YOUR_API_KEY
Create a collection named
star_chartswith 4-dimensional vectors using Cosine similarity as the distance metric.console$ curl -X PUT "https://qdrant.example.com/collections/star_charts" \ -H "Content-Type: application/json" \ -H "api-key: ${QDRANT_API_KEY}" \ -d '{ "vectors": { "size": 4, "distance": "Cosine" } }'
Populate your collection with sample data to test similarity search:
console$ curl -X PUT "https://qdrant.example.com/collections/star_charts/points" \ -H "Content-Type: application/json" \ -H "api-key: ${QDRANT_API_KEY}" \ -d '{ "points": [ {"id": 1, "vector": [0.05, 0.61, 0.76, 0.74], "payload": {"colony": "Mars"}}, {"id": 2, "vector": [0.19, 0.81, 0.75, 0.11], "payload": {"colony": "Jupiter"}}, {"id": 3, "vector": [0.36, 0.55, 0.47, 0.94], "payload": {"colony": "Venus"}}, {"id": 4, "vector": [0.18, 0.01, 0.85, 0.80], "payload": {"colony": "Moon"}}, {"id": 5, "vector": [0.24, 0.18, 0.22, 0.44], "payload": {"colony": "Pluto"}} ] }'
This command loads five sample vectors into the
star_chartscollection with payload data.Query the collection to find the vectors most similar to a given sample:
console$ curl -X POST "https://qdrant.example.com/collections/star_charts/points/search" \ -H "Content-Type: application/json" \ -H "api-key: ${QDRANT_API_KEY}" \ -d '{ "vector": [0.2, 0.1, 0.9, 0.7], "limit": 3, "with_payload": true }'
Output:
{
  "result": [
    {"id": 4, "version": 1, "score": 0.99248314, "payload": {"colony": "Moon"}},
    {"id": 1, "version": 1, "score": 0.89463294, "payload": {"colony": "Mars"}},
    {"id": 5, "version": 1, "score": 0.8543979, "payload": {"colony": "Pluto"}}
  ],
  "status": "ok",
  "time": 0.000246899
}
The response confirms that Qdrant is indexing vectors and returning similarity results over HTTPS.
Open your Qdrant dashboard in a browser and click Collections in the left sidebar. Verify that
star_chartsappears in the list with a GREEN status and 5 points.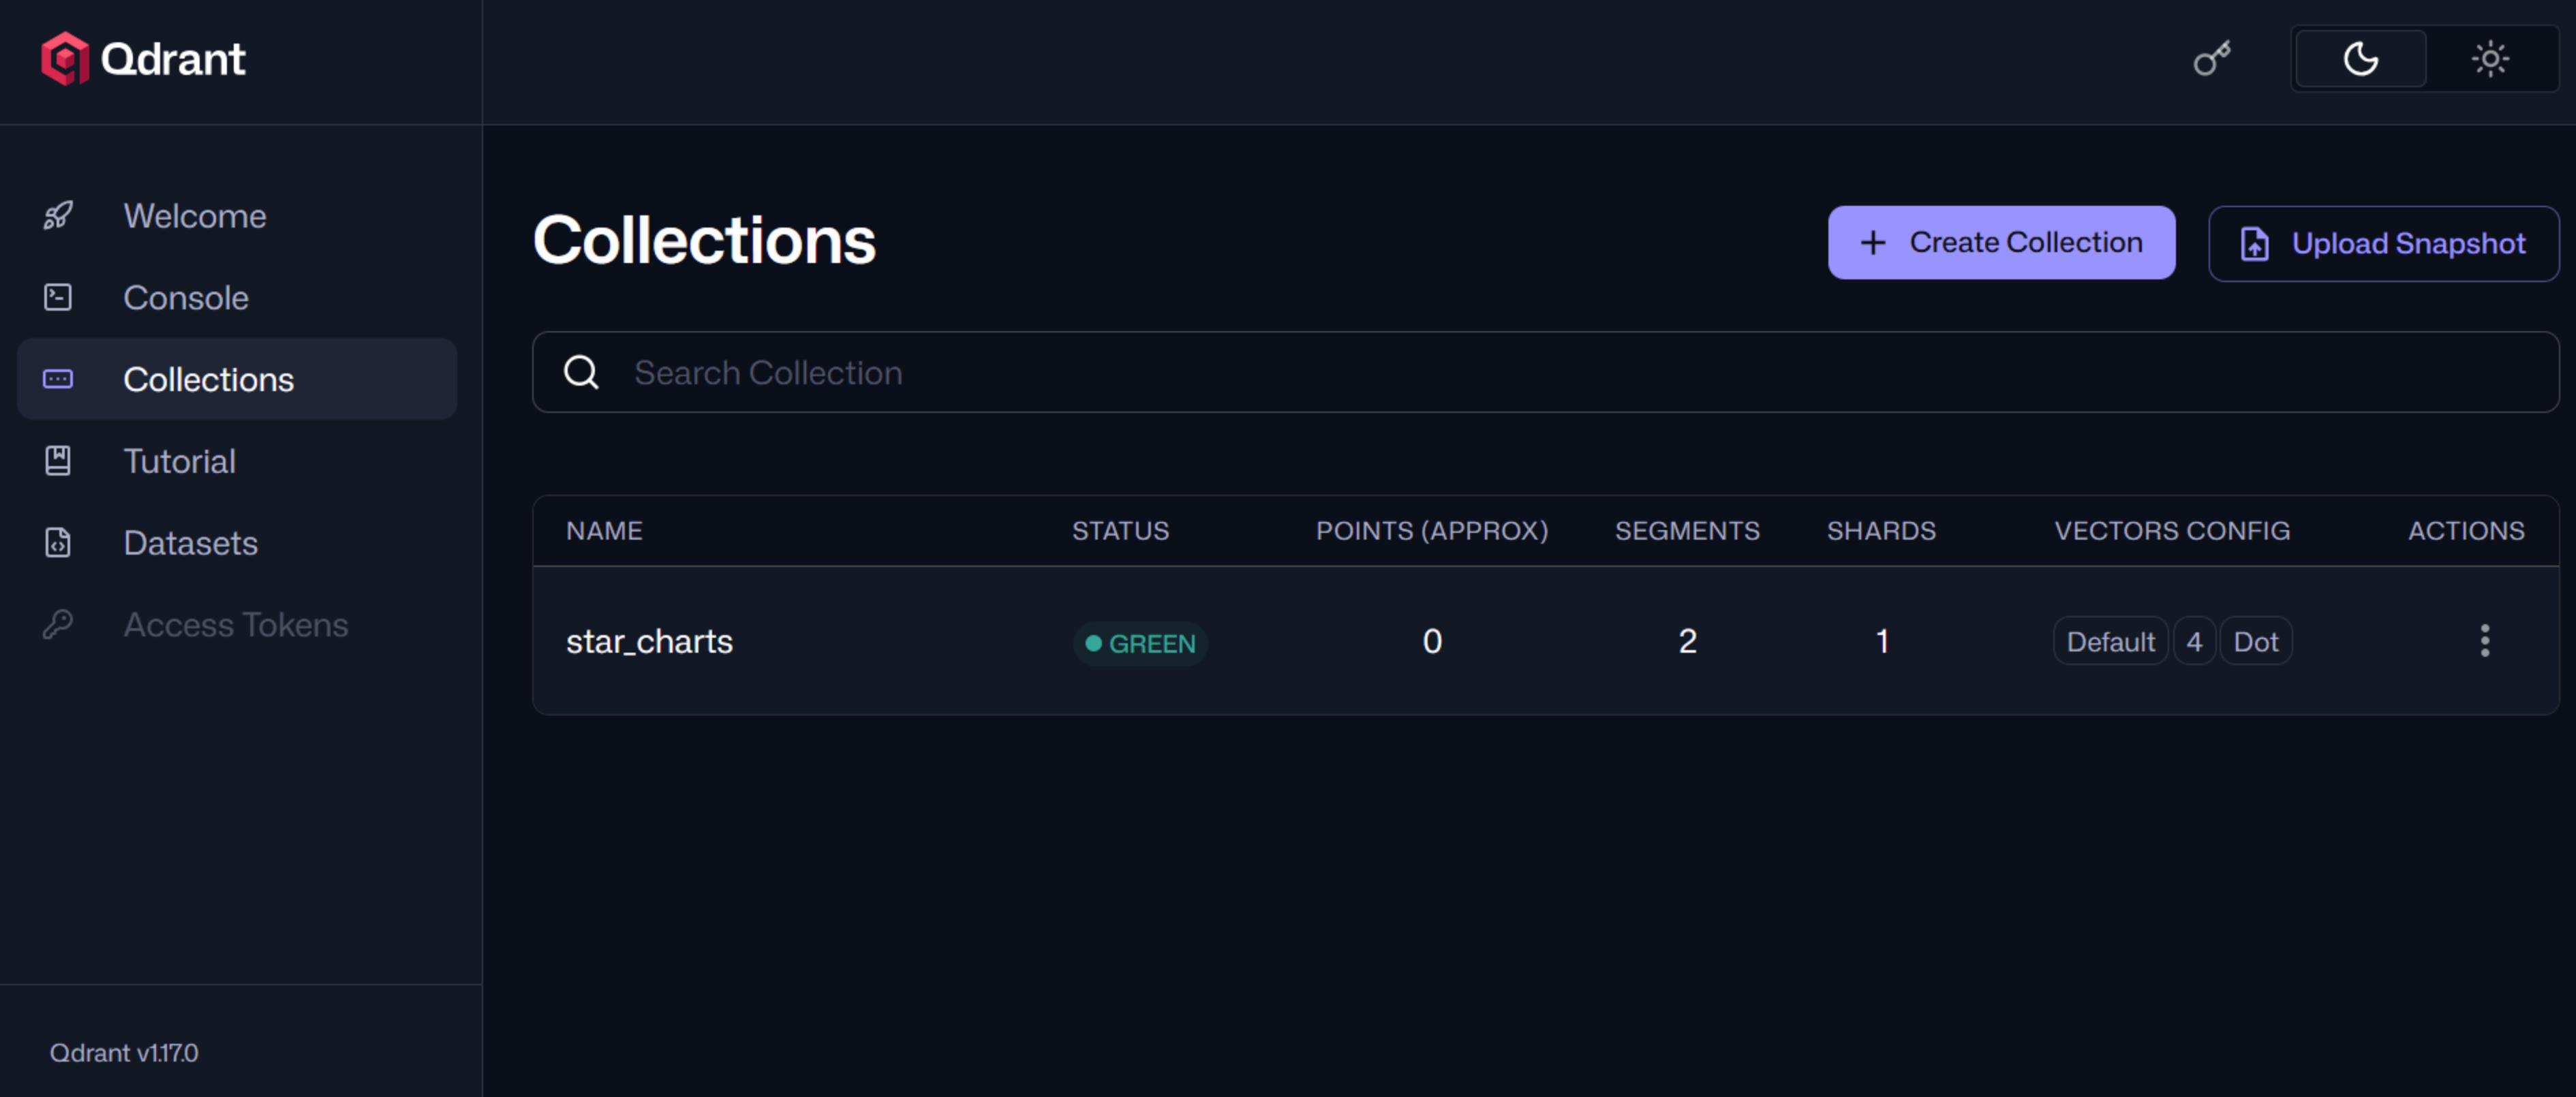
These steps confirm that your Qdrant deployment is successfully indexing vectors and serving similarity queries over authenticated HTTPS.
Conclusion
You have successfully deployed Qdrant using Docker Compose with HTTPS. The setup provides a vector database with API key authentication, and a web dashboard for managing collections and vectors. For additional configuration options such as clustering, backup strategies, and advanced indexing, refer to the official Qdrant documentation.