
How to Install and Use AdGuard on Ubuntu 24.04
There are various ways to block internet advertisements (ads). One of the most popular ones is using a browser extension. But what happens when you want to use ads that run on other apps or even mobile games? In such a case, you need to block ads from their source, that is, directly on the network. This is where AdGuard comes in. With AdGuard, you can block all or most ads by making AdGuard act as an intermediary (a DNS server) that filters content between your network and the internet.
In this article, you will install and set up AdGuard Home on Ubuntu 24.04, enable TLS encryption with automatic renewals, and configure custom DNS settings. You can choose between two installation methods: Docker and the official installation script.
Prerequisites
Before you begin,
- Have access to an Ubuntu 24.04 based server as a non-root user with sudo privileges.
- Create an A record in your domain’s DNS pointing to your server’s IP address. This article uses
adguard.example.com, replace it with your own domain.
Understand How AdGuard Home Works
AdGuard Home is a tool that blocks ads and malicious domains across your entire network. It works by acting as your DNS server. When a device on your network tries to access the internet, AdGuard checks whether the requested domain is on a blocklist. If it is, AdGuard stops the connection and prevents the ad or tracker from loading by returning a fake IP address.
Unlike browser extensions that only block ads on one device, AdGuard filters all DNS traffic from every device connected to your network. It also keeps your internet activity private from your internet provider with features like encrypted DNS.
Free Port 53 From systemd-Resolved
Ubuntu 24.04 uses systemd-resolved for local DNS caching and resolution, which binds to port 53 by default. AdGuard Home requires this port for DNS services. Follow the steps below to reconfigure systemd-resolved and free port 53.
Create the
/etc/systemd/resolved.conf.ddirectory to store a new config file.console$ sudo mkdir -p /etc/systemd/resolved.conf.d
Create and edit the new config file
/etc/systemd/resolved.conf.d/adguardhome.conf.console$ sudo nano /etc/systemd/resolved.conf.d/adguardhome.conf
Creating a new config file instead of editing the existing one ensures that the changes are not overwritten during system upgrades.
Add the following contents to the file.
ini[Resolve] DNS=127.0.0.1 DNSStubListener=no
Save and close the file. The above configuration:
- Explicitly sets the DNS to
127.0.0.1, which is Adguard home. - Disables
DNSStubListener, which frees up port 53.
- Explicitly sets the DNS to
/etc/resolv.confis the file most programs read to know which DNS server to use. This file is a symlink to/run/systemd/resolve/stub-resolv.conf, which points to 127.0.0.53. After disabling theDNSStubListener, this config breaks. You need to update the symlink:Back up the existing
resolv.conffile.console$ sudo mv /etc/resolv.conf /etc/resolv.conf.backup
Create a new symlink pointing to
/run/systemd/resolve/resolv.conf.console$ sudo ln -s /run/systemd/resolve/resolv.conf /etc/resolv.conf
This step ensures that applications now use the DNS server defined in
adguardhome.conf. The file/run/systemd/resolve/resolv.confdynamically reflects the active resolver settings fromsystemd-resolved, including the override you added in/etc/systemd/resolved.conf.d/adguardhome.conf. Now, all DNS queries get redirected to127.0.0.1, where AdGuard Home is listening.Restart
systemd-resolvedto apply the changes.console$ sudo systemctl restart systemd-resolved
Verify port 53 is free.
console$ sudo lsof -i :53
The command should return no output.
Set up Firewall Rules
Configure UFW to allow connections to the required AdGuard Home ports before installing and configuring.
Allow DNS traffic on port 53.
console$ sudo ufw allow 53
Allow
DNS-over-TLSandDNS-over-QUICport 853.console$ sudo ufw allow 853
DNS-over-TLSuses TCP protocol, whereasDNS-over-QUICuses UDP protocol.The initial AdGuard Home setup interface runs on port 3000. Allow it.
console$ sudo ufw allow 3000/tcp
Allow HTTP traffic for the web dashboard and certificate verification.
console$ sudo ufw allow 80/tcp
Allow HTTPS for the secure web interface and enable
DNS-over-HTTPS.console$ sudo ufw allow 443/tcp
Reload UFW to apply the firewall rules.
console$ sudo ufw reload
Install AdGuard Home on Ubuntu 24.04
You can install AdGuard Home using Docker or the official install script. Both methods provide the same functionality.
Install Docker on your server.
Add your user to Docker group.
console$ sudo usermod -aG docker $USER
Update the Docker group membership.
console$ newgrp docker
Create the project directory structure.
console$ mkdir -p ~/adguardhome/{conf,work,certs,scripts}
Navigate to the project root path.
console$ cd ~/adguardhome
Create a Docker Compose configuration file.
console$ nano compose.yml
Add the following configuration.
yamlname: adguardhome services: adguardhome: image: adguard/adguardhome:latest container_name: adguardhome network_mode: host restart: unless-stopped volumes: - ./conf:/opt/adguardhome/conf - ./work:/opt/adguardhome/work - ./certs:/opt/adguardhome/certs cap_add: - NET_ADMIN - NET_BIND_SERVICE - NET_RAW healthcheck: test: ["CMD", "wget", "--no-verbose", "--tries=1", "--spider", "http://localhost:3000"] interval: 30s timeout: 10s retries: 3 start_period: 40s
Save and close the file. This file defines:
- A service named adguardhome using the official
adguard/adguardhome:latestimage. network_mode: hostso the container shares the host’s network stack and can bind directly to DNS port 53.- Volumes (conf, work, certs) persist configuration, runtime data, and certificates across container restarts.
- Additional Linux capabilities
(NET_ADMIN, NET_BIND_SERVICE, NET_RAW)to allow the container to handle low-level networking and bind to privileged ports. - A health check that queries the web setup interface on port 3000 to verify the service is running.
- A service named adguardhome using the official
Start the AdGuard Home container.
console$ docker compose up -d
This command:
- Pulls the AdGuard Home image from Docker Hub.
- Creates and starts the container in detached mode.
Verify the container is running.
console$ docker compose ps
This method uses AdGuard Home's official install script to run the application as a system service on your host. Follow the steps below to install AdGuard Home using the install script.
Update your system.
console$ sudo apt update
Download and run the AdGuard Home installation script.
console$ curl -s -S -L https://raw.githubusercontent.com/AdguardTeam/AdGuardHome/master/scripts/install.sh | sh -s -- -v
Create directories for certificates and scripts.
console$ sudo mkdir -p /opt/AdGuardHome/{certs,scripts}
Verify the AdGuard Home service status.
console$ sudo /opt/AdGuardHome/AdGuardHome -s status
The output should include a line indicating the service is running, similar to:
...
2025/10/07 17:37:00 [info] service: running
...
Generate TLS Certificate
This section covers generating Let's Encrypt certificates for secure HTTPS access to the AdGuard Home dashboard.
Install Certbot for certificate generation.
console$ sudo apt install certbot -y
Generate a certificate for your domain. Replace
adguard.example.comwith your actual domain andadmin@example.comwith your email address.console$ sudo certbot certonly --standalone -d adguard.example.com --agree-tos --no-eff-email --email admin@example.com
Output:
...
Successfully received certificate.
Certificate is saved at: /etc/letsencrypt/live/adguard.example.com/fullchain.pem
Key is saved at:         /etc/letsencrypt/live/adguard.example.com/privkey.pem
...
Create a certificate copy script based on your installation method.
For Docker installation:
console$ nano ~/adguardhome/scripts/copy-certs.sh
For Script installation:
console$ sudo nano /opt/AdGuardHome/scripts/copy-certs.sh
Add the certificate copy script content. Replace
adguard.example.comwith your actual domain.For Docker installation:
bash#!/bin/bash DOMAIN="adguard.example.com" ADGUARD_DIR="/home/YOUR_USERNAME/adguardhome" CERT_DIR="$ADGUARD_DIR/certs" sudo cp /etc/letsencrypt/live/$DOMAIN/fullchain.pem $CERT_DIR/cert.pem sudo cp /etc/letsencrypt/live/$DOMAIN/privkey.pem $CERT_DIR/key.pem sudo chown YOUR_USERNAME:YOUR_USERNAME $CERT_DIR/*.pem chmod 644 $CERT_DIR/cert.pem chmod 600 $CERT_DIR/key.pem if docker ps | grep -q adguardhome; then cd $ADGUARD_DIR docker compose restart fi
Save and close the file. Then, update the script with your actual username. Replace all instances of
YOUR_USERNAMEwith your system username.console$ sed -i "s/YOUR_USERNAME/$USER/g" ~/adguardhome/scripts/copy-certs.sh
For Script installation, add the following content:
bash#!/bin/bash DOMAIN="adguard.example.com" CERT_DIR="/opt/AdGuardHome/certs" cp /etc/letsencrypt/live/$DOMAIN/fullchain.pem $CERT_DIR/cert.pem cp /etc/letsencrypt/live/$DOMAIN/privkey.pem $CERT_DIR/key.pem chmod 644 $CERT_DIR/cert.pem chmod 600 $CERT_DIR/key.pem /opt/AdGuardHome/AdGuardHome -s restart
Make the script executable and run it.
For Docker installation:
console$ chmod +x ~/adguardhome/scripts/copy-certs.sh $ ~/adguardhome/scripts/copy-certs.sh
For Script installation:
console$ sudo chmod +x /opt/AdGuardHome/scripts/copy-certs.sh $ sudo /opt/AdGuardHome/scripts/copy-certs.sh
Check the certificates.
For Docker:
console$ ls -la ~/adguardhome/certs/
For Script installation:
console$ sudo ls -la /opt/AdGuardHome/certs/
You should see
cert.pemandkey.pemfiles with the correct permissions.
Configure Automatic Certificate Renewal
Let's Encrypt certificates expire every 90 days. In this section, configure automatic renewal of your TLS certificates.
Create a Certbot renewal hook script.
console$ sudo nano /etc/letsencrypt/renewal-hooks/deploy/adguard-renewal.sh
Add the renewal script content based on your installation method.
For Docker installation:
bash#!/bin/bash /home/YOUR_USERNAME/adguardhome/scripts/copy-certs.shReplaceNoteYOUR_USERNAMEwith your username.For Script installation:
bash#!/bin/bash /opt/AdGuardHome/scripts/copy-certs.sh
Save and close the file.
Make the renewal hook executable.
console$ sudo chmod +x /etc/letsencrypt/renewal-hooks/deploy/adguard-renewal.sh
To handle port 80 conflicts during renewal (since AdGuard Home binds to port 80 after setup), create stop and start scripts, then add pre-hooks and post-hooks to the Certbot renewal configuration. This temporarily stops AdGuard Home before the renewal attempt and starts it afterward.
For Docker installation:
Create a stop script.
console$ nano ~/adguardhome/scripts/stop-adguard.sh
Add:
bash#!/bin/bash docker compose -f /home/YOUR_USERNAME/adguardhome/compose.yml stop > /dev/null 2>&1
Create a start script.
console$ nano ~/adguardhome/scripts/start-adguard.sh
Add:
bash#!/bin/bash docker compose -f /home/YOUR_USERNAME/adguardhome/compose.yml start > /dev/null 2>&1
Make them executable.
console$ chmod +x ~/adguardhome/scripts/{stop-adguard.sh,start-adguard.sh}
Update the scripts with your actual username.
console$ sed -i "s/YOUR_USERNAME/$USER/g" ~/adguardhome/scripts/stop-adguard.sh $ sed -i "s/YOUR_USERNAME/$USER/g" ~/adguardhome/scripts/start-adguard.sh
For Script installation:
Create a stop script.
console$ sudo nano /opt/AdGuardHome/scripts/stop-adguard.sh
Add:
bash#!/bin/bash /opt/AdGuardHome/AdGuardHome -s stop > /dev/null 2>&1
Create a start script.
console$ sudo nano /opt/AdGuardHome/scripts/start-adguard.sh
Add:
bash#!/bin/bash /opt/AdGuardHome/AdGuardHome -s start > /dev/null 2>&1
Make them executable.
console$ sudo chmod +x /opt/AdGuardHome/scripts/{stop-adguard.sh,start-adguard.sh}
Edit the Certbot renewal configuration to add the hooks. Replace
adguard.example.comwith your domain.console$ sudo nano /etc/letsencrypt/renewal/adguard.example.com.conf
Add or update under the
[renewalparams]section:For Docker installation:
inipre_hook = /home/YOUR_USERNAME/adguardhome/scripts/stop-adguard.sh post_hook = /home/YOUR_USERNAME/adguardhome/scripts/start-adguard.sh
ReplaceNoteYOUR_USERNAMEwith your username.For Script installation:
inipre_hook = /opt/AdGuardHome/scripts/stop-adguard.sh post_hook = /opt/AdGuardHome/scripts/start-adguard.sh
Save and close the file.
Test the automatic renewal process.
console$ sudo certbot renew --dry-run
Output:
...
Congratulations, all simulated renewals succeeded
...
Configure AdGuard Home’s Initial Setup
Access the AdGuard Home web interface to complete the initial configuration.
Open your web browser and navigate to the setup interface.
http://YOUR_SERVER_IP:3000Click Get Started on the welcome page.

Set Up the Admin Web Interface:
- Listen Interface: Select All interfaces
- Port: Enter
80
Configure the DNS Server:
- Listen Interface: Select All interfaces
- Port: Keep
53
Click Next and create an administrator account with a username and a strong password.
Click Next. You'll land on the Configure your devices page, where you'll see the configuration settings for various types of devices. Click Next.
Click Open Dashboard to access the main interface.
Remove port 3000 from the firewall after completing initial configuration.
console$ sudo ufw delete allow 3000/tcp $ sudo ufw reload
Enable TLS Encryption
Configure HTTPS access using your TLS certificates for secure dashboard access.
Access the AdGuard Home dashboard and log in to the dashboard with the credentials you set earlier.
http://YOUR_SERVER_IP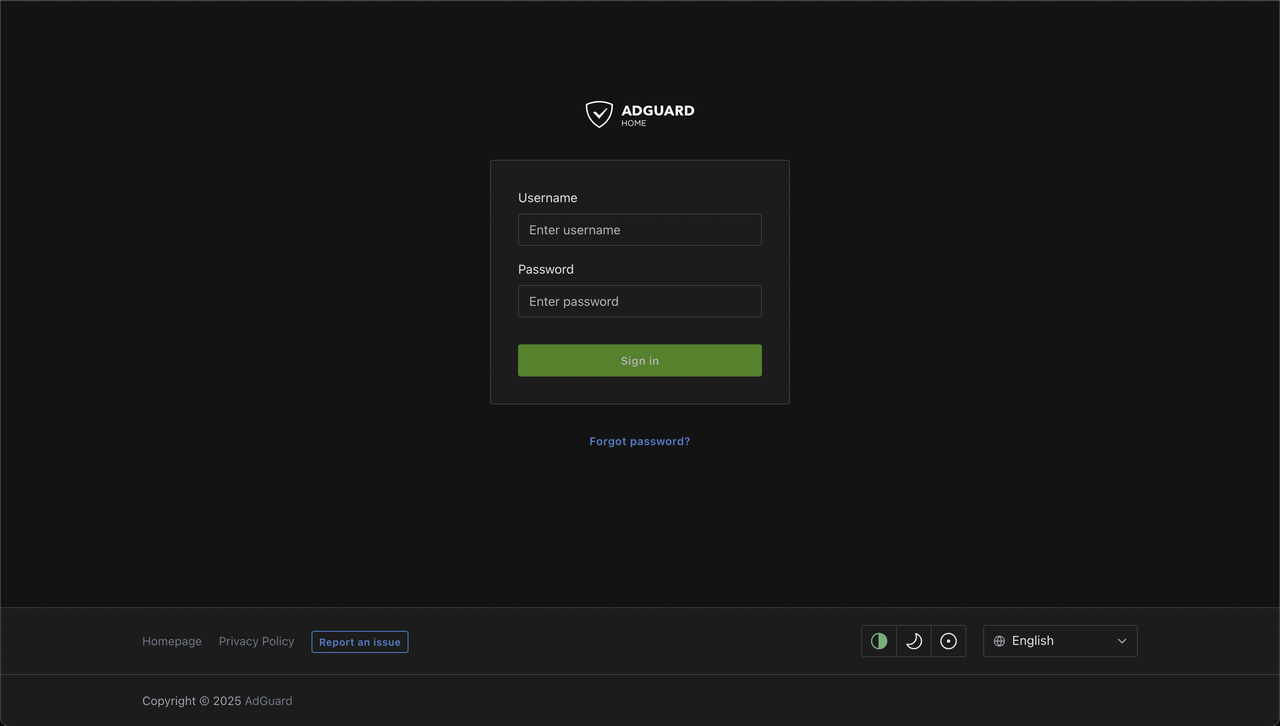
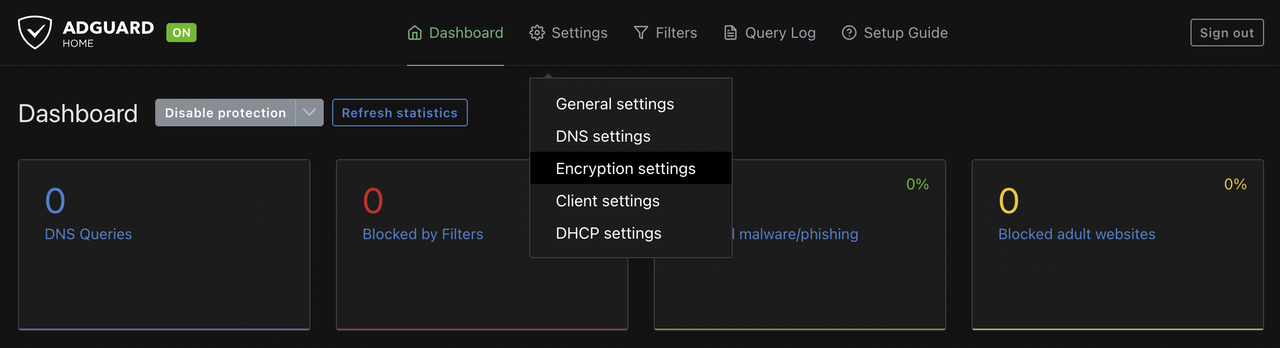
Click the Settings button on the top navigation menu, and click Encryption settings.
Configure the following encryption settings:
Enable Encryption: Check to enable.
Server name: Enter your domain name.
Redirect to HTTPS automatically: Enable.
HTTPS port:
443DNS-over-HTTPS port:
443DNS-over-TLS port:
853DNS-over-QUIC port:
853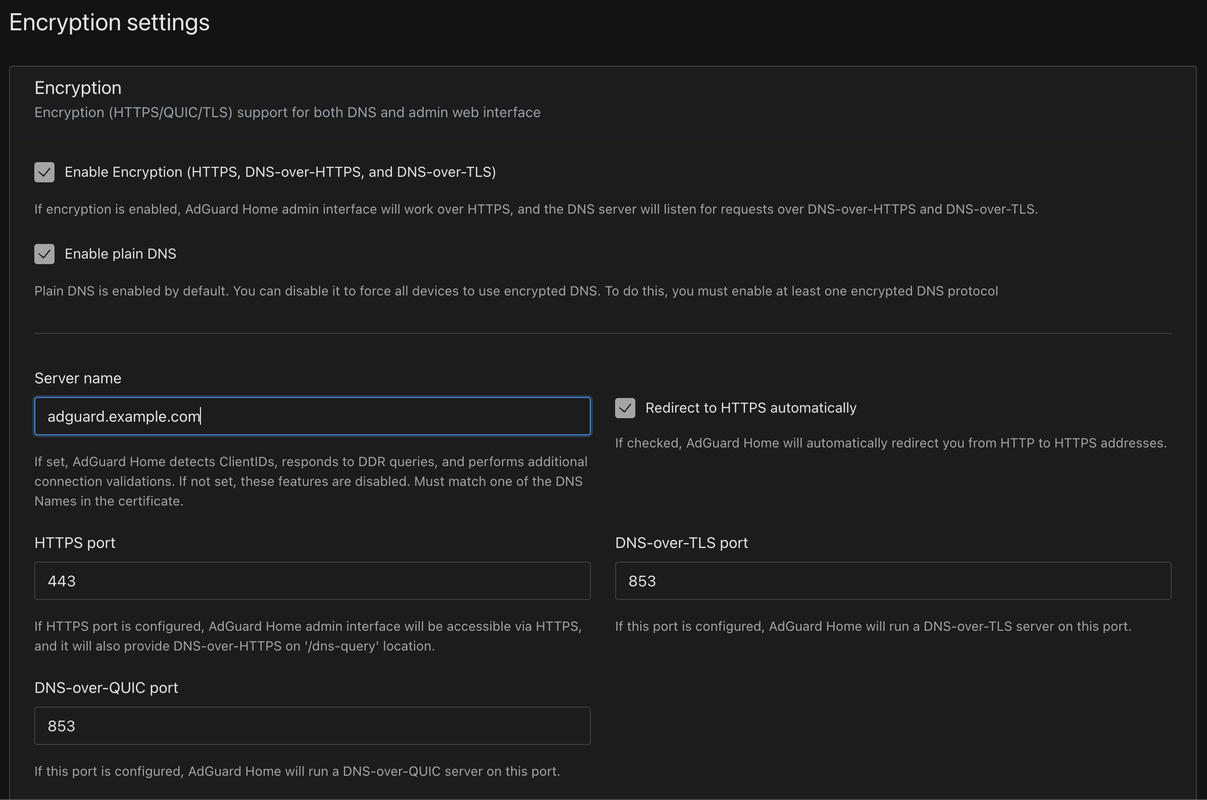
Configure certificate paths:
Select Set a certificates file path option.
For Docker installation:
- Certificates path:
/opt/adguardhome/certs/cert.pem - Private key path:
/opt/adguardhome/certs/key.pem
- Certificates path:
For Script installation:
- Certificates path:
/opt/AdGuardHome/certs/cert.pem - Private key path:
/opt/AdGuardHome/certs/key.pem
- Certificates path:
Click Save to apply the encryption settings. After enabling encryption, access AdGuard Home using
https://adguard.example.com.
Configure DNS Privacy Settings
AdGuard Home supports encrypted DNS protocols to prevent ISPs and third parties from monitoring your DNS queries. Configure upstream DNS servers that support DNS-over-HTTPS (DoH) or DNS-over-TLS (DoT) for enhanced privacy.
Click the Settings button on the top navigation menu, and click DNS Settings.
In the Upstream DNS servers field, add encrypted DNS providers of your choice, such as:
https://dns.cloudflare.com/dns-query
https://dns.google/dns-query
https://dns.quad9.net/dns-query
tls://1.1.1.1
tls://8.8.8.8
These upstream servers use HTTPS or TLS encryption to secure DNS queries between AdGuard Home and the upstream providers. The encrypted protocols prevent your ISP from seeing which domains you're resolving.
Configure Fallback DNS servers for redundancy. These servers are used when encrypted upstream servers are unavailable. Add DNS servers of your choice, such as:
1.1.1.1 8.8.8.8 9.9.9.9Fallback servers typically use standard unencrypted DNS (port 53) because they serve as emergency backups when encrypted connections fail. During normal operation, AdGuard Home uses only the encrypted upstream servers.NoteConfigure Bootstrap DNS servers. These servers resolve the domain names of your encrypted upstream servers (like
dns.cloudflare.com). You can add:1.1.1.1 8.8.8.8 9.9.9.9Enable the following DNS features:
- Parallel requests: Enable to query multiple servers simultaneously for faster responses
- Enable DNSSEC: Validate DNS responses for authenticity
- Enable EDNS client subnet: Improve CDN performance
- Disable IPv6: Enable only if your network doesn't support IPv6
Click Save to apply the DNS configuration.
Set Up Blocklist
AdGuard has a built-in DNS filter, but you can expand its capabilities by adding additional blocklists. These publicly maintained lists contain tens of thousands of known ad, tracker, malware, and telemetry domains.
From the top navigation menu, click Filters and select DNS blocklists.
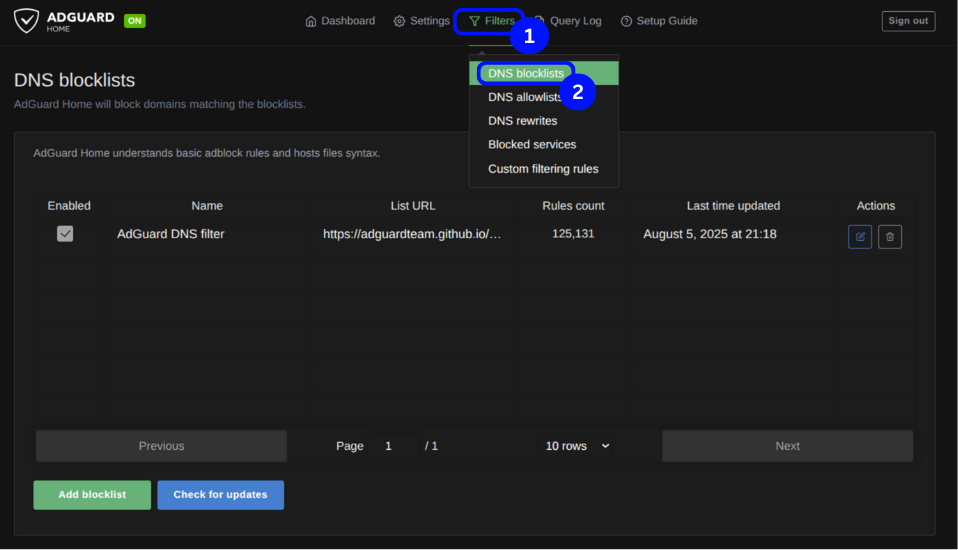
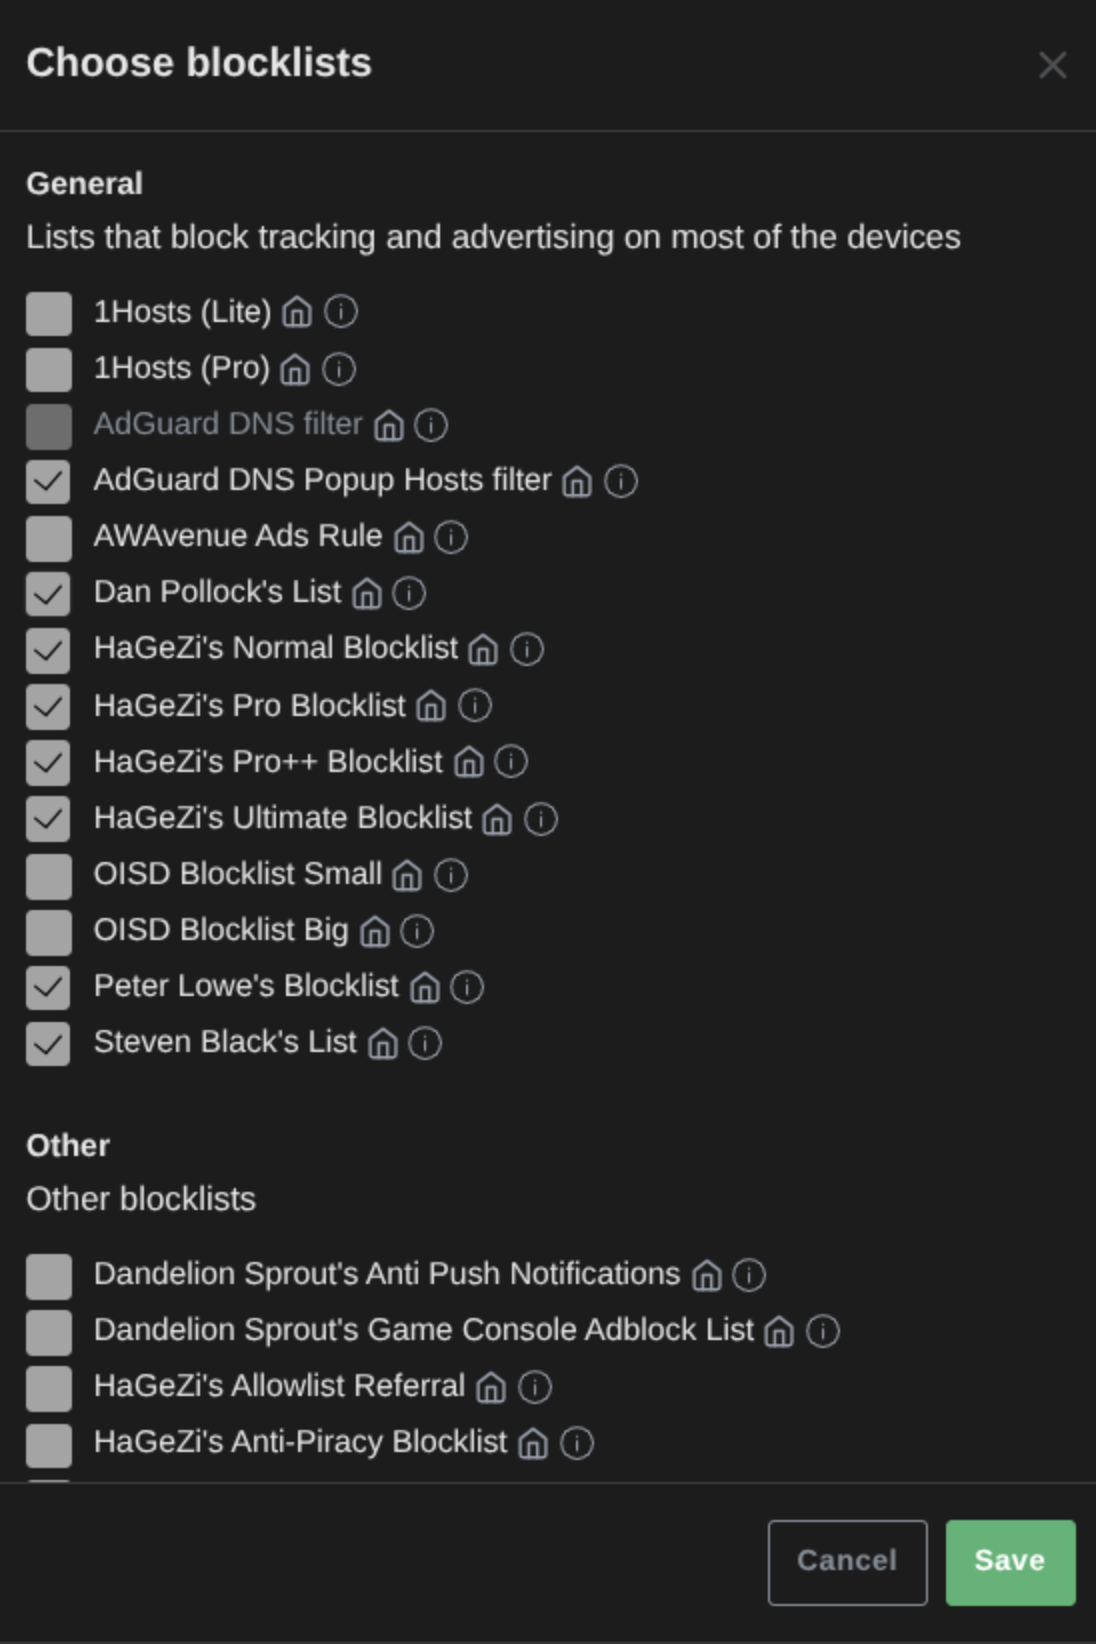
Click Add blocklist and click Choose from the list.
Select the options in the image below, then click Save.
Browse the internet for a while, then check your AdGuard Home dashboard on your browser.
http://SERVER-IPYou would see all the sites, trackers, and ads that have been blocked.
Custom DNS Rewrites
DNS rewrites are rules that override standard DNS resolution by mapping specific domain names to custom IP addresses.
AdGuard supports DNS rewrites, which allow you to map domain names to specific IP addresses within your network. This acts like a mini local DNS server for internal use.
For example, you can map adguard.home to SERVER-IP, to access your AdGuard dashboard.
Follow the steps below to access your AdGuard Home dashboard with adguard.home instead of your server IP address.
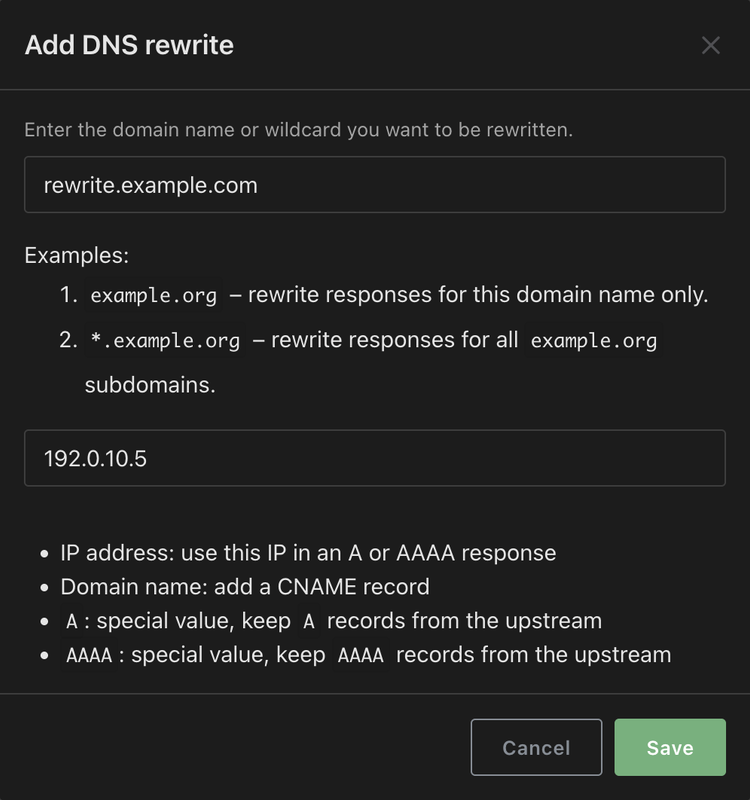
- From the top navigation menu, click Filters and select DNS rewrites.
- Click Add DNS rewrites.
- Input the domain and your server IP address, then click Save.
Configure Client Devices
You can configure your devices to use AdGuard Home as their DNS server. The configuration varies between different types of devices. The section below covers setting up your router to use your AdGuard Home server as a DNS server.
Router Configuration
Configure your router to apply AdGuard Home DNS to all connected devices automatically.
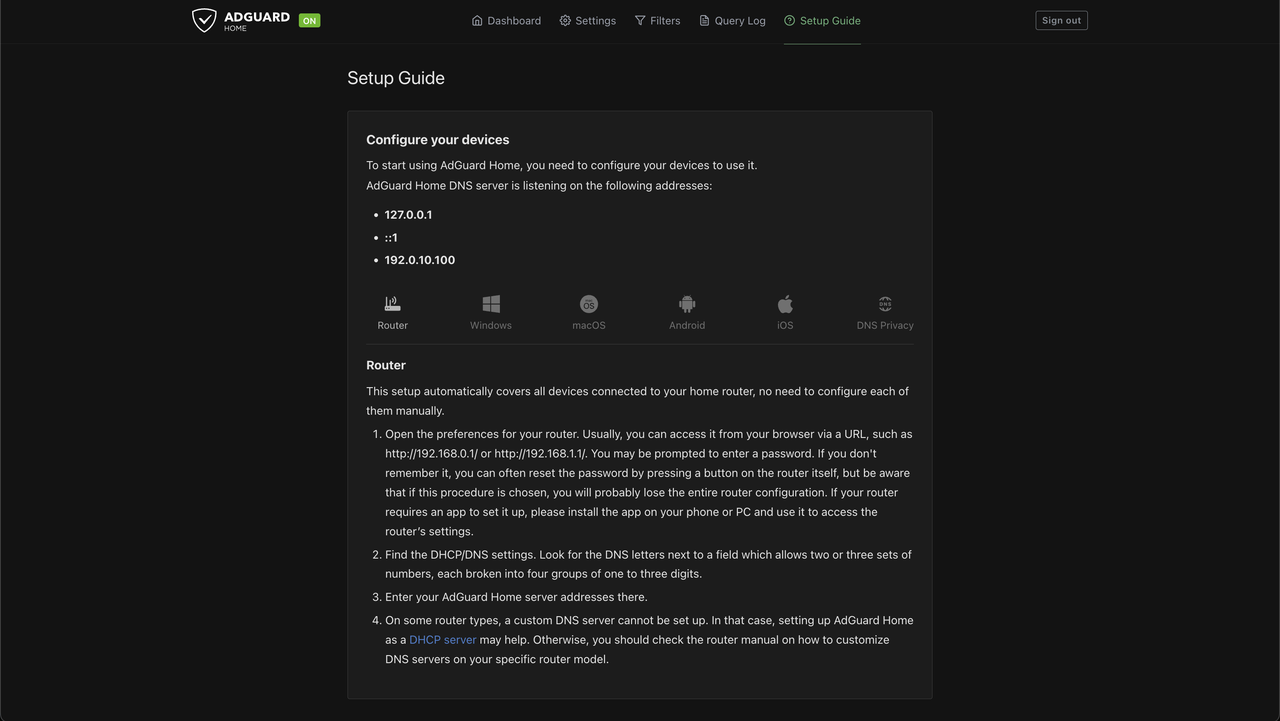
- Access your router's admin webpage (typically
http://192.168.1.1orhttp://192.168.0.1). - Navigate to the DHCP or DNS settings section.
- Enable custom DNS and add your AdGuard Home server's IP address, or replace the existing DNS server addresses with your AdGuard Home server's IP address.
- Save and apply the settings.
You can find configuration settings for most device types from the Setup Guide option on the top navigation menu of AdGuard Home dashboard.
Monitor and Maintain
AdGuard Home shows statistics about DNS queries on its dashboard.
View Statistics
Access the dashboard at https://adguard.example.com. You should see logs of DNS queries that reached your AdGuard Home DNS server.
Conclusion
You have successfully deployed AdGuard Home on Ubuntu 24.04 with automatic TLS certificate renewal and encrypted DNS protocols using the official installation script and Docker. To learn more about using it, refer to the AdGuard Home Wiki page.