
How to Install Cockpit on Ubuntu 24.04
Cockpit is a web-based server management control panel used to perform system administration tasks such as service monitoring, applications, networking, storage, logs, and user account management. Cockpit includes a user-friendly interface that's highly extensible with multiple extensions to perform system administration tasks on a server.
This article explains how to install Cockpit on Ubuntu 24.04 to perform system administration and monitoring tasks using the web-based control panel on a server.
Prerequisites
Before you begin, you need to:
- Have access to an Ubuntu 24.04 server.
- Create a domain A record pointing to the server's IP address. For example,
cockpit.example.com. - Create a dedicated non-root sudo user to manage the instance using Cockpit. For example,
cockpit_admin
Install Cockpit on Ubuntu 24.04
Cockpit is available in the default package repositories on Ubuntu. Follow the steps below to update the server's APT package index and install Cockpit.
Update the server's package index.
console$ sudo apt update
Install Cockpit.
console$ sudo apt install cockpit -y
Enable the Cockpit service to automatically start at boot.
console$ sudo systemctl enable cockpit.socket
Start the Cockpit service.
console$ sudo systemctl start cockpit
View the Cockpit status and verify that it's running.
console$ sudo systemctl status cockpit
Output:
● cockpit.service - Cockpit Web Service
     Loaded: loaded (/usr/lib/systemd/system/cockpit.service; static)
     Active: active (running) since Tue 2024-12-10 18:50:56 UTC; 7s ago
TriggeredBy: ● cockpit.socket
       Docs: man:cockpit-ws(8)
    Process: 12887 ExecStartPre=/usr/lib/cockpit/cockpit-certificate-ensure --for-cockpit-tls code=exited, >   Main PID: 12900 (cockpit-tls)
      Tasks: 1 (limit: 1061)
     Memory: 2.7M (peak: 4.0M)
        CPU: 229ms
     CGroup: /system.slice/cockpit.service
             └─12900 /usr/lib/cockpit/cockpit-tls
Cockpit is installed and actively listens for connection requests using the TCP port
9090.If you're using Debian 12, you can easily get started by installing Cockpit on Debian 12 to simplify your system administration tasks with its intuitive web-based interface.
Secure Cockpit with Trusted SSL Certificates
Cockpit listens for connection requests on the TCP port 9090 by default, without encryption. Unencrypted and Insecure connections to the Cockpit web dashboard can expose your server to multiple security threats due to plain HTTP requests. You can enable secure network connections to the Cockpit web dashboard using trusted SSL certificates. Follow the steps below to generate Let's Encrypt SSL certificates using your domain to encrypt and secure network connections to the Cockpit web dashboard.
View the UFW status and verify that the firewall is active.
console$ sudo ufw status
Allow network connections to the default Cockpit port
9090.console$ sudo ufw allow 9090/tcp
Allow connections to the HTTP port
80to enable Let's Encrypt validations.console$ sudo ufw allow 80/tcp
Allow secure connections to the HTTPS port
443.console$ sudo ufw allow 443/tcp
Reload UFW to apply the firewall changes.
console$ sudo ufw reload
Install the Snapd package.
console$ sudo apt install snapd -y
Install the Certbot Let's Encrypt client tool using Snap.
console$ sudo snap install certbot --classic
Generate a new Let's Encrypt SSL certificate using your
cockpit.example.comCockpit domain. Replacecockpit.example.comwith your actual domain andcockpit@example.comwith your active email address.console$ sudo certbot --standalone certonly -d cockpit.example.com -m cockpit@example.com --agree-tos
Verify that Certbot auto-renews the SSL certificate before expiry.
console$ sudo certbot renew --dry-run
Combine the SSL certificate and private key files into a single
.certfile to use with Cockpit.console$ sudo cat /etc/letsencrypt/live/cockpit.example.com/fullchain.pem /etc/letsencrypt/live/cockpit.example.com/privkey.pem > cockpit.cert
Move the
cockpit.certfile to thews-certs.dCockpit directory.console$ sudo mv cockpit.cert /etc/cockpit/ws-certs.d/
Restart the Cockpit service to enable the SSL certificate changes.
console$ sudo systemctl restart cockpit.socket
Access the Cockpit Web Dashboard
Follow the steps below to access the Cockpit web dashboard, log in and perform system administration tasks including service monitoring, manage user accounts, and monitor the resource usage statistics.
Access the Cockpit port
9090using yourcockpit.example.comdomain in a web browser such as Firefox.https://cockpit.example.com:9090Enter your sudo user account credentials to log in.
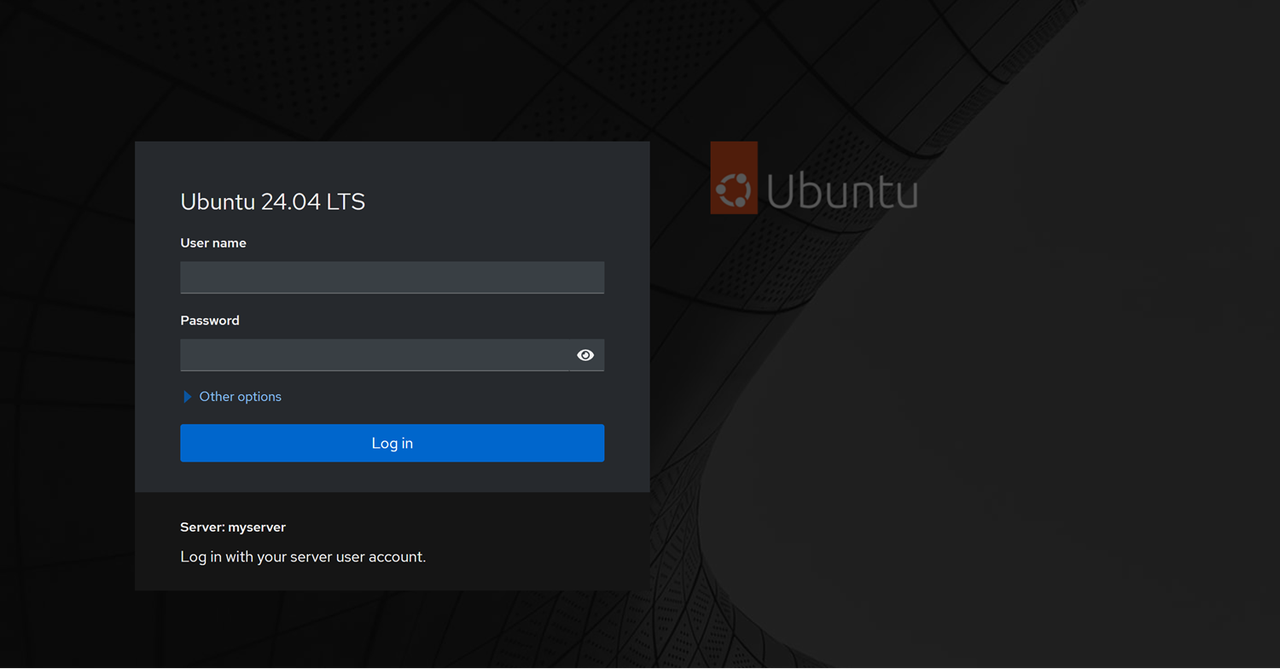
Cockpit does not support
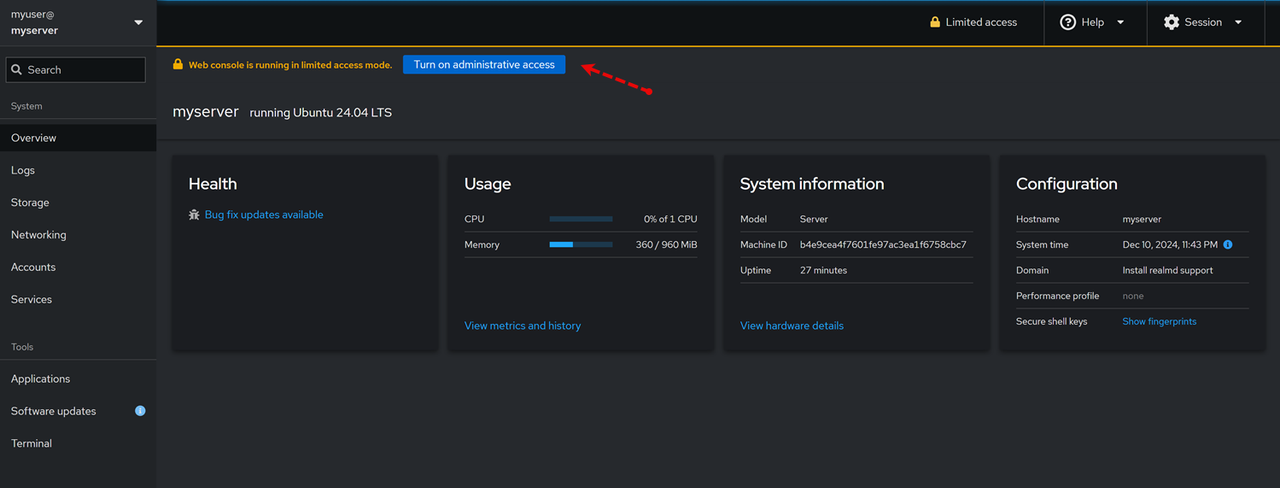
rootuser account logins directly through the web interface. Ensure to use non-root user accounts to access Cockpit and manage the server..Click Turn on administrative access on the main navigation menu and enter your sudo user password to enable administrative privileges.
Manage the Server Using Cockpit
You can perfom multiple system administration tasks using Cockpit in your web browser. Follow the steps below to explore the default tasks you can perform using Cockpit.
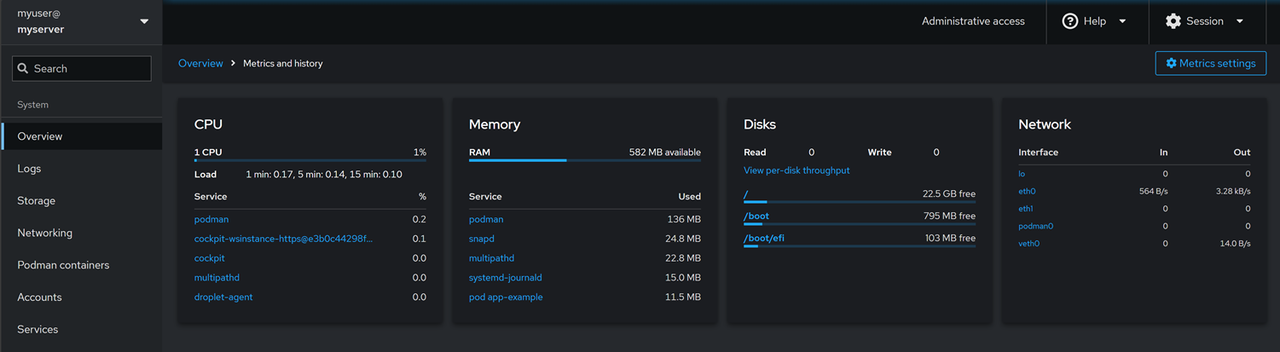
System Monitoring: On the main Overview page, monitor your server's status including the health, CPU, memory usage, system information and the active configuration.Click View metrics and history on the overview page to access the server usage statistics page.
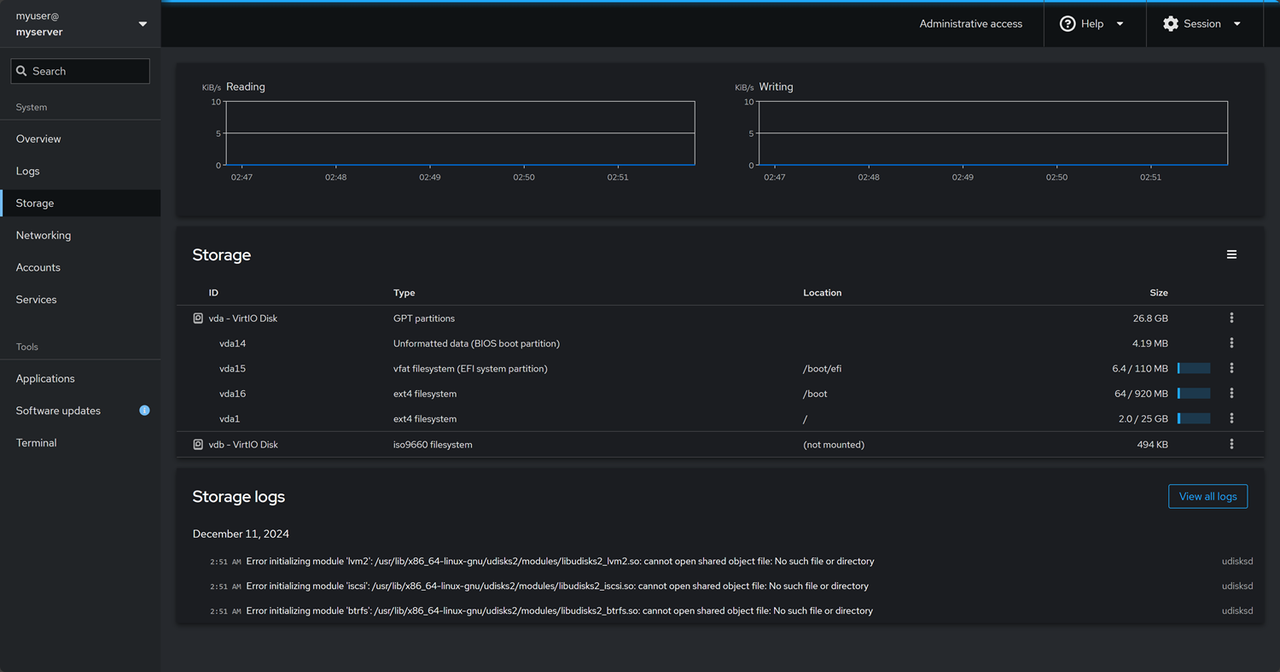
Storage Management: Click Storage on the main navigation menu to manage all storage devices attached to the server. You can monitor the read/write speeds and view all storage logs to troubleshoot common system errors.
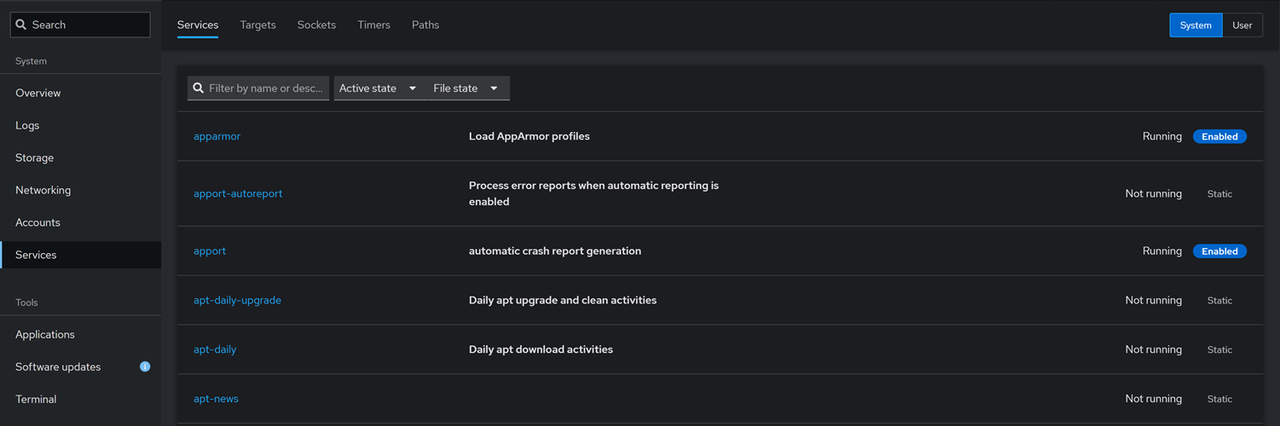
Service Management: Click Services to view and manage all system services on the server, including timers, sockets, paths and targets.
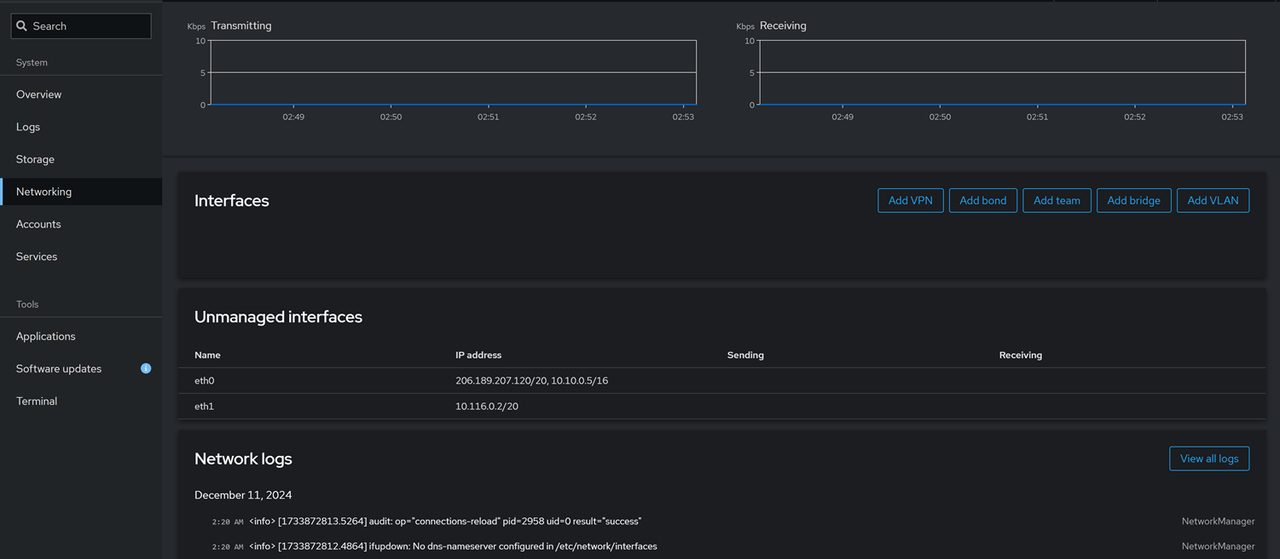
Network Usage and Monitoring: Click Networking on the main navigation menu and monitor the active server interfaces. You can monitor the real-time network usage information and access the full networking logs to troubleshoot errors on the server.
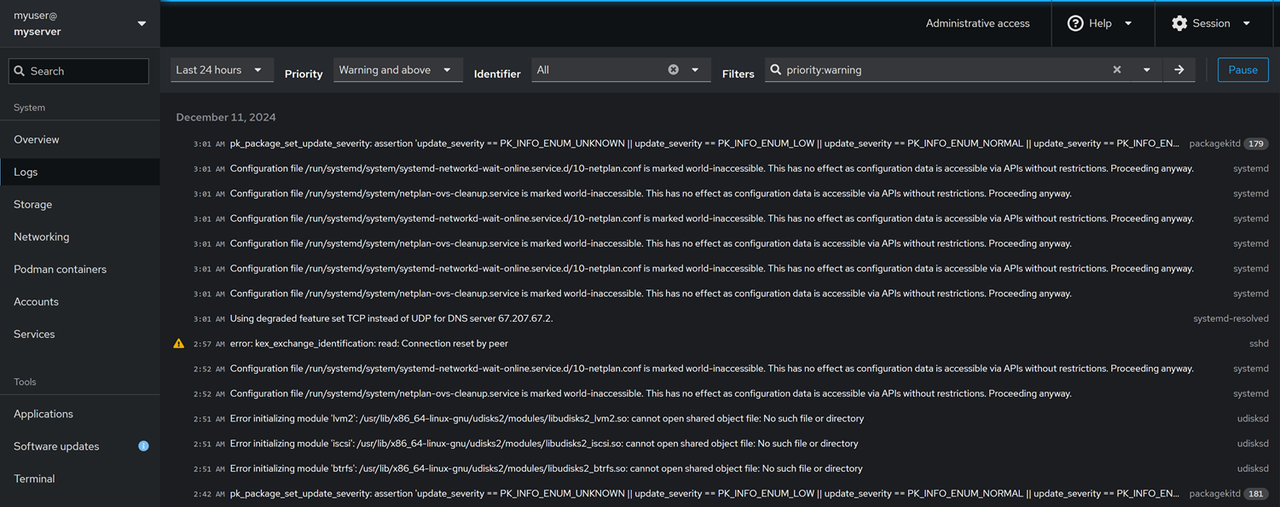
Log Management: Click Logs on the main navigation menu, select a duration, and set the priority level to monitor all system logs. Click Identifier to filter logs by daemon name and use Filters to modify the log results.
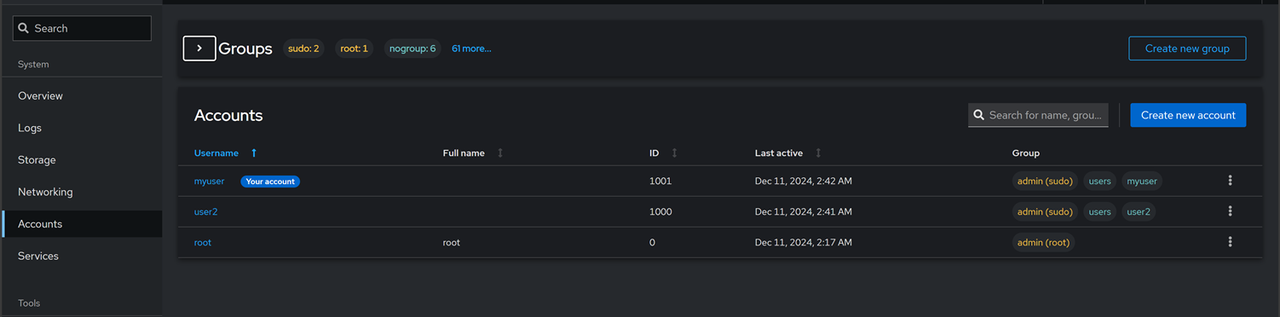
User Management: Click Accounts on the main navigation menu to view all active users and groups on the server. Click Create new account and fill-in the required user information to setup a new user.
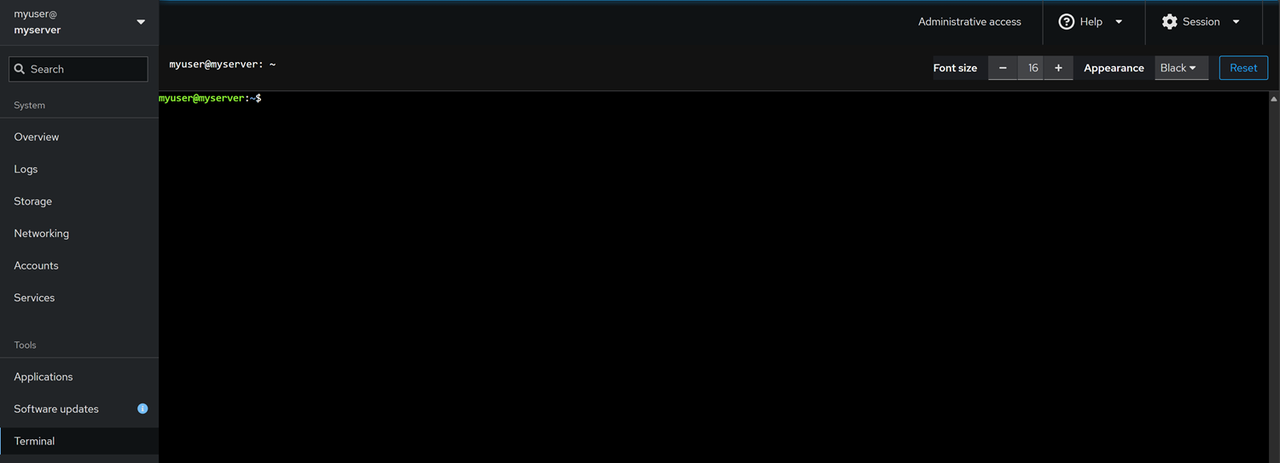
Terminal Access: Click Terminal within the Tools section on the main navigation menu to open a new terminal session for managing the server.
Manage Containerized Applications Using Cockpit Podman
Cockpit supports multiple extensions and add-ons that enable specific features for server management. Cockpit Podman is an extension that lets you install and manage containerized applications using Podman. Follow the steps below to install the Cockpit Podman extension and manage containerized applications on your server.
Click Terminal on the main navigation menu to open a new terminal session.
Update the server's package index.
console$ sudo apt update
Install the Cockpit plugin for Podman.
console$ sudo apt install cockpit-podman -y
Allow UFW to forward traffic to the Podman containers running on port 80.
console$ sudo ufw route allow proto tcp from any to any port 80
Reload UFW to apply the firewall changes.
console$ sudo ufw reload
Refresh the Cockpit web dashboard and click Podman containers on the main navigation menu.
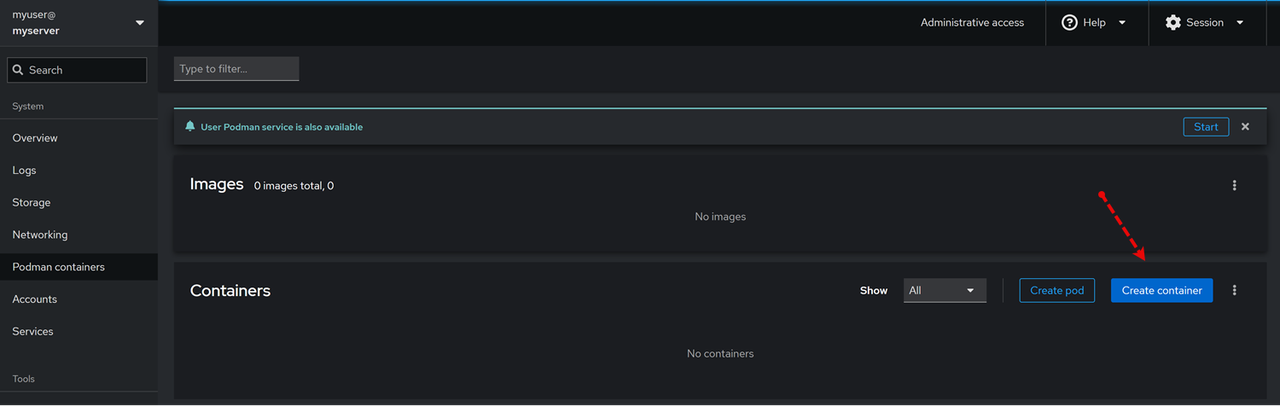
Click Create container to set up a new container.
Enter a new container name such as
app-examplein the Name field.Enter
Nginxin the Image field and select thedocker.io/library/nginximage from the search results.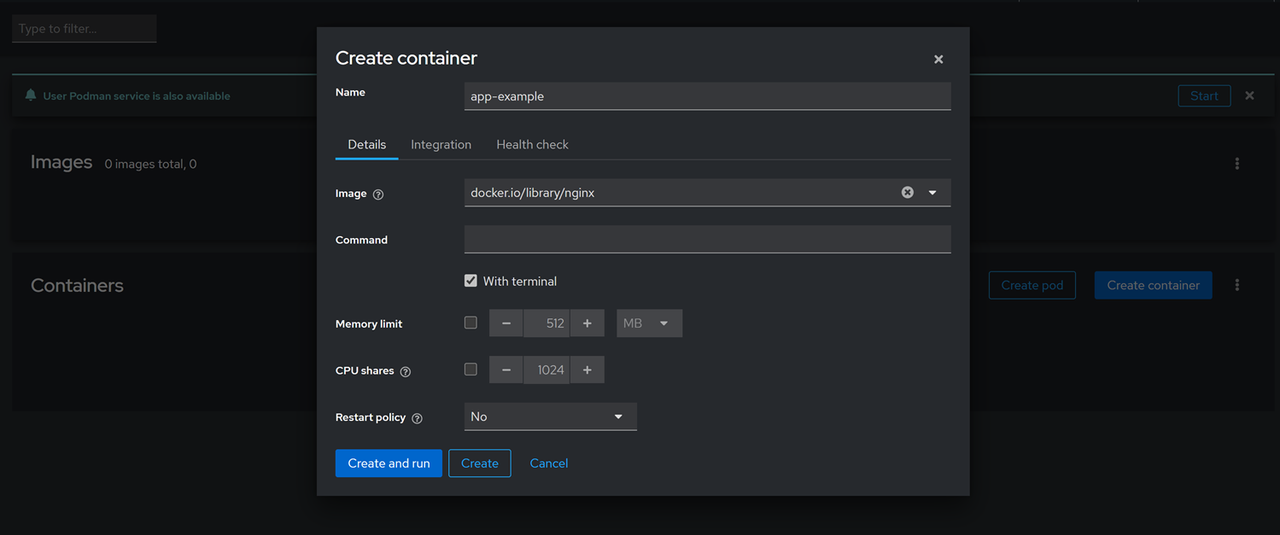
Click Integration to map the container ports to the host ports.
Click Add port mapping, enter
80in the Host port and Container port fields respectively, and keep the IP address field empty to map the container ports to all network addresses on the server.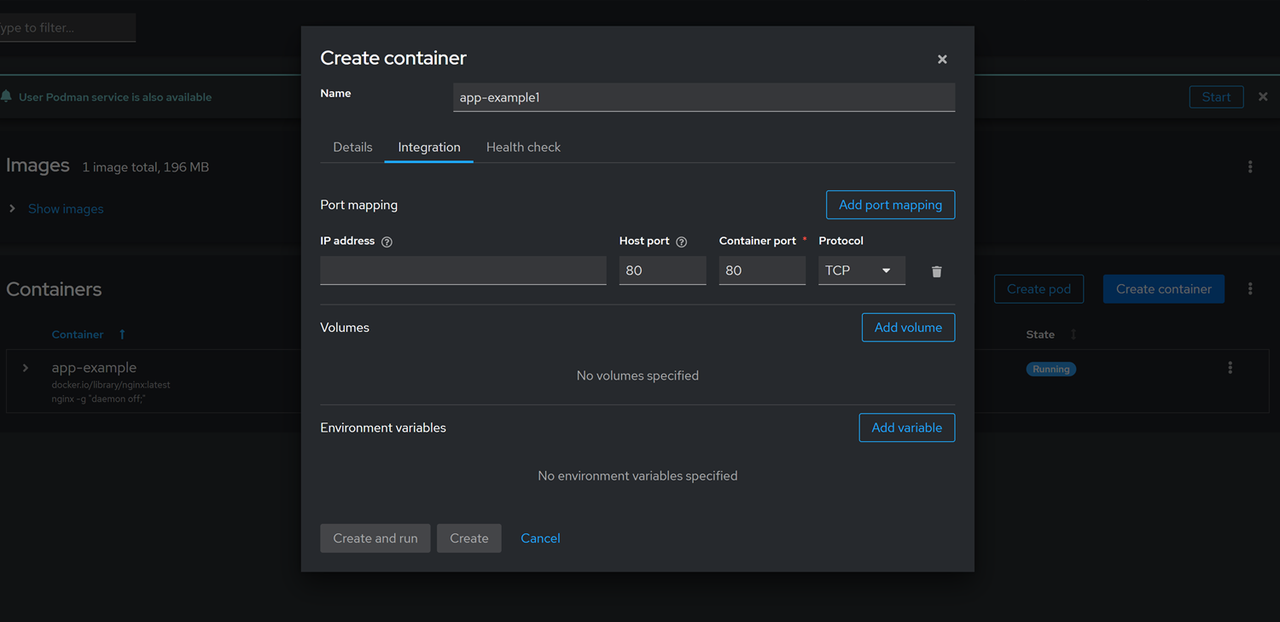
Click Create and run to deploy the Nginx container using Podman.
Verify that the
app-examplecontainer is created, and its state is Running within the Containers section.
Access your server's IP address in a new browser tab and verify that the default Nginx webpage displays.
http://SERVER-IP
Conclusion
You have installed Cockpit on Ubuntu 24.04 and managed containerized applications using Podman on the server. Cockpit is a highly extensible web-based control panel that allows you to monitor and administer a server. You can install multiple extensions including Cockpit-Podman to enable new features in the web dashboard. For more information and configuration options, please visit the Cockpit documentation.