
How to Install Memcached on Ubuntu 22.04
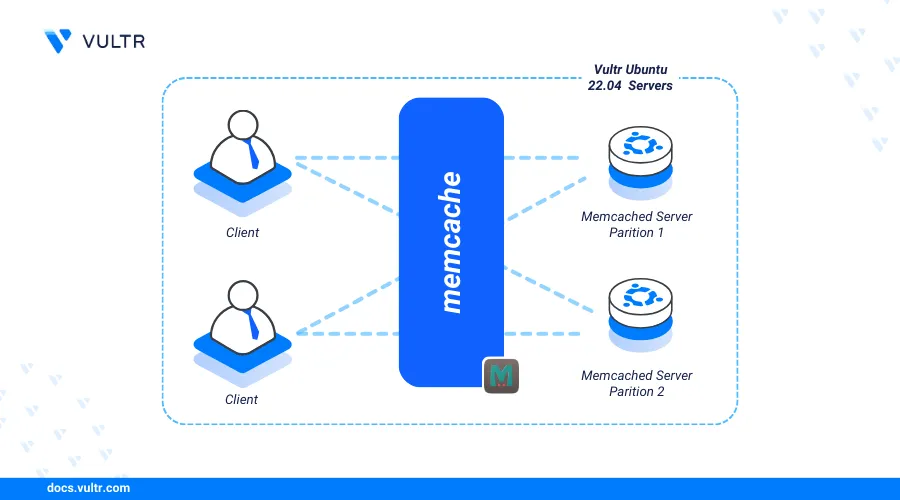
Memcached is an open-source distributed caching system that stores data like database queries, API calls, and session data in RAM. It helps reduce frequent operations, improving application response time and server resource usage.
In this article, you are to install Memcached on Ubuntu 22.04 and configure it to enable secure connections using the SASL (Simple Authentication and Security Layer) mechanism.
Prerequisites
Before you begin:
Have an Ubuntu 22.04 server.
Access the server using SSH as a non-root user with sudo privileges.
Install Memcached
Memcached is available in the default Ubuntu 22.04 repositories and can be installed via the APT package manager. Alternatively, you can compile and install a specific version from the source code. Follow the steps below to install and enable Memcached on your server.
Update the server package index.
console$ sudo apt update
Install Memcached and required add-on tools.
console$ sudo apt install memcached libmemcached-tools -y
View the installed Memcached version on your server.
console$ memcached --version
Output:
memcached 1.6.14Enable the Memcached service to automatically start at boot time.
console$ sudo systemctl enable memcached
Start the Memcached service.
console$ sudo systemctl start memcached
Configure Memcached
Memcached uses the /etc/memcached.conf file for configurations, including the port, connection limits, memory, and IP address to listen for incoming connections. Follow the steps below to configure Memcached and verify its process details on your server.
Open the Memcached configuration file
/etc/memcached.confusing a text editor such as Nano.console$ sudo nano /etc/memcached.conf
Add
-Sat the end of the file after-P /var/run/memcached/memcached.pidto enable SASL authentication on your server.ini... -P /var/run/memcached/memcached.pid -S
Find and uncomment the
-vdirective to enable verbose logging to the/var/log/memcachefile.ini-vUncomment the
-c 1024directive to limit the number of simultaneous Memcached connections. Replace1024with your desired number of connections.ini-c 1024Find the following Memcached port directive to verify the application connection port on your server.
ini# Default connection port is 11211 -p 11211
Locate the listen directive and ensure it is set to the server's loopback address
127.0.0.1to accept only local Memcached connections. If using Memcached on a standalone server, change the address to your public IP or Vultr VPC address to allow external connections.ini-l 127.0.0.1 -l ::1
Save and close the file.
Restart Memcached to apply the configuration changes.
console$ sudo systemctl restart memcached
Secure Memcached
Memcached does not run with any authentication protocol unless enabled in your configuration making it insecure and open to all requests. The SASL protocol enables authentication and requires a valid user to access Memcached. Follow the steps below to install the SASL package and secure Memcached on your server.
Install the SASL package on your server.
console$ sudo apt install sasl2-bin -y
Create a new directory to store your SASL authentication credentials.
console$ sudo mkdir /etc/sasl2
Create a new SASL configuration file to use with Memcached. For example,
memcached.conf.console$ sudo nano /etc/sasl2/memcached.conf
Add the following contents to the file.
inilog_level: 5 mech_list: plain sasldb_path: /etc/sasl2/memcached-sasldb2
Save and close the file
The above SASL configuration enables authentication using the Memcached database. Within the configuration:
log_level: Enables logging. A value of5sets high-detail logging.mech_list: Sets the authentication mechanism.plainenables username and password authentication.sasldb_path: Specifies the path to the SASL database file for Memcached authentication.
Create a user using the
saslpasswd2utility. Replaceexample-userwith your actual username to add it to the Memcached SASL database.console$ sudo saslpasswd2 -a memcached -c -f /etc/sasl2/memcached-sasldb2 example-user
Enter a strong password for the new user when prompted.
Grant the Memcached user
memcachefull privileges to the/etc/sasl2/memcached-sasldb2database file.console$ sudo chown memcache:memcache /etc/sasl2/memcached-sasldb2
Restart Memcached to apply the configuration changes.
console$ sudo systemctl restart memcached
Check the status of Memcached server.
console$ sudo systemctl status memcached
List all the created user in SASL authentication database.
console$ sudo sasldblistusers2 -f /etc/sasl2/memcached-sasldb2
Output:
example-user@ubuntu22: userPasswordConnect to Memcached to test your new user credentials. Replace
example-user@ubuntu22andstrong-passwordwith your actual user details.console$ memcstat --binary --servers="127.0.0.1" --username='example-user@ubuntu22' --password=strong-password
Your output should look like the one below when successful.
Server: 127.0.0.1 (11211)
    pid: 3988
    uptime: 369
    time: 1743878609
    version: 1.6.14
    libevent: 2.1.12-stable
    pointer_size: 64
    rusage_user: 0.058393
    rusage_system: 0.023357
    max_connections: 1024
    curr_connections: 2
    total_connections: 5
Connect to Memcached
Memcached integrates with application frameworks such as PHP, Perl, Python, Ruby, and Java. Follow the steps below to connect to Memcached and test it using PHP.
Install PHP and the Memcached module.
console$ sudo apt install php php-memcached -y
Create a new sample PHP script to connect to Memcached.
console$ nano memcached.php
Add the following contents to the file. Replace
example-user@ubuntu22andstrong-passwordwith your actual user credentials.php<?php $memcached = new Memcached(); $memcached->setOption(Memcached::OPT_BINARY_PROTOCOL, true); $memcached->addServer('127.0.0.1', 11211); $memcached->setSaslAuthData('example-user@ubuntu22', 'strong-password'); // Set and retrieve a value to test the connection $memcached->set('example', 'Greetings from Vultr!'); echo $memcached->get('example'); ?>
Save and close the file.
The above PHP script connects to Memcached using your example user and the binary protocol. It sets a new key
examplewith the valueGreetings from Vultr!and retrieves it using the$memcachedvariable.Run the script using PHP to test the connection to Memcached.
console$ php memcached.php
Output:
Greetings from Vultr!Based on the above output, the PHP script successfully connects to Memcached, creates the
examplekey and writes a new valueGreetings from Vultrto retrieve from memory.
Conclusion
In this article, you installed and secured Memcached on an Ubuntu 22.04 server. Memcached improves server performance by caching repeated operations like database queries and integrates easily with dynamic web applications.