How to Install PostgreSQL in Vultr Kubernetes Engine (VKE) with Postgres Operator
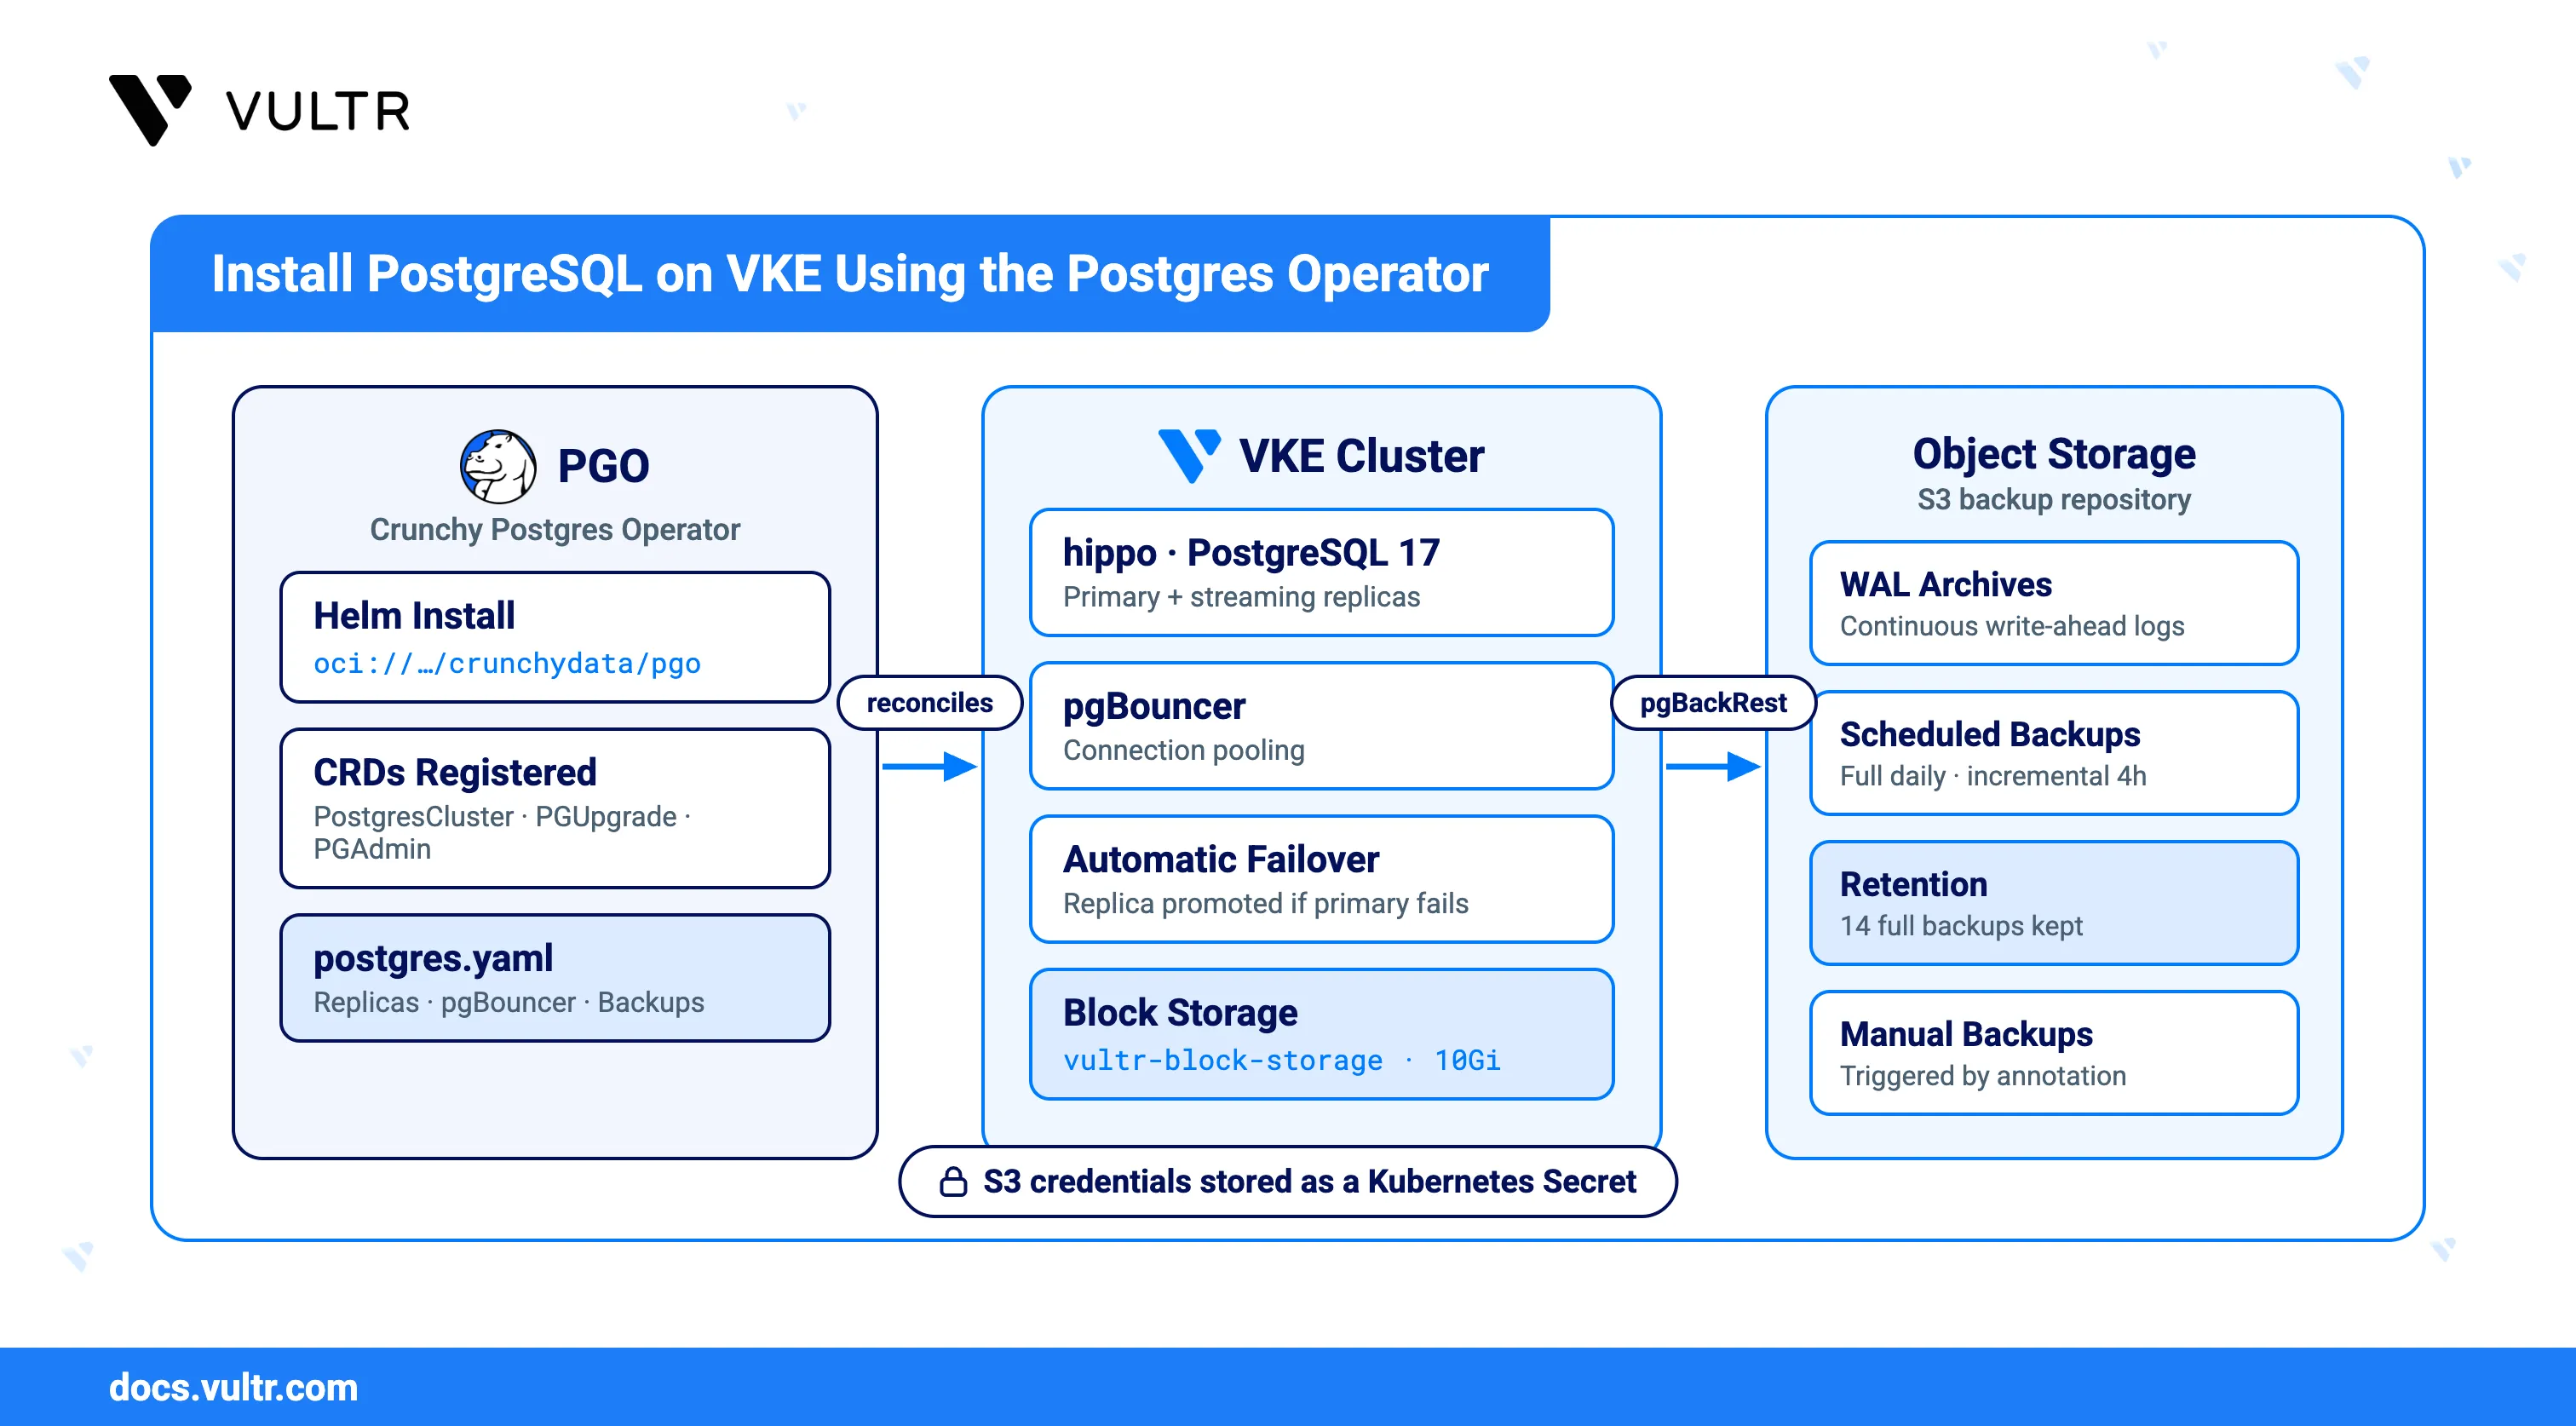
PostgreSQL is an open-source relational database system with strong support for extensibility, concurrency, and SQL standards compliance. PGO, the Postgres Operator from Crunchy Data, extends Kubernetes with custom resources that automate provisioning, high availability, backups, and upgrades for PostgreSQL clusters.
This guide explains how to install PostgreSQL in a Vultr Kubernetes Engine (VKE) cluster using PGO. It covers installing the operator with Helm, provisioning a cluster backed by Block Storage, configuring pgBackRest to archive write-ahead logs and backups to Object Storage, connecting to the database, and applying common customizations such as replicas, connection pooling, and scheduled backups.
Prerequisites
Before you begin, you need to:
- Provision a Vultr Kubernetes Engine cluster with at least 3 nodes.
- Install and configure kubectl on your local machine with access to the cluster.
- Install Helm 3 or later.
- Install jq to read the JSON output that
kubectlreturns. - Provision an Object Storage subscription and create a bucket for backups.
Install the Postgres Operator
PGO is distributed as a Helm chart in an OCI registry. Installing the chart registers the PostgresCluster, PGUpgrade, and PGAdmin Custom Resource Definitions (CRDs) and starts the controller that reconciles them.
Install the operator into a dedicated namespace.
CONSOLEVerify that the operator pod reports a
Runningstatus.CONSOLEThe output displays a single
pgopod with aRunningstatus and1/1containers ready.Confirm that the operator installed its Custom Resource Definitions.
CONSOLEThe output lists
postgresclusters,pgupgrades, andpgadmins. Thepostgresclustersresource serves both the stablev1API and the olderv1beta1API.
Store the Object Storage Credentials
pgBackRest reads its S3 credentials from a Kubernetes Secret rather than from the cluster manifest, which keeps the access keys out of the resource definition. The Secret must contain a key named s3.conf holding a pgBackRest configuration section.
Retrieve your Object Storage access key and secret key from the Object Storage page in the Vultr Console.
Create the pgBackRest configuration file.
CONSOLEAdd the following configuration. Replace
S3-ACCESS-KEYandS3-SECRET-KEYwith your Object Storage credentials.INISave and close the file.
Create the Secret from the file.
CONSOLEThe
--from-fileflag names the Secret key after the file, which produces thes3.confkey that pgBackRest expects.Verify that the Secret contains the
s3.confkey.CONSOLEThe output lists a single key,
s3.conf.Delete the local file so that the credentials do not remain on disk.
CONSOLE
Deploy a Postgres Cluster
A PostgresCluster resource describes the PostgreSQL version, storage, and backup targets. PGO supplies the container images for Postgres, pgBackRest, and pgBouncer automatically, so the manifest does not need to pin image tags.
Create the cluster manifest.
CONSOLEAdd the following configuration. Replace
BUCKET-NAMEwith your bucket andOBJECT-STORAGE-HOSTNAMEwith your Object Storage hostname, such asewr1.vultrobjects.com.YAMLSave and close the file.
apiVersion: Uses the stablev1API served by current operator releases.postgresVersion: Selects the major PostgreSQL version that PGO deploys. The operator ships images for versions 15 through 18, so set a different major version here to deploy one of the others.dataVolumeClaimSpec: Requests a PersistentVolume from thevultr-block-storageStorageClass. Block Storage enforces a 10 GB minimum, so smaller requests fail to bind.repo1-s3-uri-style: path: Required for Object Storage, which addresses buckets by path rather than by virtual host.repo1-retention-full: Keeps the 14 most recent full backups and expires older ones.region: Object Storage ignores the value but pgBackRest requires the field, so any valid region string works.
Apply the manifest.
CONSOLEWait for the cluster pod to become ready.
CONSOLEVerify the running pods.
CONSOLEThe output displays the operator pod alongside a
hippo-instance1pod with aRunningstatus and4/4containers ready, covering Postgres, pgBackRest, and the replication controller.Verify that the PersistentVolumeClaim bound to Block Storage.
CONSOLEVerify that the
STATUScolumn showsBoundand theSTORAGECLASScolumn showsvultr-block-storage.
Verify the Backups
PGO creates a pgBackRest stanza and runs an initial full backup as soon as the cluster starts. The backup and the archived write-ahead logs land in the bucket under the repo1-path prefix.
Wait for the initial backup job to finish.
CONSOLECheck the repository status reported by the operator.
CONSOLEVerify that the output reports
"stanzaCreated":trueand"replicaCreateBackupComplete":true.Identify the primary pod.
CONSOLEQuery pgBackRest from inside the primary pod. Replace
PRIMARY-POD-NAMEwith the pod name from the previous step.CONSOLEThe output confirms the stanza status and lists the completed full backup:
Connect to the Cluster
PGO generates a Secret named CLUSTER-NAME-pguser-USER-NAME that holds the generated credentials and connection strings. For the cluster in this guide, the Secret is hippo-pguser-hippo.
List the fields the Secret provides.
CONSOLEThe Secret contains
user,password,dbname,host,port,uri,jdbc-uri, andverifier.Decode the individual connection values.
CONSOLEIdentify the primary pod.
CONSOLERun a query directly against the primary to confirm the server version. Replace
PRIMARY-POD-NAMEwith the pod name from the previous step.CONSOLEForward the primary pod to your workstation to connect with an external client. Replace
PRIMARY-POD-NAMEwith the pod name returned by the previous command.CONSOLEConnect to
localhost:5432using the decoded user, database, and password.Note
Forward the pod rather than the
hippo-primaryorhippo-haServices. Patroni manages those Services without a selector, andkubectl port-forwardrejects them withService is defined without a selector.
Customize the Cluster
The operator reconciles the cluster whenever the PostgresCluster resource changes. Each of the following customizations edits postgres.yaml and applies it again.
Add Replicas
Additional replicas run streaming replication against the primary, and PGO promotes one automatically if the primary fails.
Open the cluster manifest.
CONSOLESet
replicasunder the instance set to the total number of Postgres pods.YAMLSave and close the file.
Apply the manifest.
CONSOLEVerify that the additional pods reach a
Runningstatus.CONSOLE
Enable Synchronous Replication
Synchronous replication suits workloads that cannot tolerate losing committed transactions. Commits take longer, and writes to the primary block when no synchronous replica is available.
Apply Add Replicas before this section. Enabling synchronous replication on a single-instance cluster leaves no synchronous replica available, which blocks writes to the primary.
Open the cluster manifest.
CONSOLEAdd the
patroniblock underspec.YAMLSave and close the file.
The
archive_timeoutparameter forces a write-ahead log segment switch every 60 seconds so that Object Storage receives archives on a predictable interval.Apply the manifest.
CONSOLE
Enable Connection Pooling
pgBouncer multiplexes client connections onto a smaller pool of backend connections, which helps applications that open many short-lived connections.
Open the cluster manifest.
CONSOLEAdd the
proxyblock underspec.YAMLSave and close the file.
Apply the manifest.
CONSOLEVerify that the pooler pod is running.
CONSOLEConfirm that the pooler connection details were added to the user Secret.
CONSOLEThe Secret gains
pgbouncer-host,pgbouncer-port,pgbouncer-uri, andpgbouncer-jdbc-uri.Forward the pooler Service to connect through it.
CONSOLE
Schedule Automatic Backups
A schedules block runs full and incremental backups on a cron expression instead of only on demand.
Open the cluster manifest.
CONSOLEAdd a
schedulesblock to the repository. ReplaceBUCKET-NAMEandOBJECT-STORAGE-HOSTNAMEwith the same values used in the cluster manifest.YAMLSave and close the file.
This schedule runs a full backup daily at 1 a.m. and an incremental backup every four hours.
Apply the manifest.
CONSOLEVerify that the operator created the backup CronJobs.
CONSOLE
Run a Manual Backup
A manual backup target defines the options PGO uses when you trigger a one-off backup with an annotation.
Open the cluster manifest.
CONSOLEAdd a
manualblock underpgbackrest.YAMLSave and close the file.
Apply the manifest.
CONSOLEAnnotate the cluster to trigger the backup.
CONSOLEVerify that the backup job completed.
CONSOLE
Add a Second Backup Repository
A second repository backed by a PersistentVolume keeps a local copy of backups alongside the Object Storage copy.
Open the cluster manifest.
CONSOLEAdd a second entry to
repos. ReplaceBUCKET-NAMEandOBJECT-STORAGE-HOSTNAMEwith the same values used in the cluster manifest.YAMLSave and close the file.
Block Storage enforces a 10 GB minimum, so a smaller
storagerequest leaves the claim unbound.Apply the manifest.
CONSOLEVerify that the second repository's PersistentVolumeClaim bound.
CONSOLE
Troubleshoot the Cluster
The operator records reconciliation problems as Kubernetes events and cluster conditions, and pgBackRest writes its own logs inside the instance pod.
Inspect the cluster resource and its events.
CONSOLEList namespace events in chronological order.
CONSOLEReview the operator log when a cluster never becomes ready.
CONSOLEValidate the pgBackRest configuration from inside the primary pod. Replace
PRIMARY-POD-NAMEwith your primary pod name.CONSOLEThe command produces no output and exits with status
0when the repository and archive settings are valid. A misconfigured repository prints the failing check instead.Read the pgBackRest logs. Replace
PRIMARY-POD-NAMEwith your primary pod name.CONSOLE
Conclusion
You have successfully installed PostgreSQL in a Vultr Kubernetes Engine cluster using PGO, with data stored on Block Storage and write-ahead logs and backups archived to Object Storage. Extend the deployment by adding replicas for high availability, enabling connection pooling, or scheduling recurring backups. For more information, visit the official PGO documentation.


0 Comments
Be the first to comment and share your perspective with the community.