
How to Install RabbitMQ on FreeBSD 14.0

Introduction
RabbitMQ is an open-source message broker that allows distributed systems to communicate through message queuing. RabbitMQ uses the Advanced Message Queuing Protocol (AMQP) for reliable, asynchronous message delivery. It supports a variety of messaging patterns, including publish/subscribe, request/reply, and point-to-point communication. In addition, RabbitMQ ensures message persistence, security, and fault tolerance, making it ideal for handling high-throughput workloads in modern applications.
This article explains how to install RabbitMQ on FreeBSD 14.0 and manage queues using the web administration console.
Prerequisites
Before you begin:
- Deploy a FreeBSD 14.0 instance on Vultr.
- Create a domain A record pointing to the instance's public IP address.
- Access the instance using SSH.
- Create a non-root user with sudo privileges and switch to the user.
Install RabbitMQ on FreeBSD 14.0
RabbitMQ is available in the default FreeBSD 14.0 package repositories. You can also install a specific version using the FreeBSD ports collection or a generic binary build. Follow the steps below to install RabbitMQ using the default FreeBSD pkg package manager on your server.
Update the server's package information index.
console$ sudo pkg update
Install RabbitMQ.
console$ sudo pkg install -y rabbitmq
Enable the RabbitMQ service to automatically start at system boot.
console$ sudo sysrc rabbitmq_enable=YES
Start the RabbitMQ service.
console$ sudo service rabbitmq start
View the RabbitMQ service status to ensure it's running.
console$ sudo service rabbitmq status
Output:
Status of node ......
Runtime

OS PID: 1283
OS: FreeBSD
Uptime (seconds): 7
Is under maintenance?: false

.....

Listeners

Interface: [::], port: 25672, protocol: clustering, purpose: inter-node and CLI tool communication
Interface: [::], port: 5672, protocol: amqp, purpose: AMQP 0-9-1 and AMQP 1.0
Interface: 0.0.0.0, port: 5672, protocol: amqp, purpose: AMQP 0-9-1 and AMQP 1.0
If you're looking for a different setup, you can also check out how to install rabbitmq in ubuntu to enhance your application’s message handling capabilities!
Configure RabbitMQ
RabbitMQ supports command-line (CLI) operations by default, but the web administration console provides an efficient way to manage application nodes and queues. Follow the steps below to enable the web administration console plugin and create a new administrative user account.
Enable the
rabbitmq_managementplugin.console$ sudo rabbitmq-plugins enable rabbitmq_management
Output:
Enabling plugins on node rabbit@vultr:
rabbitmq_management
The following plugins have been configured:
rabbitmq_management
rabbitmq_management_agent
rabbitmq_web_dispatch
Applying plugin configuration to rabbit@vultr...
The following plugins have been enabled:
rabbitmq_management
rabbitmq_management_agent
rabbitmq_web_dispatch

set 3 plugins.
Offline change; changes will take effect at broker restart.
Create a new
adminuser and replacestrong_passwordwith a strong password of your choice.console$ sudo -u rabbitmq rabbitmqctl add_user admin strong_password
Output:
Adding user "admin" ...
Done. Don't forget to grant the user permissions to some virtual hosts! See 'rabbitmqctl help set_permissions' to learn more.
Grant the
adminuser administative privileges using the RabbitMQset_user_tagsoption.console$ sudo -u rabbitmq rabbitmqctl set_user_tags admin administrator
Output:
Setting tags for user "admin" to [administrator] ...Grant the
adminuser full permission to execute all RabbitMQ operations.console$ sudo -u rabbitmq rabbitmqctl set_permissions admin ".*" ".*" ".*"
In the above command,
".*"is a regular expression pattern that effectively grants full permissions for each type of RabbitMQ operation, such as configure, write, and read.Restart the RabbitMQ service to apply the new user changes.
console$ sudo service rabbitmq restart
Output:
Stopping rabbitmq.
Starting rabbitmq.
Secure RabbitMQ
RabbitMQ serves the web admin console on port 15672 by default. Set up a reverse proxy to this RabbitMQ port and secure connections to the RabbitMQ interface with SSL encryption. Follow the steps below to install Nginx as a reverse proxy and configure the firewall using IPFW to allow incoming SSH, HTTP, and HTTPS connections on the server.
Delete the default RabbitMQ guest user.
console$ sudo -u rabbitmq rabbitmqctl delete_user guest
Output:
Deleting user "guest" ...Install Nginx.
console$ sudo pkg install -y nginx
Enable the Nginx service to start at system boot.
console$ sudo sysrc nginx_enable=yes
Create a new
conf.ddirectory to store your Nginx virtual host configurations.console$ sudo mkdir /usr/local/etc/nginx/conf.d
Create a new Nginx virtual host configuration in the directory using a text editor such as
vi.console$ sudo vi /usr/local/etc/nginx/conf.d/app.example.com.conf
Add the following contents to the file. Replace
app.example.comwith your actual domain.nginxserver { listen 80; listen [::]:80; server_name app.example.com; location / { proxy_pass http://localhost:15672; proxy_set_header Host $host; proxy_set_header Upgrade $http_upgrade; proxy_set_header Connection "upgrade"; proxy_set_header X-Real-IP $remote_addr; proxy_set_header X-Forwarded-Proto $scheme; proxy_set_header X-Forwarded-Host $host; proxy_set_header X-Forwarded-Port $server_port; } }
Save and close the file.
The above Nginx configuration creates a new virtual host for the
app.example.comdomain that listens for connection requests on the HTTP port80and forwards all requests to the RabbitMQ port15672.Open the Nginx configuration file using a text editor such as
vi.console$ sudo vi /usr/local/etc/nginx/nginx.conf
Add the following
includedirective before the closing}symbol at the end of the file.nginxinclude conf.d/*;
Save and close the file.
The above directive instructs Nginx to find and read additional configuration files in the
/usr/local/etc/nginx/conf.ddirectory you created.Test the Nginx configurations for errors.
console$ sudo nginx -t
Output:
nginx: the configuration file /usr/local/etc/nginx/nginx.conf syntax is ok
nginx: configuration file /usr/local/etc/nginx/nginx.conf test is successful
Restart Nginx to apply the changes.
console$ sudo service nginx restart
Output:
Performing sanity check on nginx configuration:
nginx: the configuration file /usr/local/etc/nginx/nginx.conf syntax is ok
nginx: configuration file /usr/local/etc/nginx/nginx.conf test is successful
Starting nginx.
Install the Certbot Let's Encrypt client tool and the Nginx plugin.
console$ sudo pkg install -y security/py-certbot security/py-certbot-nginx
Generate a new SSL certificate for your virtual host's domain, such as
app.example.com. Replaceapp.example.comwith your actual domain andhello@example.comwith your email address.console$ sudo certbot --nginx -d app.example.com -m hello@example.com --agree-tos
Enable Certbot to automatically renew the SSL certificate before expiry.
console$ echo weekly_certbot_enable="YES" | sudo tee -a /etc/periodic.conf
Enable the IPFW firewall service to automatically start at system boot.
console$ sudo sysrc firewall_enable="YES"
Output:
firewall_enable: NO -> YESSet IPFW to quiet mode to suppress messages when loading firewall rules.
console$ sudo sysrc firewall_quiet="YES"
Output:
firewall_quiet: NO -> YESChange the firewall type to
workstationto use stateful rules.console$ sudo sysrc firewall_type="workstation"
Output:
firewall_type: UNKNOWN -> workstationAllow the SSH, HTTP, and HTTPS ports through the firewall.
console$ sudo sysrc firewall_myservices="ssh/tcp http/tcp https/tcp"
Output:
firewall_myservices: -> ssh/tcp http/tcp https/tcpAllow any IP address to access the services in the
firewall_myservicesvariable.console$ sudo sysrc firewall_allowservices="any"
Start the IPFW service to activate the firewall rules.
console$ sudo service ipfw start
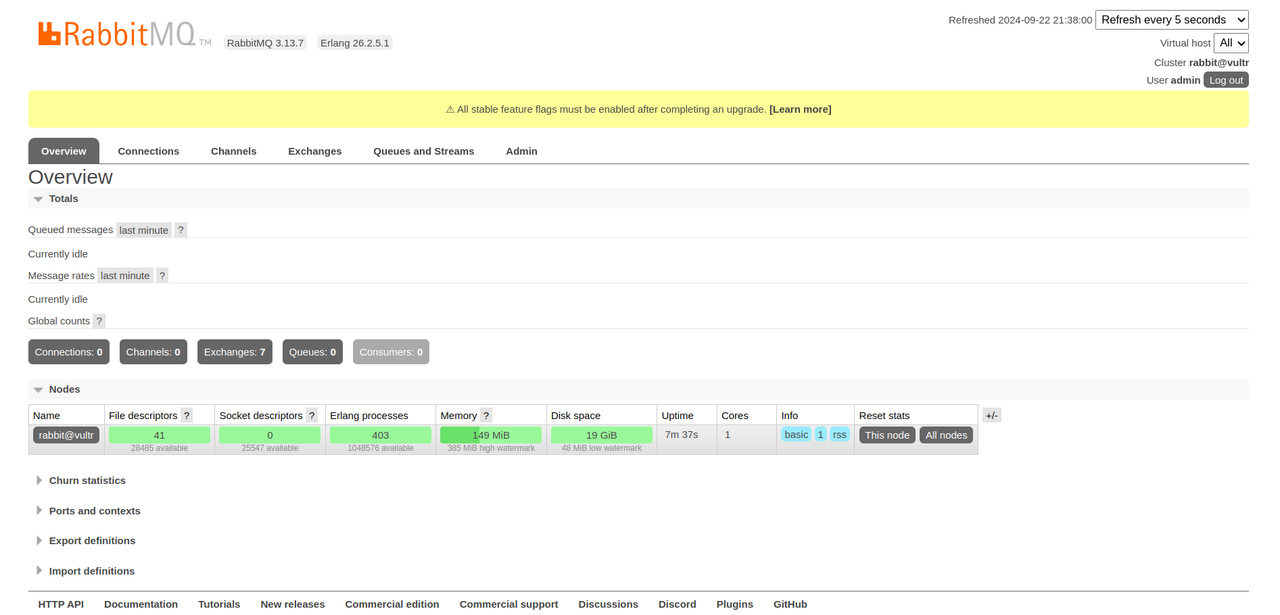
Access the RabbitMQ Console
Follow the steps below to access the RabbitMQ web administration console to manage nodes and queues on your server.
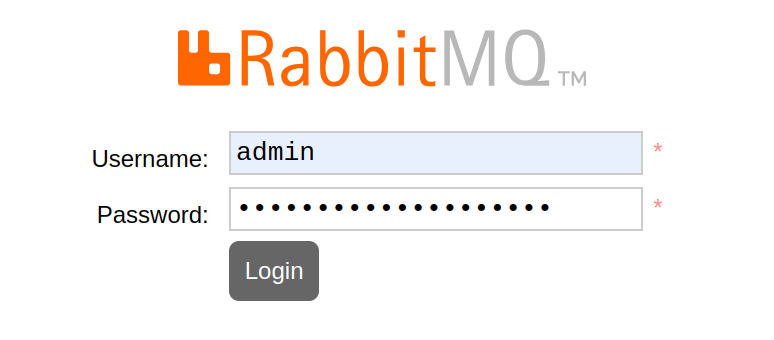
Access your RabbitMQ domain, such as
rabbitmq.example.comusing a web browser such as Chrome.https://your-domain.comVerify that the RabbitMQ web admin console displays and enter the RabbitMQ administrative user credentials you set earlier to log in.
View and manage RabbitMQ tasks using the web administration console.
Conclusion
You have installed RabbitMQ on FreeBSD 14.0 and enabled secure authentication for all users on the server. RabbitMQ is a message broker that integrates with other applications to process queues. For more information and configuration options, please visit the RabbitMQ documentation.