
How to Upgrade the Linux Kernel with Cloud-init User-data

Cloud-init is an open-source software or service that allows users to create customized cloud servers and virtual machines. It is developed by Canonical and gives you the flexibility to automate the provisioning of cloud instances. Currently, it supports all major Linux distributions, including Ubuntu, Debian, FreeBSD, CentOS, Fedora, Gentoo, OpenSUSE, and more. All major cloud vendors use it to modify generic OS configuration on boot.
You can set up your cloud instances with your desired configuration and software ready to use with cloud-init. The cloud-init service starts during the system booting process and uses the metadata provided by the cloud vendor.
Cloud-init provides ways to do some common tasks via user-data, like:
- Set up hostname
- Set up a mount point
- Update system packages and kernel
- Add users and groups.
- Run specific commands at system boot
- Install and configure software
- Add software repositories
- Reset an instance and rerun cloud-init without a complete reinstall
- Override Vultr's vendor-data with your user-data.
This post will explain how to upgrade the Linux kernel in the Vultr Linux instance with cloud-init user-data.
Create a Cloud-init Configuration File
This section explains how to create a cloud-init configuration file to upgrade the Linux kernel in CentOS 7 operating system.
Write the following code in your cloud-config user-data file:
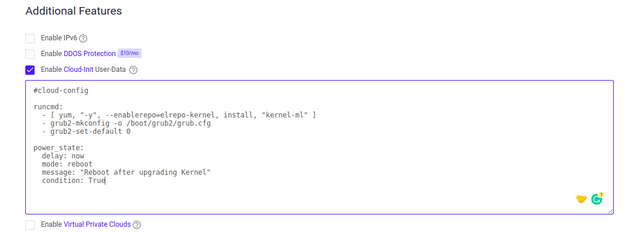
#cloud-config

runcmd:
  - [ yum, "-y", --enablerepo=elrepo-kernel, install, "kernel-ml" ]
  - grub2-mkconfig -o /boot/grub2/grub.cfg
  - grub2-set-default 0

power_state:
  delay: now
  mode: reboot
  message: "Reboot after upgrading Kernel"
  condition: true
A brief explanation of each directive in the above configuration file is shown below:
runcmd:You can specify the list of commands to run during the first boot.power_state:You can restart or shut down the Linux instance after executing all commands specified in theruncmd:directive.delay:You can specify a timeout in minutes (+m).mode:You can specify the action topoweroff,halt, orrebootthe instance.message:Display message after the process finishes.condition:Specify the condition in true (always met) or false (never met).
When you provision your new Vultr instance, the cloud-init processes the above cloud-config file and performs the following steps in order:
- Install the latest mainline stable kernel.
- Collects information from the
/bootdirectory to find newly installed Linux kernel and generates a newgrub.cfgconfiguration file. - Set the default kernel to the latest mainline kernel to boot the system after rebooting.
- Reboot the system after upgrading the Linux kernel.
Use Cloud-init User Data to Upgrade Kernel on Vultr Instance
At this point, the cloud-init configuration file is ready to upgrade the Linux kernel. You can now use this configuration file to provision the new CentOS 7 Vultr instance and upgrade the Linux kernel.
Follow the below steps to provision the CentOS 7 Vultr instance and upgrade the Linux kernel:
Log in to the Vultr Vultr Console as shown below:
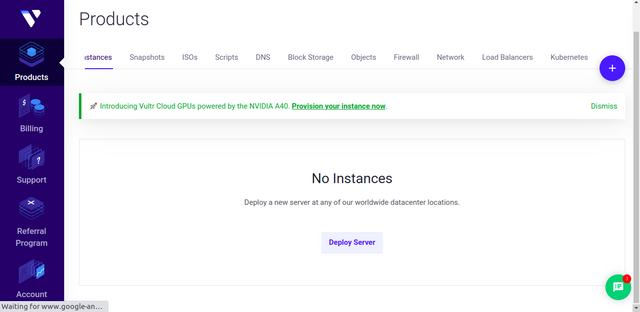
Click the Deploy Server button.
Choose your preferred server in the Choose Server section.

Choose a location near you in the Server Location section.

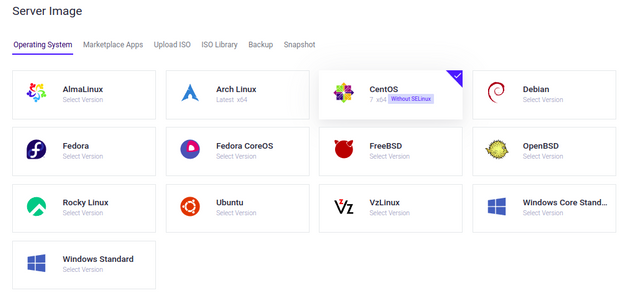
Choose a CentOS image and version 7 in the Server Image section.
Choose your server specification in the Server Size section.

Check the Enable Cloud-Init User-Data box in the Additional Features section and add the cloud-init user-data in plain text.
Define the server hostname, and label in the Server Hostname & Label section.
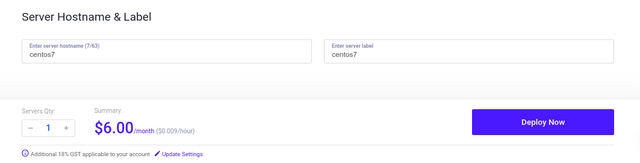
Click Deploy Now to start provisioning the instance.
The above process will take some time to provision the instance. After provisioning the CentOS 7 instance, log in to your CentOS 7 instance via SSH and run the following command to verify the newly installed kernel.
# uname -rYou should see the new Linux mainline kernel in the following output:
6.0.8-1.el7.elrepo.x86_64Troubleshoot cloud-init
Sometimes the cloud-init isn't doing what you want. In this case, you can check the cloud-init logs to troubleshoot the issue.
The cloud-init main log files are available in the following directory:
/var/log/cloud-init.log/var/log/cloud-init-output.log
You can also find more logs in the /run/cloud-init directory. In addition, you can parse the cloud-init logs using the following command:
# cloud-init analyze -hYou can use any of the following subcommands to parse the logs:
usage: /usr/local/bin/cloud-init analyze [-h] {blame,show,dump,boot} ...

options:
  -h, --help            show this help message and exit

Subcommands:
  {blame,show,dump,boot}
    blame               Print list of executed stages ordered by time to init
    show                Print list of in-order events during execution
    dump                Dump cloud-init events in JSON format
    boot                Print list of boot times for kernel and cloud-init
Conclusion
In this post, you learned how to use the cloud-init user-data to upgrade the Linux kernel on the Vultr cloud instance. Cloud-init is a potent tool and is frequently updated with new modules and vendor datasources. For more information, visit the cloud-init official documentation.