
How to Use Vultr's WebApp Marketplace Application
Introduction
Vultr WebApp is a virtual desktop solution that offers 3D acceleration for GPU-intensive applications such as games, graphics software, and Computer-Aided Design (CAD) apps. The WebApp interface is accessible through a web browser with all installed applications available in a single menu bar on the server. It's highly customizable, and securely allows you to transfer files between your local computer and the server.
This article explains how you can use the Vultr WebApp marketplace application to run access applications such as Blender, FreeCAD, and Gimp through a secure web interface.
Prerequisites
Before you begin.
Deploy a Vultr WebApp A16 Cloud GPU Instance from the Vultr Marketplace.
When deploying the application, enter the target applications to pre-install on the server. For example,
blender,gimp,freecadinstallsIn the Application Startup Command field, enter the startup command for your main application. For example
blenderlaunches Blender as your main application when you log in to the WebApp. Enter your desired username in the WebApp User field. Keep the Bash Install Script field empty if you have no extra non-APT applications to install on the server.Set up a domain A record pointing to the Vultr WebApp IP Address.
For quick access, configure a domain name to translate to your Vultr WebApp IP Address. This article uses
webapp.example.com, replace all occurrences with your actual domain name or Server IP Address.
Create a Standard User Account
To securely manage your Vultr WebApp server, it’s important to refrain from using the root user account. It’s recommended to use a standard user account with sudo privileges to install any additional applications to the server, upload, and download files. Create a new user on the server as described in the steps below.
Using SSH, access your Vultr WebApp server as root.
$ ssh root@SERVER-IPCopy the auto-generated root user password in your Vultr WebApp server control panel to log in to the server.
Create a new user account. For example
example-user.# adduser example-userEnter a strong password for the user, and press enter to accept all listed options.
Add the user to the sudoers group.
# adduser example-user sudoThe above command grants the user sudo privileges to perform tasks such as installation and configuration of application packages on the server.
Switch to the user account.
# su example-userUpdate the server packages to verify that the user has sudo privileges.
$ sudo apt updateCreate a new
filesdirectory in thewebapphome directory to upload and download files.$ sudo mkdir -p /home/webapp/filesBy default, Vultr WebApp uses the
webapphome directory to store files. In this article, you will upload and download files to the directory by creating a link to your standard user’s home directory.Link the
filesdirectory to your user home directory to create a shortcut for SFTP access.$ sudo ln -s /home/webapp/files ~/Make the parent directory writable for all users.
$ sudo chmd 777 -R /home/webapp/filesVerify that the linked
filesdirectory is added to your home directory.$ ls ~/Output:
files
Access the Vultr WebApp
In a web browser such as Chrome, visit your Vultr WebApp server IP Address.
http://SERVER-IPIf your domain propagates successfully, access WebApp using your domain name.
http://webapp.example.comWhen prompted for a username and password, fill in the fields as follows:
Username: You set during deployment
Password: Auto-generated password in your Vultr WebApp control panel
Verify that the Blender Interface loads correctly in your browser.
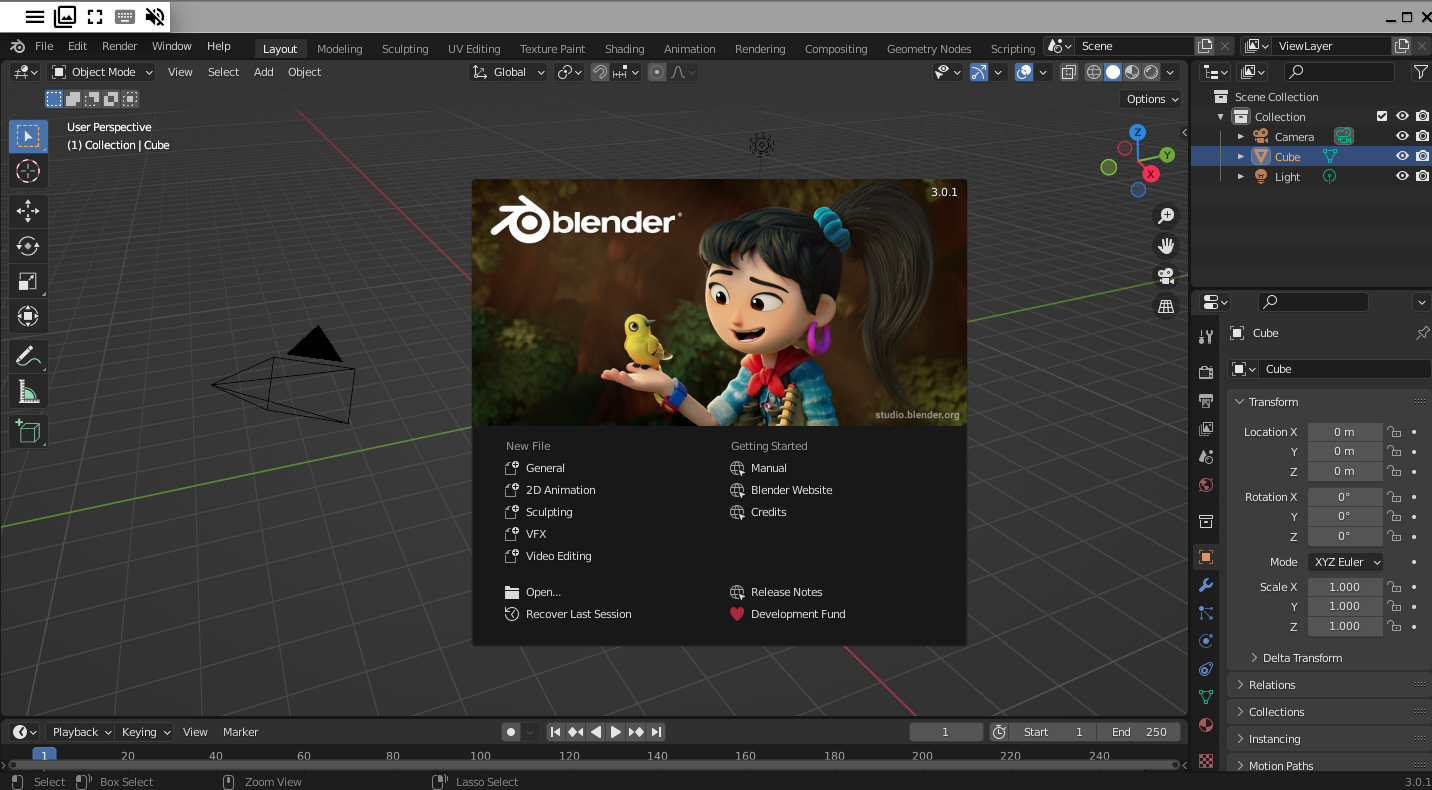
Start using the Blender to create 3D models, Save your work, and press the minimize button to hide it when running another app.
To start another application, click the floating menu bar, and hover the Start menu to reveal a dropdown list.
Click each of the list options, Graphics, and Multimedia to reveal additional applications you can run in your Vultr WebApp interface.
To open the Gimp graphics tool, navigate to
Start > Graphics, and click Gimp to open the application window.Start using Gimp to create your graphics workflows.
Save your work, and download a copy of the files to on your computer.
Upload and Download Files
To upload files to your Vultr WebApp server, use the main web interface to upload a single file for use in your application. However, to upload a batch of files, you need to use a secure FTP or SFTP connection to the server. Through the connection, you can upload and download files on the server directly to your local computer as described in the following steps.
To upload a single file on the server, click the floating menu bar.
Navigate to Server to reveal a dropdown menu, and select Upload File from the list.
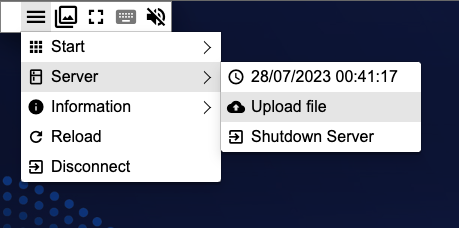
Browse a file from your computer, and click Open to upload the file to the Vultr WebApp server.
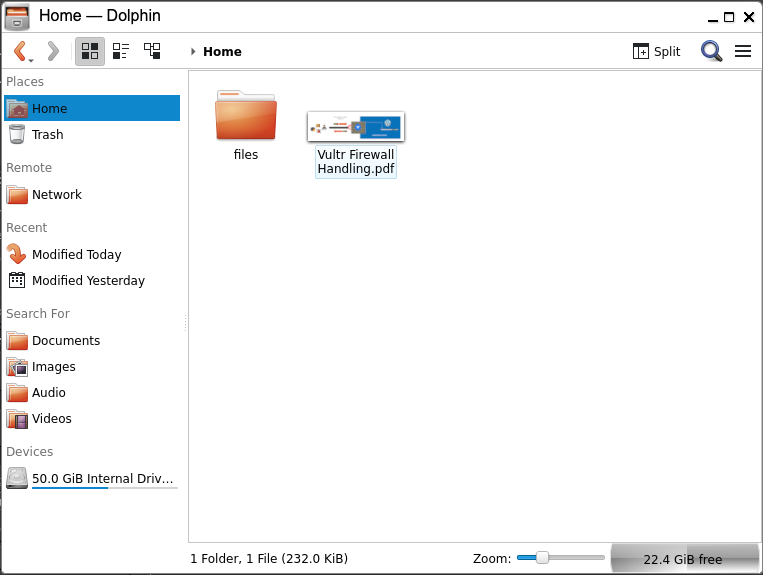
To view the uploaded file, click the main menu bar, navigate to Start, scroll to System, and click Dolphin to open the file explorer.
In the Places section, click Home, view, and verify that your file is available in the directory.
Upload Multiple Files
To upload multiple files on your Vultr WebApp server, you must establish a secure connection to the server using a file transfer protocol such as FTP, SFTP, or Rsync. In this section, you will use the FileZilla SFTP client to connect to the server and upload multiple files as described in the steps below.
Download and Install FileZilla on your computer from the official website.
From your applications menu, open FileZilla.
Within the FileZilla window, enter your Vultr WebApp IP Address in the Host field, or the configured domain name.
In the Username: field, enter the standard user you created earlier.
Enter the user password in the Password: field.
Enter
22in the Port: field to instruct FileZilla to use FTP.
Click the Quick Connect button to establish a connection to the server.
In the Remote Site section, verify that the
filesdirectory is available.Double-click to open the directory.
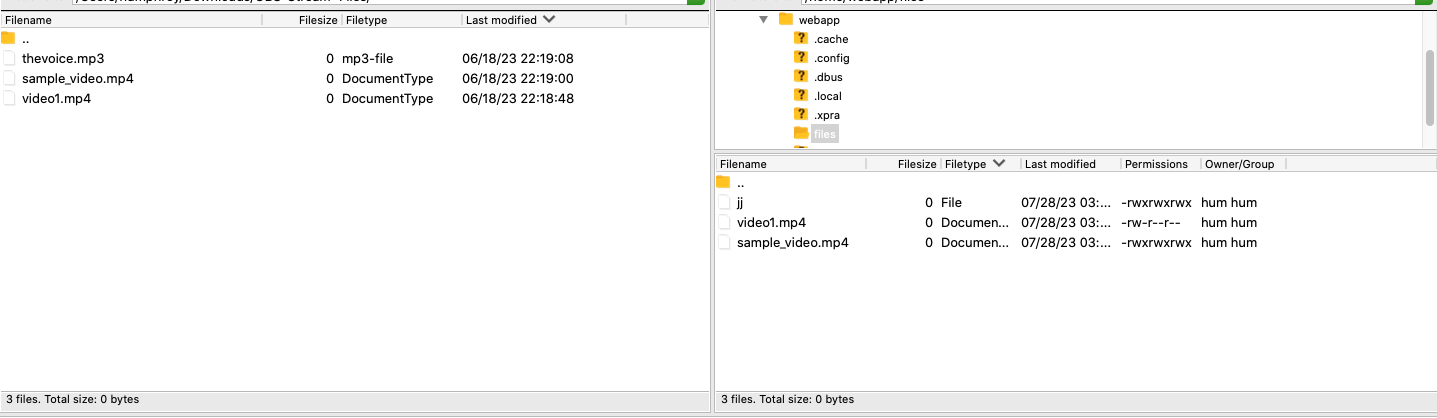
In the Local Site section, navigate to the directory where your target upload files are stored.
Drag and drop files from the Local Site section to the Remote Site to start uploading them to the Vultr WebApp server.
When successful, open Vultr WebApp in your web browser.
Click the floating menu bar, navigate to System, and open the Dolphin file explorer.
Click the Home directory, double-click
files, and verify that your uploaded files are available in the directory.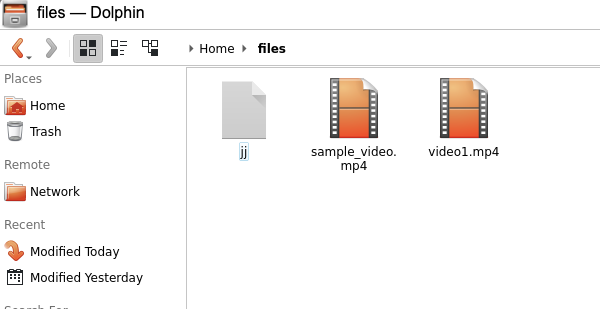
Download Files
In your FileZilla SFTP session, navigate to the
filesdirectory in the Remote Site section.Verify that your target files are available, drag and drop them to your destination directory in the Local Site section to save them on your computer.
Open a new file explorer window on your local computer.
Navigate to your destination directory.
Verify that your downloaded files from WebApp are available.
To connect, upload and download files on your Vultr WebApp server, you can use other SFTP clients such as Cyberduck, or directly sync your local directories with the WebApp server using RSync to continuously download new files.
Install Additional Applications
Vultr WebApp allows you to install multiple applications with the , separator during the deployment stage. To install additional applications such as OBS on your Vultr WebApp, make sure they are graphical applications, then use the Ubuntu APT repository to install them as below.
Update the server packages.
$ sudo apt updateInstall your target application, for example,
OBS-Studio.$ sudo apt install obs-studio ffmpegThe
ffmpegpackage is a necessary application for OBS Studio to correctly work on the server.Install a web browser, for example,
Chromiumto browse the web using Vultr WebApp.$ sudo apt install chromium-browserAlternatively, install non-apt packages from sources such as
snap. For example, to install Minecraft, run the following command.$ sudo snap install mc-installerInstall the Shotcut video editor.
$ sudo snap install shotcutTo verify that all additional applications are successfully added to your Vultr WebApp server. Load the WebApp interface in your browser.
http://webapp.example.comNavigate to the floating menu bar, and hover over the Start menu.
Verify that new categories are added to the dropdown menu.
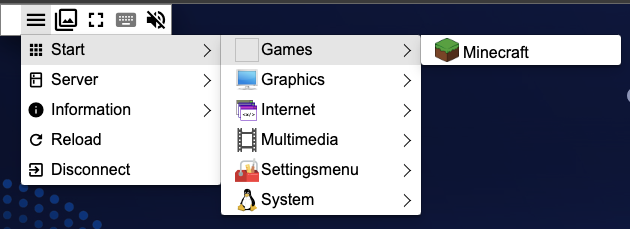
As displayed on the interface, you installed the Minecraft game which creates a new Games category in your WebApp menu. The Chromium browser also creates a new Internet menu option.
Security
To secure your Vultr WebApp server, verify your Firewall table rules, and redirect all HTTP requests to HTTPS to add an encryption layer to your server traffic. Additionally, you can change the Vultr WebApp user password, and add any secondary users to grant access to your server as described in this section.
Verify the available rules in the Uncomplicated Firewall (UFW) table.
$ sudo ufw statusOutput:
 Status: active

 To                         Action      From
 --                         ------      ----
 22/tcp                     ALLOW       Anywhere
 443                        ALLOW       Anywhere
 80                         ALLOW       Anywhere
 9080/tcp                   ALLOW       Anywhere
 22/tcp (v6)                ALLOW       Anywhere (v6)
 443 (v6)                   ALLOW       Anywhere (v6)
 80 (v6)                    ALLOW       Anywhere (v6)
 9080/tcp (v6)              ALLOW       Anywhere (v6)
As displayed in the above output, the HTTP port
80, HTTPS port443, and SSH port22are allowed through the firewall.Block access to the Cockpit port
9080if you are not using it.$ sudo ufw deny 9080/tcpRestart the firewall to load changes.
$ sudo ufw reload
Generate Let’s Encrypt SSL Certificates
To configure Nginx to read your domain name, navigate to the host files directory.
$ sudo cd /nginx/sites-availableBack up the
webapp_https.conffile to your user home directory.$ sudo mv webapp_https.conf ~/Delete the orphaned file from the
sites-enableddirectory.$ sudo rm ../sites-enabled/webapp_https.confUsing a text editor such as
Nano, edit thewebapp_http.conffile.$ sudo nano webapp_http.confFind the
server_name _;directive, and include your domain name as below.server_name webapp.example.com;Save and close the file.
Test Nginx for configuration errors.
$ sudo nginx -tRestart Nginx.
$ sudo systemctl restart nginxInstall the Certbot Let’s Encrypt client.
$ sudo snap install --classic certbotActivate the Certbot systemwide command.
$ sudo ln -s /snap/bin/certbot /usr/bin/certbotRequest for a new SSL certificate. Replace
webapp.example.comwith your actual domain name, anduser@example.comwith your actual email address.$ sudo certbot --nginx -d webapp.example.com -m user@example.com --agree-tos --redirectVerify that the certificate auto-renews upon expiry.
$ sudo certbot renew --dry-runIn your web browser, visit your domain to verify that it’s accessible over HTTPS.
https://webapp.example.com
Optional: Set up Vultr WebApp Users
To change your Vultr WebApp user password, or set up additional users, create a new password as described in the steps below.
Using the
htpasswdutility, Change your user password in the/etc/nginx/htpasswd/webappfile by running the following command.$ htpasswd -c /nginx/htpasswd/webapp myuserEnter your new password when prompted, and replace
myuserwith your actual user.The above command overwrites the existing user password in the
webappfile with your new password.To fully change the user password, edit the
.xprapasswdfile in the webapp home directory as below.$ sudo nano /home/webapp/.xprapasswdSet a new password in the file.
STRONG-PASSWORDSave and close the file.
To create additional users to access your Vultr WebApp, append the
/etc/nginx/htpasswd/webappfile to set up a new basic authentication user as below.$ htpasswd -b /etc/nginx/htpasswd/webapp example-designer STRONG-PASSWORDThe above command creates the user
example-designerwith access to your Vultr WebApp interface.
Conclusion
You have used the Vultr WebApp Marketplace application to access your GPU-intensive applications, installed extra apps, and improved the server security. By using the Vultr WebApp interface, you can easily access your applications faster than VNC, or Remote Desktop connections (RDP) that require special apps to connect.
Next Steps
For more information on how to secure your Vultr WebApp server, and deploy other applications to run, visit the following resources.