

Introduction
OPNsense is an open source FreeBSD-based firewall and routing platform, forked from pfSense and m0n0wall. It's an ideal tool for system administrators who need an open-source router and firewall suite with an optional VPN and load balancer. This guide explains how to install OPNsense on a Vultr cloud server.
Deploy a FreeBSD Instance
OPNsense is based on FreeBSD, which needs custom settings at Vultr. The easiest way to get a FreeBSD-compatible instance is to deploy a FreeBSD server temporarily, then attach the OPNsense ISO and reformat the original server. By deploying a FreeBSD server first, Vultr will choose a compatible instance type for you, which you can overwrite with OPNsense.
Navigate to your customer portal's Deploy New Instance page.
Deploy a new FreeBSD server.
Navigate to the Server Information page for the FreeBSD server.
Click the Setting tab.
Click Custom ISO in the left-hand menu.
In the ISO Library section, select the OPNsense ISO.
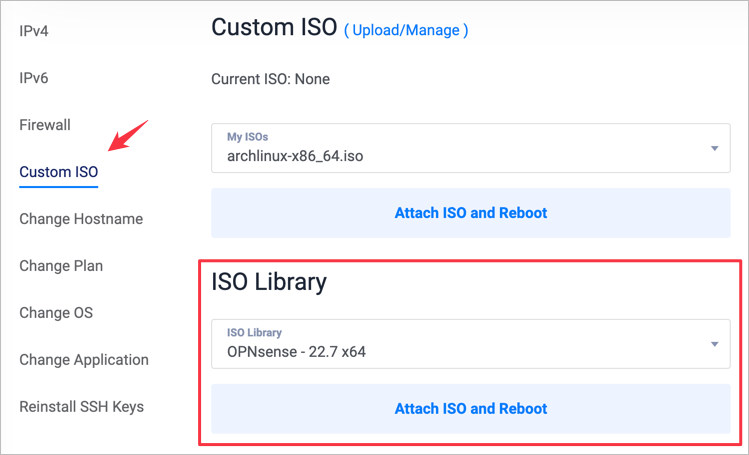
Click Attach ISO and Reboot.
Install OPNsense
- Open the web console for your server. Wait for the OPNsense installer to boot.
- Enter
installerat the login prompt - Enter
opnsenseas the password. - The OPNsense installer dialog launches.
After successfully booting the installation ISO, follow the OPNsense installation steps to configure your system.
Post-installation Steps
After the installer prompts you to reboot the server, it will attempt to boot from the OPNsense ISO again. You must remove the ISO from the instance to boot the new OPNsense server.
Navigate to the Server Information page for the server.
Click the Setting tab.
Click Custom ISO in the left-hand menu.
Click Remove ISO.

The server will boot OPNsense.
No comments yet.