Introduction
osTicket is a web-based open-source ticketing system for streamlining your customers' experience. It's written in PHP and MySQL/MariaDB. On top of its easy-to-follow installation process, osTicket comes with rich dashboard reports, configurable help topics, service level agreements, ticket filters, and built-in API. osTicket is free, and more than 5 million users rely on the software to seamlessly route customers' queries created via web forms, emails, or API. In this guide, you'll create a robust customer support portal with osTicket on a LAMP stack running on Fedora 34.
Prerequisites
Before you proceed, make sure you have the following.
- A Fedora 34 server.
- A domain name such as example.com. To complete this tutorial, you may use your server's public IP address and change it later.
- A non-root sudo user
- A Fedora 34 LAMP Stack
1. Install the Dependencies
Make sure your system is up to date.
$ sudo dnf -y upgradeInstall the following helper packages.
$ sudo dnf install -y socat git wget unzip nanoInstall the required PHP extensions.
$ sudo dnf install -y php-{cli,fpm,common,mbstring,curl,gd,mysqlnd,json,xml,intl,pecl-apcu,opcache}To load the new PHP extensions, restart the httpd service.
$ sudo systemctl restart httpd2. Create the Database
osTicket relies on a database to store tickets and other information. You must set up one for it to work.
Log in to your MySQL/MariaDB server as root.
$ sudo mysql -u root -pEnter the root password for your MySQL/MariaDB server and press Enter to continue.
Create a database and name it os_ticket. You can use any name here, but having a descriptive name will help you easily identify the database and troubleshoot problems if they occur later. Next, create a user named os_ticket_user. Then, exit from the MySQL/MariaDB command-line interface.
Choose the commands below depending on your choice of the database server. Remember to replace EXAMPLE_PASSWORD with a strong value.
If you use MySQL:
  mysql> CREATE DATABASE os_ticket;
         CREATE USER 'os_ticket_user'@'localhost' IDENTIFIED WITH mysql_native_password BY 'EXAMPLE_PASSWORD';
         GRANT ALL PRIVILEGES ON os_ticket.* TO 'os_ticket_user'@'localhost';
         FLUSH PRIVILEGES;
         EXIT;
If you use MariaDB:
  MariaDB> CREATE DATABASE os_ticket;
           GRANT ALL PRIVILEGES on os_ticket.* TO 'os_ticket_user'@'localhost' identified by 'EXAMPLE_PASSWORD';
           EXIT;
3. Install osTicket
You'll install the osTicket under the /var/www/ directory. To keep things simple, create a child directory and name it os_ticket.
$ sudo mkdir -p /var/www/os_ticketChange the ownership of the directory to your current username to avoid permission issues when installing the package.
$ sudo chown -R $USER:$USER /var/www/os_ticketNavigate to the /var/www/os_ticket directory.
$ cd /var/www/os_ticketUse the Linux wget command to download the latest stable osTicket version.
$ wget https://github.com/osTicket/osTicket/releases/download/v1.15.2/osTicket-v1.15.2.zipUnzip the osTicket-v1.15.2.zip archive file.
$ unzip osTicket-v1.15.2.zipDelete the zip file after you've extracted it.
$ rm osTicket-v1.15.2.zipCopy the sample configuration file to ost-config.php.
$ sudo cp upload/include/ost-sampleconfig.php upload/include/ost-config.phpChange the ownership of the entire /var/www/os_ticket directory to the apache user.
$ sudo chown -R apache:apache /var/www/os_ticketSet the correct permissions for the /var/www/os_ticket directory.
$ sudo chmod -R 755 /var/www/os_ticket4. Disable SELinux
Open the file /etc/selinux/config using nano.
$ sudo nano /etc/selinux/configFind the line SELINUX=enforcing.
...
SELINUX=enforcing
...
Change the value of SELINUX from enforcing to disabled.
...
SELINUX=disabled
...
Reboot the server to load the new SELinux configurations.
$ sudo reboot5. Create the Virtual Host File
Create a new os_ticket.conf virtual host file under the /etc/httpd/conf/ directory.
$ sudo nano /etc/httpd/conf.d/os_ticket.confEnter the information below into the file. Replace example.com with the correct domain name or public IP address of your server.
<VirtualHost *:80>
  ServerAdmin webmaster@example.com
  DocumentRoot /var/www/os_ticket/upload
  ServerName example.com
  ErrorLog logs/example.com-error_log
  CustomLog logs/example.com-access_log common
</VirtualHost>
Save and close the file.
Restart Apache to load the new configuration.
$ sudo systemctl restart httpd6. Finish the Installation
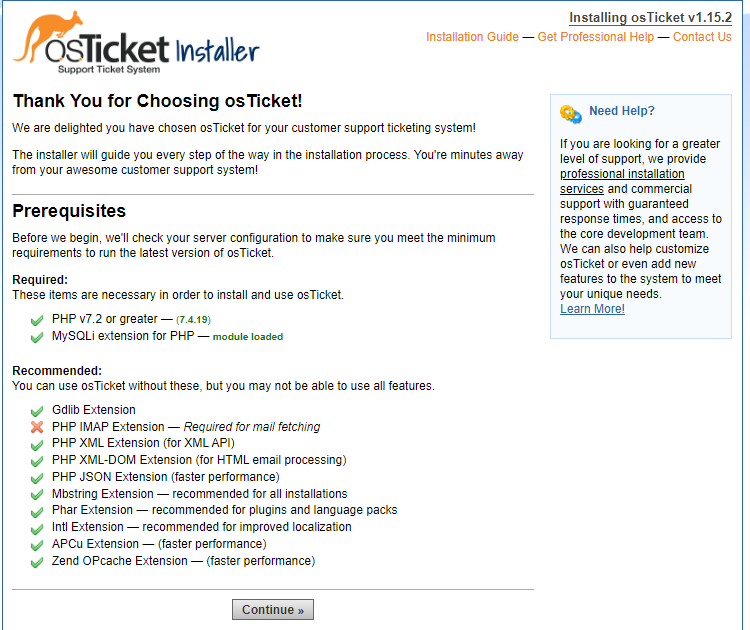
Visit your server's URL in a web browser to complete the osTicket installation. Replace example.com with your domain name or server's public IP address.
http://www.example.comYou should see an output like the screenshot below.

Respond to the on-screen wizard to complete the following:
- System Settings
- Admin User account
- Database Settings. Here, you should enter the database details that you created earlier in this guide.
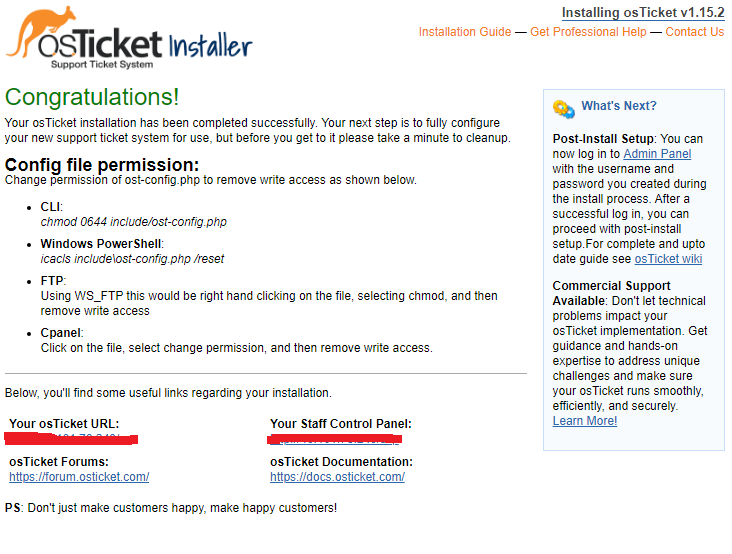
Your osTicket installation should be finalized, and you'll see the following output.

Complete the osTicket installation by deleting the setup directory.
$ sudo rm -rf /var/www/os_ticket/upload/setupRemove write access to the main osTicket configuration file.
$ sudo chmod 0644 /var/www/os_ticket/upload/include/ost-config.phpConclusion
In this tutorial, you've installed an osTicket with LAMP stack on Fedora 34. You can now proceed and use the intuitive web-based ticketing dashboard to manage your customer queries.
No comments yet.