Introduction
pfSense is an ideal tool for system administrators looking to add a broad range of features to their network. It is primarily an open-source router/firewall suite built on top of FreeBSD, but it also supports setting up a VPN or load balancer with just a few clicks. This guide explains how to install pfSense on a Vultr cloud server with at least 1 GB of RAM.
1. Upload pfSense to Vultr
Locate the most recent stable community edition on the official website and upload the ISO to your Vultr account.
2. Deploy a pfSense server
pfSense is based on FreeBSD, which needs custom VPS settings at Vultr. The easiest way to get a FreeBSD-compatible VPS is to deploy a FreeBSD server. Then, you'll attach the pfSense ISO and reformat the original server. By deploying a FreeBSD server first, Vultr will choose a compatible instance type for you, which you can then overwrite with pfSense.
- Navigate to the Deploy New Instance page in your customer portal.
- Deploy a new FreeBSD server.
- Navigate the the Server Information page for the FreeBSD server.
- Click the Setting tab.
- Click Custom ISO in the left-hand menu.
- In the Custom ISO section, select your pfSense ISO and click Attach ISO and Reboot.
Open the web console for your server. You will see the following screen after some time:
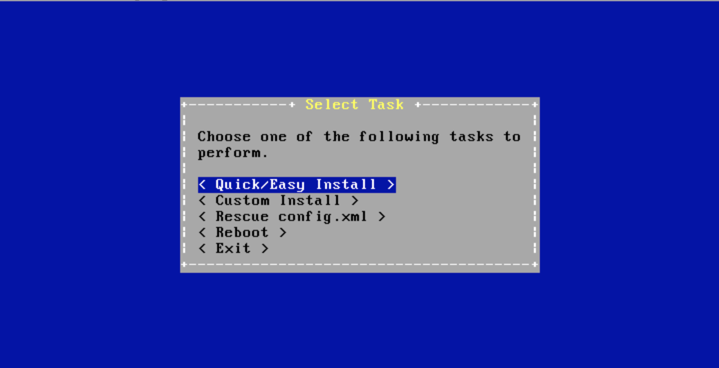
We want to use the standard option "Quick/Easy Install". As this has already been selected, press Enter. If pfSense asks for a confirmation, press Enter again. Then you will need to choose the kernel to use.
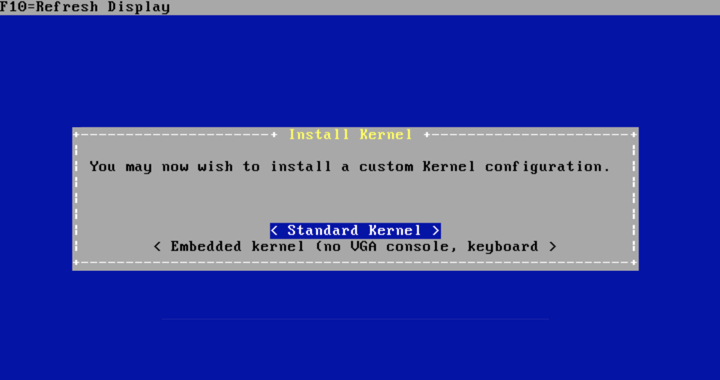
If you are unsure which kernel you should use, choose the default kernel version.
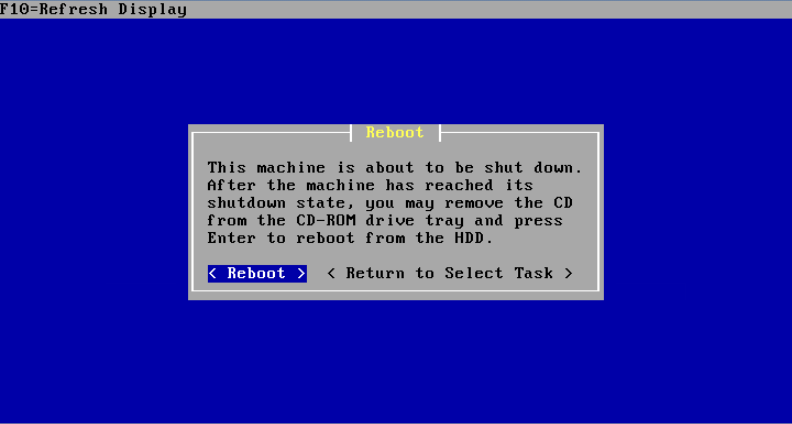
After some time, pfSense will automatically reboot. This is somewhat confusing because pfSense will restart to the installation screen, making it look like you have to walk through the entire process again. However, this is not necessary; navigate to "Reboot" with your arrow keys.
3. Configure pfSense
Dismount the Custom ISO after installation so the instance can boot normally; otherwise, the instance will continuously enter the installation after each reboot.
- Visit your Vultr management page.
- Select the instance.
- Choose the "Settings" link near the top of the page.
- Click the "Custom ISO" link on the side.
- Select the 'Remove ISO' button.
The installation will now proceed in the console. Please match the questions with the appropriate letters as seen below.
Should VLANs be set up now? n
Enter the WAN interface or "a" for auto-detection: vtnet0, press enter
Enter the LAN interface name or "a" for auto-detection: press enter
Do you want to proceed? y
You have now walked through the first part of pfSense's configuration. Next, you will set up the configuration through the built-in webConfigurator, a web interface used for administrating pfSense and accessing its tools. To use this tool, please navigate to the IP address of your Vultr server. You can find this IP address on the Vultr control panel.
Upon navigating to the webConfigurator, you will see an SSL error. However, you can safely ignore this and proceed. The default user name is admin and the default password is pfsense. Enter this is in the login form and login.
Click "Next" to start the installation. I will guide you through this process step-by-step.
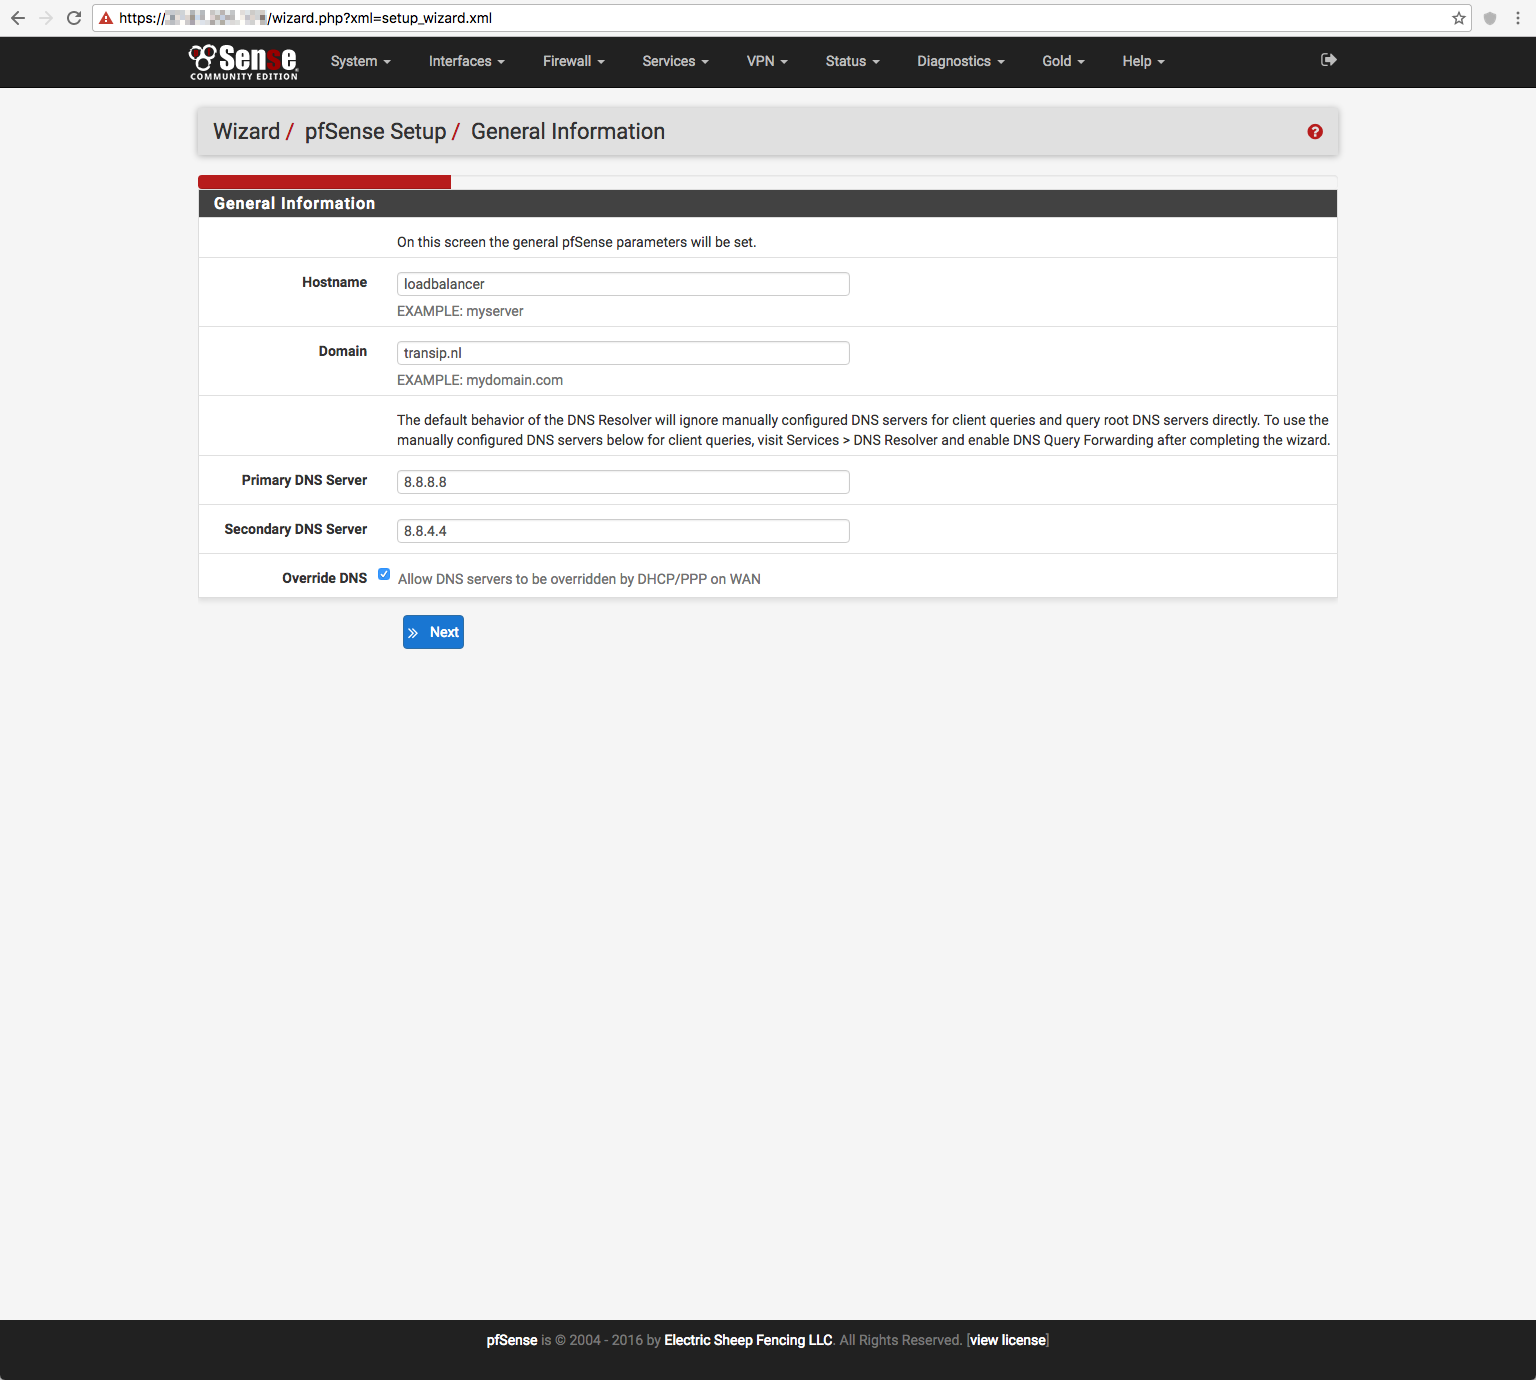
General Information
- Hostname: Do not enter an FQDN, but a general description such as "loadbalancer".
- Domain: Enter a domain name for your pfSense install.
- Primary & Secondary DNS server: If you are unsure which DNS server you should use, please use
8.8.8.8(Google DNS). - Override DNS: yes.
Time Server Information
pfSense uses a time server to determine the time. Leave this on the default setting. (Time server hostname: 0.pfsense.pool.ntp.org).
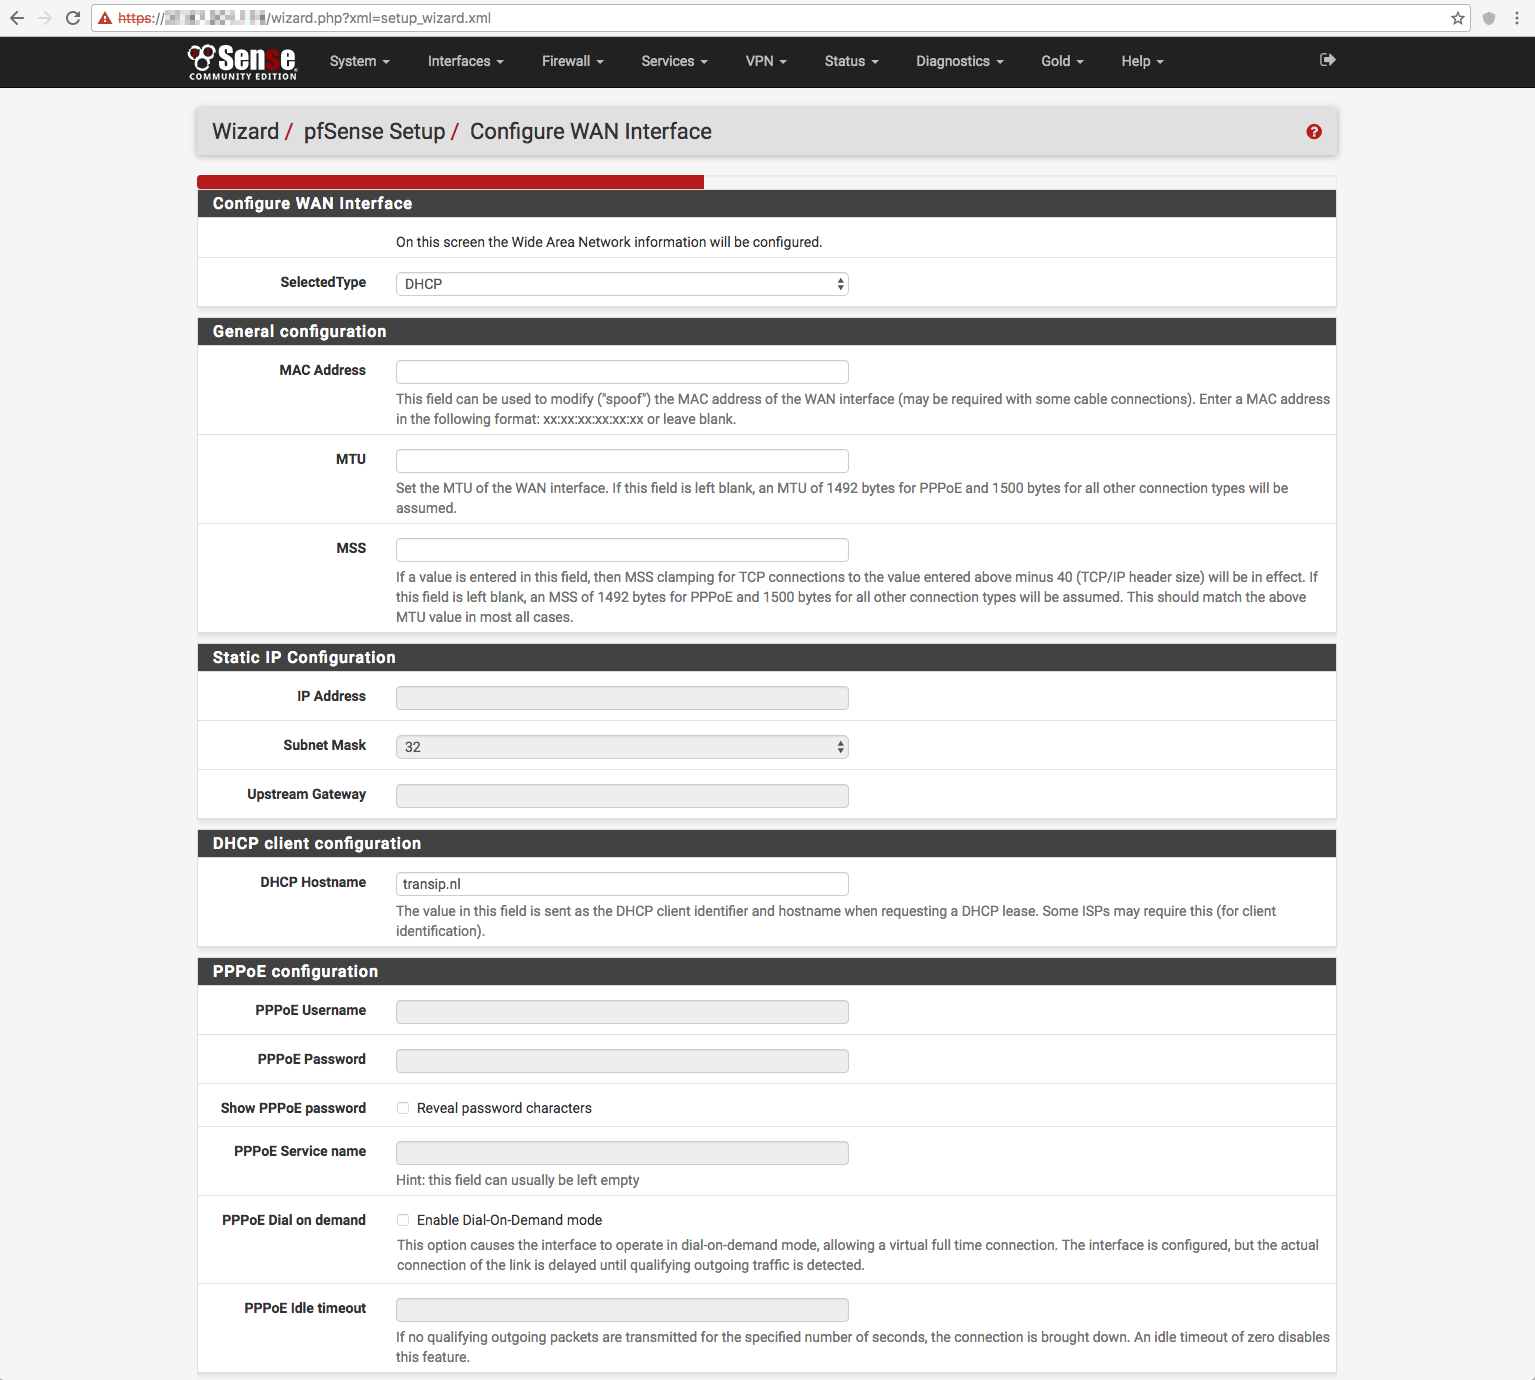
Configure WAN Interface
- SelectedType: DHCP.
General Configuration
- MAC Address: leave empty.
- MTU: leave empty.
- MSS: leave empty.
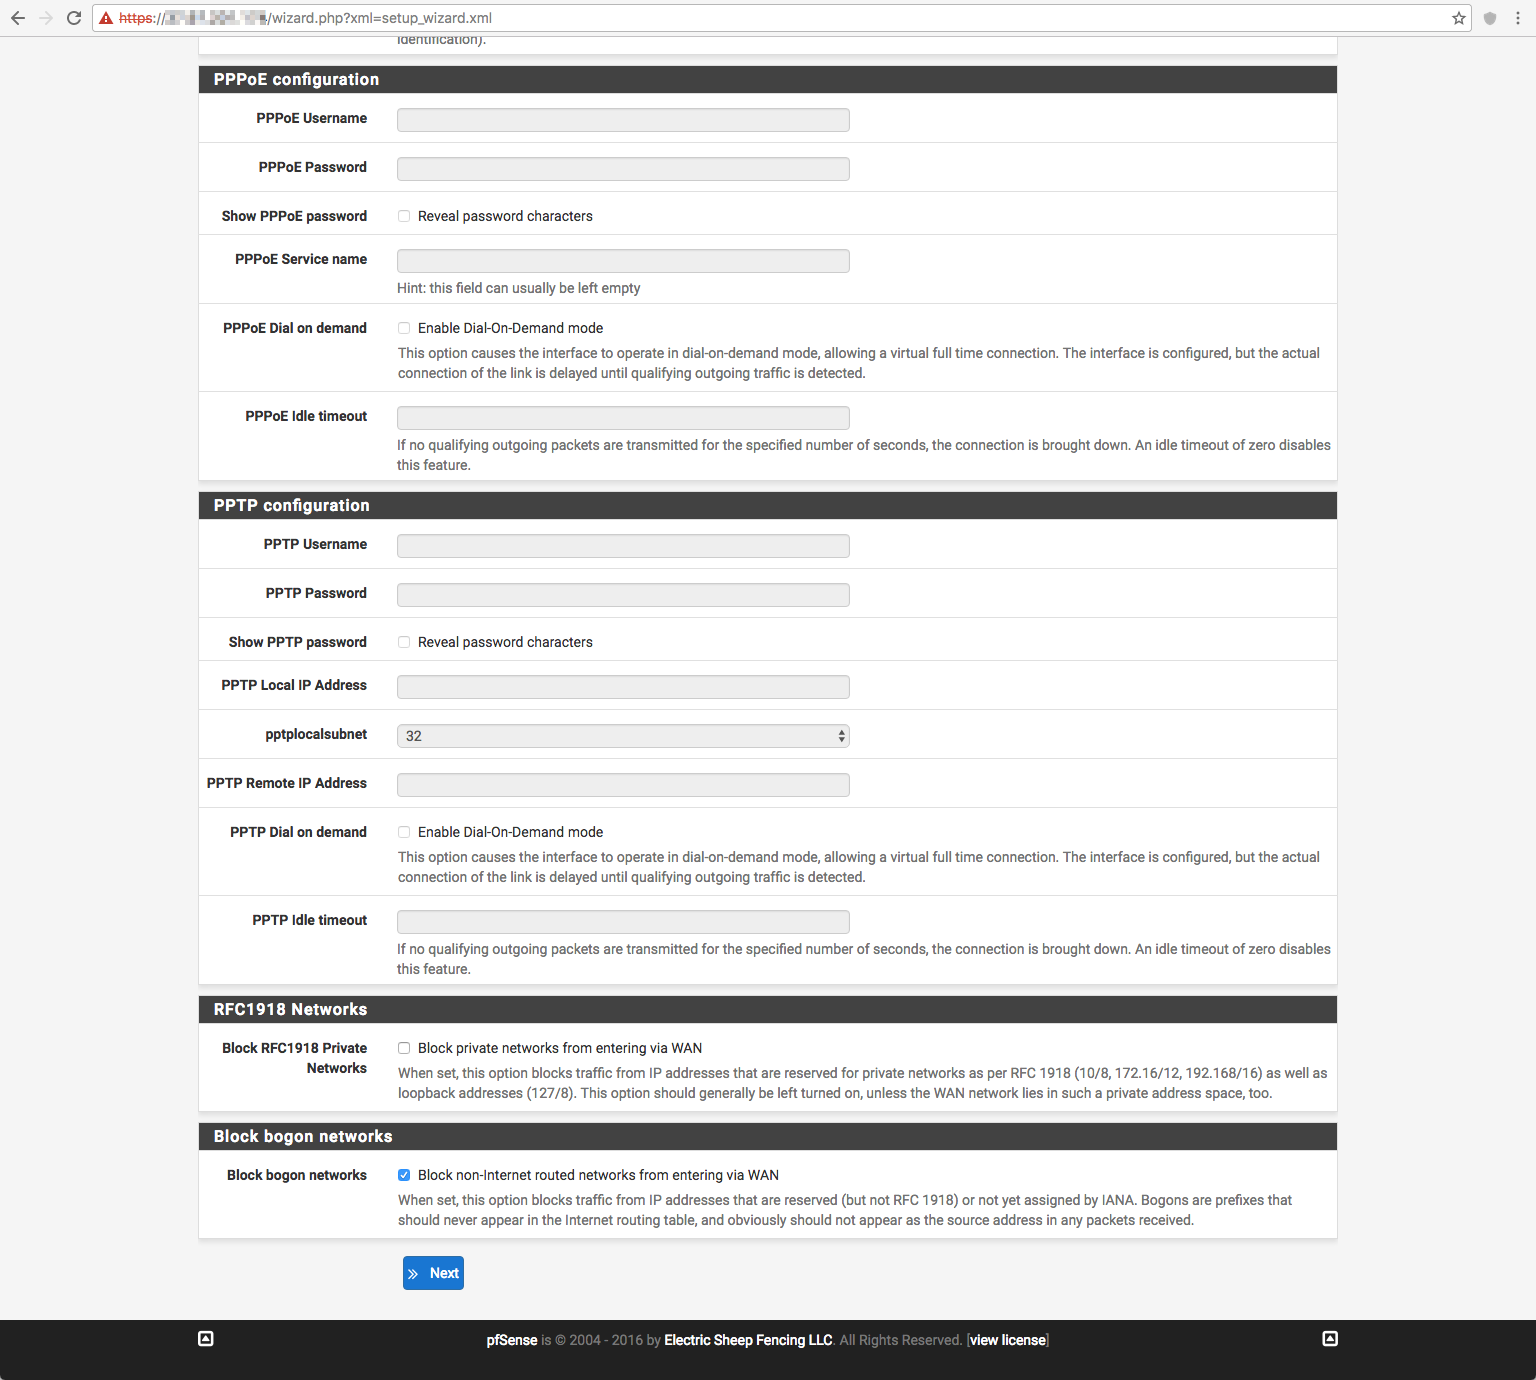
DHCP Client Configuration
Type the same domain name as you did at "General Information".
Set Admin WebGUI Password
Make sure to enter a strong password to access the pfSense web GUI.
Click "Click here to continue on to pfSense webConfigurator" to configure pfSense.
Slow Connectivity
If, for some reason, you experience slow connectivity to your pfSense when downloading, go into System > Advanced > Networking, and disable the following features:
- Hardware Checksum Offloading
- Hardware TCP Segmentation Offloading
See https://docs.netgate.com/pfsense/en/latest/virtualization/virtio-driver-support.html for more information.
No comments yet.