
Video Scene Transition Detection and Split Video Using PySceneDetect

Introduction
Video transition detection also known as scene cut detection is an important video processing task that aims at finding interjoined scenes to identify visual content. It's a fundamental step for video post-production tasks that may involve the addition of newer scenes to visual content. For example, the best duration to insert advertisements into a video streaming service is between the video scene transitions to reduce the prediction of visual changes. Additionally, a content-based video retrieval process requires efficient access to a huge amount of video frame archives which is solved by selecting a representative picture from each scene.
This article explains how to perform video scene transition detection and split video sections using PySceneDetect on a Vultr Cloud GPU server. You will import a sample video, detect transitions, and identify all scenes for advanced usage in a Jupyter Notebook session.
Prerequisites
- Deploy a Ubuntu 22.04 A100 Vultr Cloud GPU server.
- Access the server using SSH as a non-root user with sudo privileges
- Update the server
- Install JupyterLab and PyTorch.
Set Up the Server
To start video scene transition detection processes on the server, install the necessary dependency packages, and download a sample video to use as the input file for classification purposes. Follow the steps below to install packages using the Python PIP package manager and download a sample Google Chromecast video on your server.
Switch to your user home directory.
console$ cd
Install all required packages using Pip.
console$ pip install scenedetect opencv-python matplotlib ipywidgets
The above command installs the necessary detection libraries including
scenedetect,opencv-python, andmatplotlibwith the following functionalities:scenedetect: Detects scene changes and cuts by analyzing the input video.opencv-python: Enables a wide range of image processing functionalities.matplotlib: Creates static or interactive visualizations.ipywidgets: Enables interactive HTML widgets for Jupyter Notebooks using IPython kernel.
Download a sample video to use as the input file. Replace the Google Chromecast video link with your desired file URL and save it as
video.mp4.console$ wget http://commondatastorage.googleapis.com/gtv-videos-bucket/sample/ForBiggerFun.mp4 -O video.mp4
Copy the input video file to the
/home/jupyter/directory.console$ sudo cp video.mp4 /home/jupyter/
Detect video scene transition
Click Notebook within the JupyterLab interface and create a new
Python3Kernel file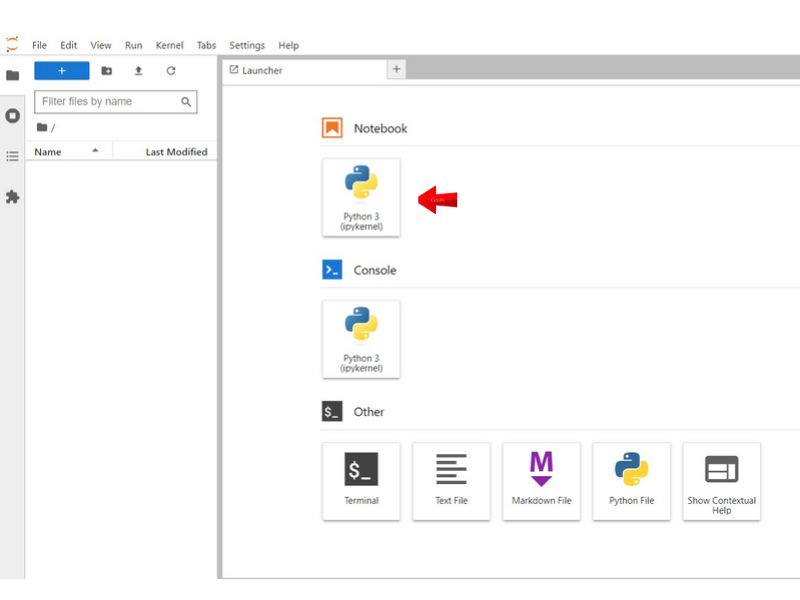
In the new notebook code cell, import the required dependency libraries.
pythonfrom scenedetect import detect, AdaptiveDetector from PIL import Image import matplotlib.pyplot as plt import cv2 import math import os
Press Shift + Enter to run the code cell and import the libraries in your session.
Define a new
video_local_pathvariable with your input video file location as the value.pythonvideo_local_path = "/home/jupyter/video.mp4"
Start a video scene transition detection function.
pythoncontent_list = detect(video_local_path, AdaptiveDetector())
The above command starts a new scene detection function using the Adaptive Content Detector package. Other supported detectors include:
- Content-aware Detector: Checks the difference between each adjacent frame, and creates a scene break when the threshold value is exceeded.
- Adaptive Content Detector: Performs similar checks as the content-aware detector, but instead of using a fixed threshold, it uses an adaptive threshold based on the rolling average of adjacent frame changes. This improves the detection performance mostly for fast motion.
- Threshold Detector: Compares the intensity/brightness of adjacent frames by averaging the R, G, and B values for every pixel in a frame. It's good at detecting fade-in and fade-out events.
Extract the First Video Scene Representative Frame
Get the frame in the middle of the first detected timeline scene. There are two elements for each scene indicating the start, end timestamp, and frame number. Run the following code to view the frame index of the image in the middle of the first scene.
pythonframe_num = (content_list[0][1] - content_list[0][0]).frame_num first_scene_frame_index = frame_num // 2 + content_list[0][0].frame_num
Create the video processing instance using the OpenCV
VideoCaptureclass to seek and extract frames using the specified frame index.pythonvideo = cv2.VideoCapture(video_local_path)
Get the
first_scene_framevalue based on the calculated frame_index.pythonvideo.set(cv2.CAP_PROP_POS_FRAMES, first_scene_frame_index) _, first_scene_frame = video.read()
Display and view the extracted frame.
pythonplt.imshow(first_scene_frame)
Based on the input video, the first video frame displays in your output with a monochrome standard.
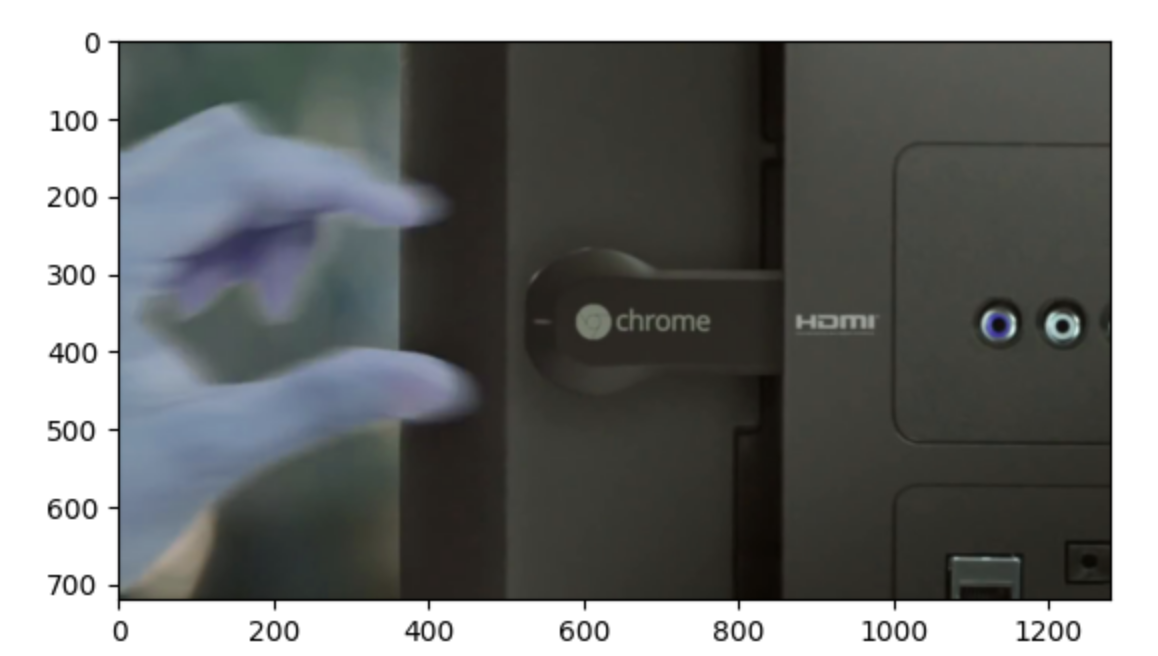 .
.The
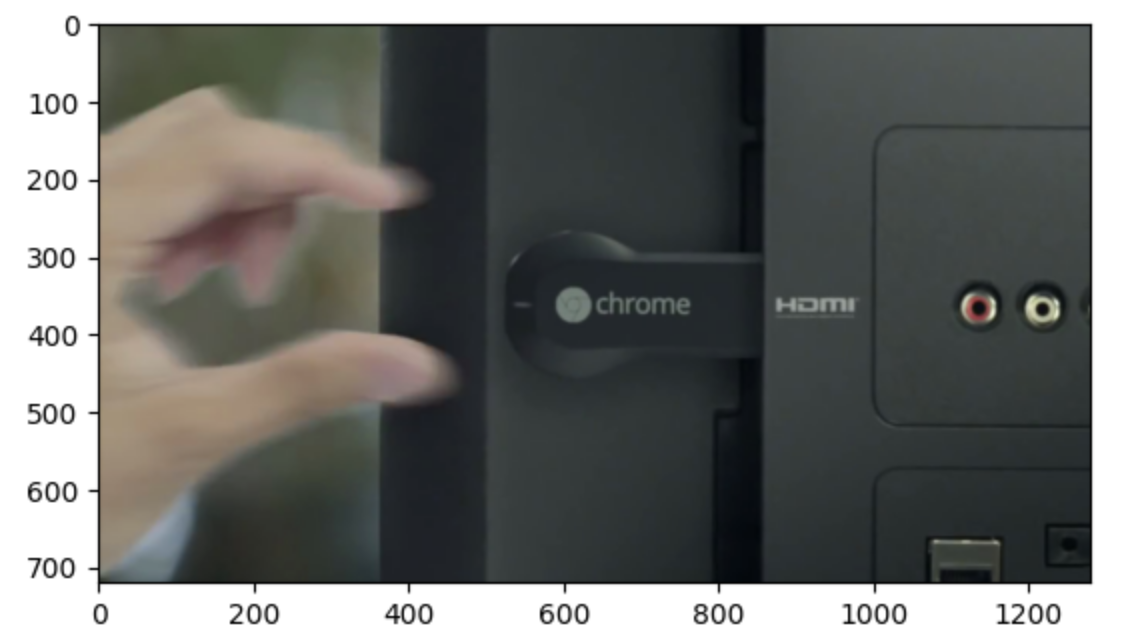
openCVpackage uses a BGR order when processing images whilematplotliband most other tools use RGB order. As a result, to view the image in color mode, you should convert BGR to RGB.Convert BGR to RGB and view the frame image again.
pythonfirst_scene_frame = Image.fromarray(cv2.cvtColor(first_scene_frame, cv2.COLOR_BGR2RGB)) plt.imshow(first_scene_frame)
A well-aligned and colored image is displayed similar to the original input video.
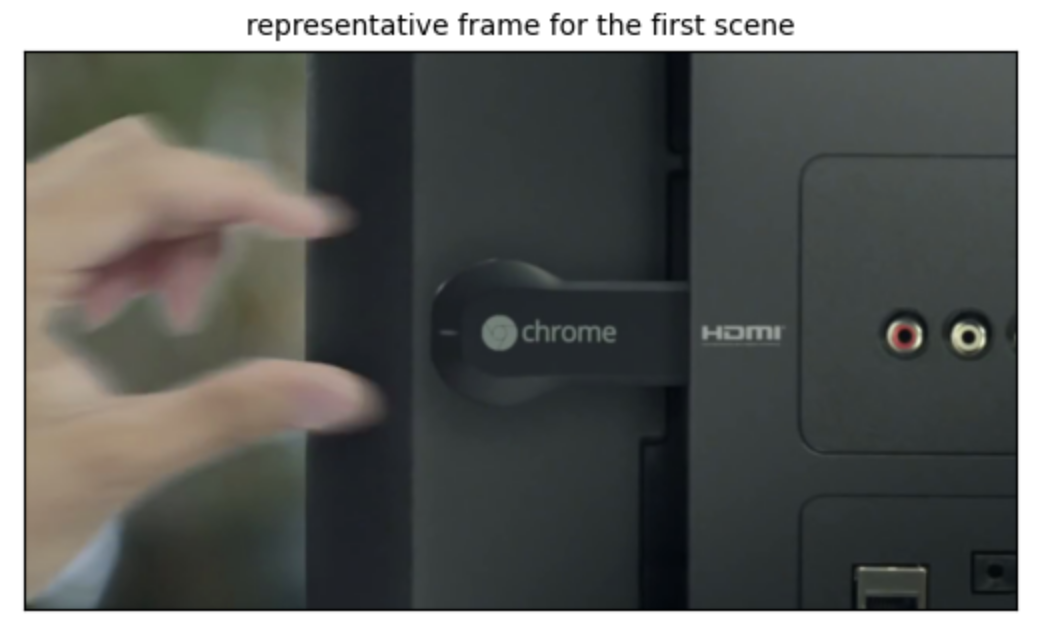
Remove the
x and yalignment ticks, then add the title for the image display. Replacerepresentative frame for the first scenewith your desired output image title, andfontsize=10with the text size to display.pythonplt.imshow(first_scene_frame) plt.title("representative frame for the first scene", fontsize=10) plt.xticks([]) plt.yticks([])
The new output image includes a representative title and closely matches the first detected scene.
Extract the Representative Frame for all Video Scenes
Follow the steps below to merge all functions and visualize the representative images for all the detected scenes. Then, export the generated images to a data directory for additional usage or modification tasks.
Define a new function to get the representative frame for each scene.
pythondef get_frame(scene): frame_id = (scene[1] - scene[0]).frame_num // 2 + scene[0].frame_num video.set(cv2.CAP_PROP_POS_FRAMES, frame_id) _, frame = video.read() return Image.fromarray(cv2.cvtColor(frame, cv2.COLOR_BGR2RGB))
Define the number of rows and columns to use for visualization.
pythonframe_display_per_row = 5 frame_display_rows = math.ceil(len(content_list) / frame_display_per_row)
Create an empty array to store the representative images for each scene.
pythonframes = []
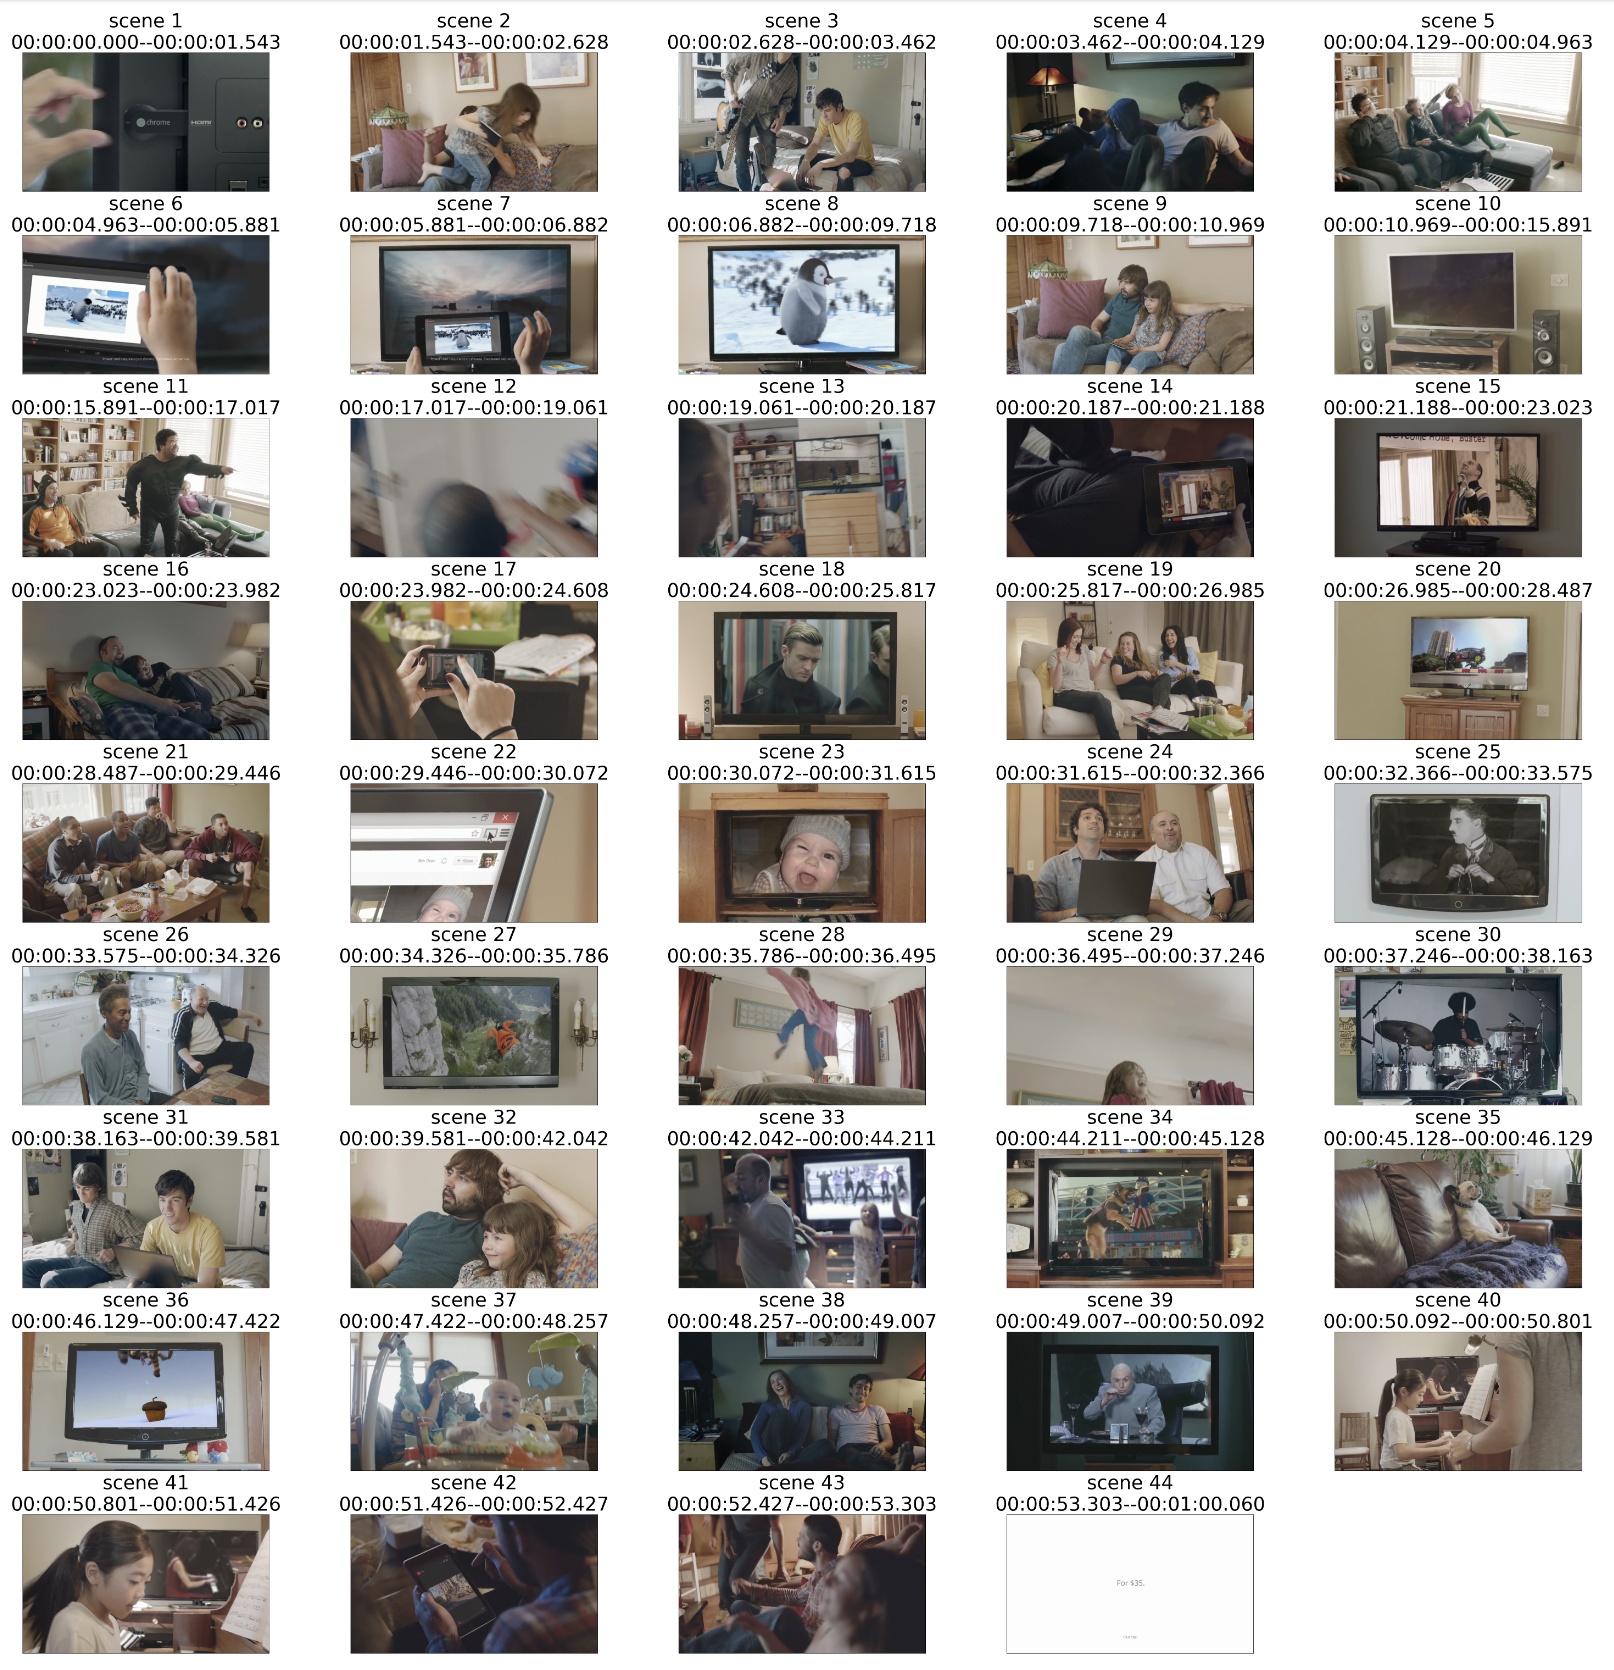
Visualize the representative frames of each scene by iterating the detected scene list, then merge the code implementations. Replace
scenewith your desired frame title text.pythonplt.figure(figsize=(60, 60)) for i, scene in enumerate(content_list): frame = get_frame(scene) frames.append(frame) plt.subplot(frame_display_rows, frame_display_per_row, i+1) plt.imshow(frame) plt.title(f"scene {i+1}\n{scene[0].get_timecode()}--{scene[1].get_timecode()}", fontsize=50) plt.xticks([]) plt.yticks([]) plt.tight_layout()
Based on the input video, all the representative images for detected video scenes display with a custom title in your notebook session.
Define a new function to save the generated images to the directory on your server. Replace
frameswith your desired data directory to auto-create in the Jupyter user home directory.pythonsave_folder = "frames" os.makedirs(save_folder, exist_ok=True)
Save all generated scene images to the target directory.
pythonfor i, frame in enumerate(frames): frame.save(f"{save_folder}/scene{i+1}.jpg")
Potential Downstreaming Tasks
You can perform multiple downstreaming tasks from detected scenes using functions such as:
Video frame indexing and searching: Locates specific frames inside a video by taking keywords or queries/questions in a natural language. For example, a query input such asshow me all films where there's a scene for people watching TVtraditionally requires the slicing and storage of all video frames in a database. However, this is inefficient when working with multiple videos with a long video length. The scene detection and cut function could store, and process only the representative frames which reduces the searching space. Based on the example in this article, the total number of frames can reduce from1440to44indicating a97%reduction in the processing time.Objectionable video frame detection: Checks if a newly uploaded video contains objectionable scenes that are suitable for some audiences. Similarly, it's inefficient to check all the frames from all the videos on a large scale and scene detection could significantly improve its efficiency.Best places to insert ads: Finds the video transition durations for advertisement slots so that viewer experiences are less interrupted. This task explicitly requires scene detection as a dependency.
Conclusion
You have created a video scene transition detection pipeline on a Vultr Cloud GPU server. It consists of multiple steps that include an input video file, conducting the scene transition detection, visualizing the representative frames of each scene, and the storage of frames for further downstreaming tasks. For more detector methods and parameters, visit the scenedetect CLI documentation.