How to Install CouchBase Database on Ubuntu 22.04
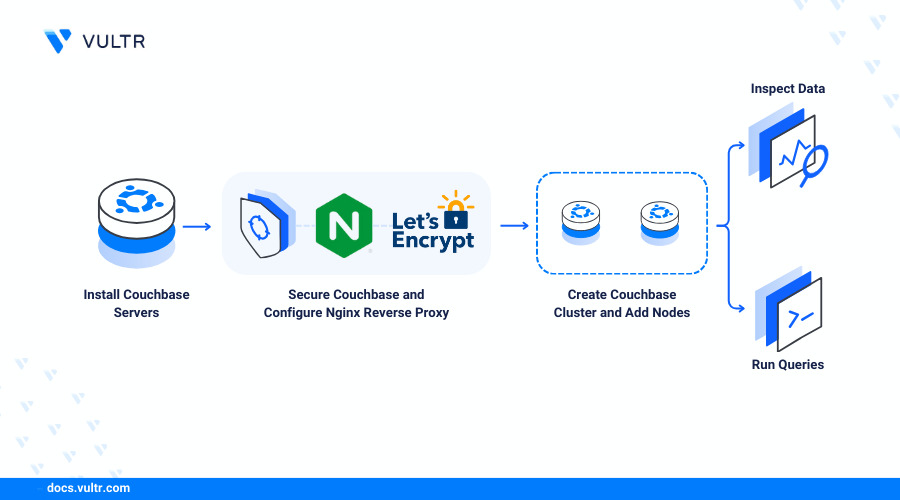
Couchbase is a distributed NoSQL database management designed to deliver high performance, scalability, and flexibility while managing large volumes of data. It combines key-value and document-oriented database functionalities to optimize the storage and retrieval of unstructured data. The Couchbase memory-first architecture focuses on in-memory storage over server storage to improve the response rate for production applications.
This article explains how to deploy a Couchbase database cluster on Ubuntu 22.04. You will use a VPC network to internalize all cluster communications and securely integrate all nodes to form a high-performance cluster.
Prerequisites
Before you begin, you need to:
- Deploy a Ubuntu 22.04 server instance as a non-root user with sudo privileges, with at least
4GBRAM, to use as the Couchbase server. - Deploy at least two Ubuntu 22.04 instances as non-root users with sudo privileges, with at least
4GBRAM each, to use as Couchbase nodes in the same Vultr location as the Couchbase server. - Attach all servers to the same VPC network to form an internal Couchbase cluster.
- Set up a new domain A record pointing to the main Couchbase server IP address. For example,
couchbase.example.com.
Install Couchbase
This section installs Couchbase Server on your main Couchbase server and verifies that it's running before you repeat the same process on each additional node.
Access the main Couchbase server using SSH as a non-root user with sudo privileges. Replace
linuxuserwith your actual sudo user account.CONSOLEReplace
SERVER-IPwith the public IP address of the server.Download the latest Couchbase APT repository configuration package.
CONSOLEInstall the package to add the Couchbase repository information on your server.
CONSOLEUpdate the server repository index to synchronize the Couchbase information.
CONSOLEInstall the latest Couchbase server community package on your server.
CONSOLEView the Couchbase server status and verify that it's actively running on your server.
CONSOLEOutput:
View the server IP information and verify the VPC network interface address.
CONSOLEYour output should be similar to the one below:
Allow all network connections through the VPC network using the default Uncomplicated Firewall (UFW).
CONSOLENote
Repeat the above Couchbase installation process on all servers to form a cluster in your VPC network.
Configure Nginx as a Reverse Proxy to Access the Cluster
All Couchbase servers in the VPC network communicate with each other using private network addresses. Configure Nginx on the main Couchbase server to work as a reverse proxy to securely access all servers without exposing the backend application ports to the Internet. Follow the steps below to install and configure Nginx as a reverse proxy to forward connections to the internal Couchbase cluster nodes.
Install Nginx on the main Couchbase server.
CONSOLEDisable the default Nginx virtual host configuration.
CONSOLECreate a new Nginx virtual host configuration using a text editor such as Nano.
CONSOLEAdd the following configurations to the file.
NGINXSave and close the file.
The above Nginx configuration forwards all external HTTP port
80requests to the main Couchbase server interface port8091. In addition, thenode1andnode2paths redirect to the respective Couchbase servers in your VPC network using private network addresses. The above configuration secures all Couchbase external and internal communications by forwarding all connection requests using different access methods.Test the Nginx configuration for errors.
CONSOLERestart Nginx to apply the configuration changes.
CONSOLEAllow the HTTP port
80through UFW to enable connection requests on your server.CONSOLEReload UFW to apply the new firewall configuration.
CONSOLE
Create a Couchbase Cluster
With Couchbase installed on all servers, initialize the main server as a new cluster using its web administration interface.
Access your main Couchbase server domain using a web browser such as Chrome.
Verify that the Couchbase server interface displays in your web browser. Click Setup New Cluster to configure the new Couchbase cluster.
Enter your Couchbase cluster name, administrator username, and a strong password in the respective fields to secure the server.
Click Next: Accept Terms to apply your new administrative user details.
Click the
I accept the terms & conditionscheckbox to accept the Couchbase terms of service and click Finish with Defaults to finish the configuration process.
Add Couchbase Nodes to the Cluster
After creating the cluster, join each additional Couchbase server to it through the Nginx reverse proxy paths configured earlier.
Access your Couchbase cluster nodes using your domain and the path you specified in the Nginx configuration based on the server's internal VPC address. For example, access your node-1 Couchbase server.
Verify that the Couchbase setup interface displays in your web browser and click Join Existing Cluster to set up a connection to the main Couchbase server.
Enter your main Couchbase server VPC address in the Cluster Host Name/IP Address field.
Enter the administrator username and password you created on your main Couchbase server.
Click Join Cluster to join the main Couchbase server cluster.
When the Couchbase cluster connection is successful, verify that the Couchbase interface displays in your web browser.
Click Servers on the left navigation bar to access the Couchbase cluster.
Click the Rebalance button in the top right corner to finish your node configuration process.
Wait for the rebalancing process to complete and verify that a new
Rebalance Completed Successfullynotification displays in your Couchbase dashboard.You have connected the Couchbase node to your cluster. The main Couchbase server actively maintains the cluster and communicates with all nodes in the VPC network.
Note
Repeat the above process on all servers in your VPC network to join the Couchbase cluster.
Load a Sample Dataset
The Couchbase server contains 3 sample datasets you can experiment with to use the database cluster. Follow the steps below to load a sample dataset that stores travel data such as hotels and airports.
Access your main Couchbase database server interface.
Click Buckets on the left navigation menu.
Click sample bucket link within the
ADD BUCKETnotification message.Select any of the
3datasets to apply to your database server. For example, check the travel-sample option to use the travel dataset.Click Load Sample Data to add the sample data on your Couchbase server.
Inspect Data
After loading the sample dataset, inspect its buckets, scopes, and collections to understand how Couchbase organizes the data.
Click Buckets on the main navigation menu.
Verify that the new bucket with sample data is available. Then, click Documents next to the
travel-samplebucket.Verify the retrieved documents in the
travel-samplebucket.Click Buckets on the left navigation menu and select
travel-sampleto view additional information about the bucket.Verify the bucket information including the number of replicas, bucket RAM, server nodes, and cluster RAM.
Click Scopes & Collections next to Documents to view a list of scopes in the bucket.
Click to expand the inventory scope and view all available collections.
Verify the scope information including the number of documents in each collection and data such as memory and disk usage.
Execute Queries
Couchbase supports the N1QL query language to retrieve documents using SQL-like syntax. Run a sample query against the loaded travel dataset.
Click Query on the left navigation menu and enter the following query in the Query Editor field.
SQLThe above query retrieves hotels located in Paris with free parking. Within the query:
SELECT name: Specifies that thenameattribute is queried from the dataset.FROM `travel-sample`.inventory.hotel: Configures the query to retrieve documents from thetravel-samplebucket, theinventoryscope, and thehotelcollection.WHERE type = "hotel" AND city = "Paris" AND free_parking = true: Defines the conditions that each document must meet for inclusion in the query results. The document must have thetypeattribute set tohotel,cityset toParisandfree_parkingset to true.LIMIT 5: Specifies that a maximum of 5 query results are displayed.
Click Execute to run the query.
Verify the query results displayed in a JSON format. The
Resultsfield includes5hotel names that match the specified conditions.
Monitoring
Couchbase provides a built-in dashboard to monitor cluster performance and resource usage in real time.
Click Dashboard on the left navigation menu.
Verify the Cluster Overview information to monitor statistics about active database processes on the server.
Expand the Node Resources dropdown to view additional information about the server CPU, request rate, and memory usage statistics.
Click the
Choose Dashboarddropdown to create a new custom monitoring dashboard.Click new dashboard and enter a name for your dashboard. Then, click Save to create the new monitoring dashboard.
Click Add a Chart to set up a new monitoring chart.
Select combine node data + multiple stats per chart to set up a chart with multiple statistics.
Select multiple charts from the tabbed list of options. For example, select
Available RAMandSwap Used. Then, click the Query tab to enableQuery Execution TimeandQueries > 500ms(queries that take longer than 500 ms to execute).Click Save Chart to apply the new chart configurations.
Expand the Cluster Overview group and verify that your charts are active. For example, the charts display data, such as the time it takes for queries to execute on the server.
Conclusion
You have deployed a Couchbase cluster with multiple nodes in a VPC network. The main Couchbase server securely manages all nodes to perform basic database operations such as loading datasets, data inspection, query execution, bucket creation, scopes, collections, and documents within the cluster. For more information about Couchbase server clusters, visit the official documentation.


0 Comments
Be the first to comment and share your perspective with the community.