How to Install OpenLiteSpeed Webserver on FreeBSD 14.0
Introduction
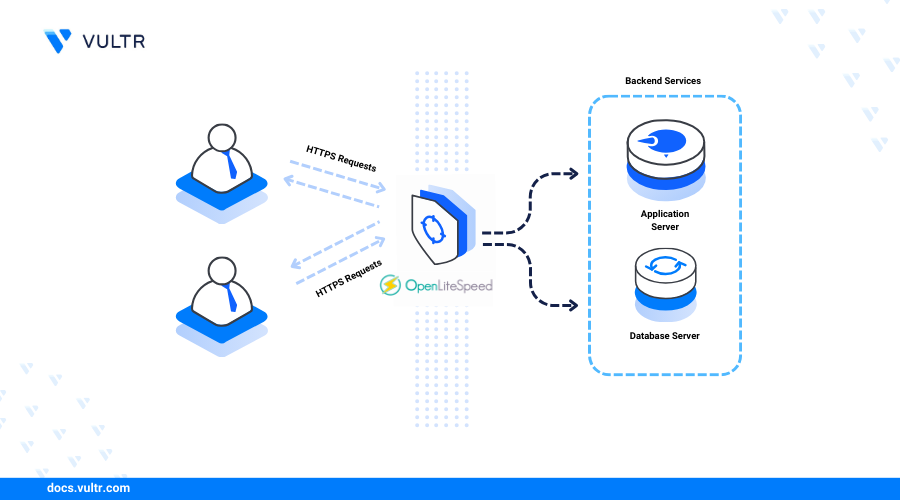
Install OpenLiteSpeed on FreeBSD 14 to leverage a high-performance, open-source webserver designed for low resource consumption. OpenLiteSpeed features an event-driven architecture, built-in caching, and a user-friendly web-based administration interface. It supports modern web technologies, including HTTP/2, HTTP/3, QUIC, and Brotli compression, making it an efficient and powerful solution for hosting dynamic web applications.
This article explains how to install OpenLiteSpeed on FreeBSD 14 and configure the webserver to serve web applications using virtual host configurations.
Build and Install OpenLiteSpeed on FreeBSD 14 From Source
OpenLiteSpeed is not available in the default package repositories and ports collection on FreeBSD. Follow the steps below to build and install OpenLiteSpeed on a FreeBSD server from source.
Update the server's package index.
CONSOLEInstall all required dependencies for building OpenLiteSpeed.
CONSOLE
Build and Install the YAJL Dynamic Library
Yet Another JSON Library (YAJL) is a lightweight, and highly portable JSON parsing and generation library written in C. OpenLiteSpeed requires YAJL to install and run dynamic libraries. Follow the steps below to build and install the YAJL dynamic library.
Create the
/usr/local/srcdirectory to store your project files.CONSOLESwitch to the
/usr/local/srcdirectory.CONSOLEClone the YAJL repository using Git.
CONSOLESwitch to the cloned
yajldirectory.CONSOLECheckout to the latest YAJL stable release using Git. For example,
2.1.0.CONSOLECreate a new
builddirectory.CONSOLESwitch to the
builddirectory.CONSOLERun the following
cmakecommand to build YAJL as a dynamic library.CONSOLEUse the
make installcommand to install the YAJL library.CONSOLEList all files in the
/usr/local/lib/libyajl.*directory to verify that YAJL is installed.CONSOLEUpdate the system's dynamic linker cache to read shared libraries in the
/usr/local/libdirectory.CONSOLECreate a
LDFLAGSenvironment variable to enable OpenLiteSpeed to access all required libraries.CONSOLECreate a
CPPFLAGSenvironment variable to enable thegcccompiler to access dependency libraries.CONSOLE
If you are using Debian 12, you can follow this guide to install OpenLiteSpeed on Debian 12 and set up a high-performance, lightweight webserver with support for modern web technologies.
Build and Install OpenLiteSpeed
Follow the steps below to build and install OpenLiteSpeed on FreeBSD after setting up all necessary libraries including YAJL on the server.
Switch to the
/usr/local/srcdirectory.CONSOLEClone the OpenLiteSpeed repository.
CONSOLESwitch to the
openlitespeeddirectory.CONSOLECheckout to the latest stable release. For example,
1.8.2.CONSOLEUpdate all submodules using Git.
CONSOLEOpen the
/usr/local/src/openlitespeed/src/extensions/cgi/lscgid.cppfile using a text editor such asnano.CONSOLEAdd the following
#define LS_NS_LEN 5preprocessor directive after the***comments in the file.CPPSave and close the file.
The above
#define LS_NS_LEN 5preprocessor directive enables the CGI module namespace used for unique process identification tasks. Ensure that the directive includes the#symbol to work correctly on your server. Setting the directive's value to5enables compatibility with other system processes and prevents namespace collisions.Use the
ldconfigcommand to apply the configuration changes.CONSOLERun the
build.shscript to build OpenLiteSpeed.CONSOLEWait for at least 15 minutes for the build process to complete.
Run the
install.shscript to install OpenLiteSpeed.CONSOLEWhen the installation is successful, note the default administrator password in your output similar to the one below.
Reboot the server to apply all OpenLiteSpeed changes.
CONSOLEStart the OpenLiteSpeed webserver.
CONSOLEOutput:
Access port
8088using your server's IP address in a web browser such as Chrome and verify that the default OpenLiteSpeed page displays.Stop the OpenLiteSpeed webserver to set it up as a system service.
CONSOLE
If you are using Ubuntu Server, install OpenLiteSpeed on Ubuntu 24.04 to configure a lightweight, high-performance webserver with support for HTTP/3 and built-in caching.
Set Up OpenLiteSpeed as a System Service
Follow the steps below to set up the OpenLiteSpeed webserver as a system service to automatically start on the server.
Create a new
/usr/local/etc/rc.d/openlitespeedfile.CONSOLEAdd the following configurations to the file.
SHSave and close the file.
Enable
executepermissions on the script.CONSOLEOpen the
/etc/rc.conffile.CONSOLEAdd the following directive to the
rc.conffile to enable the OpenLiteSpeed service to automatically start at boot.INIStart the OpenLiteSpeed system service.
CONSOLEView the OpenLiteSpeed service status and verify that it's running.
CONSOLE
Secure the OpenLiteSpeed Webserver
OpenLiteSpeed generates a default administrator password during installation and serves the web administration interface on port 7080 using HTTP. Follow the steps below to reset the default administrator password, generated trusted SSL certificates using a domain and configure the packet filter (pf) firewall to secure connections to the OpenLiteSpeed webserver.
Run the
admpass.shscript to reset the OpenLiteSpeed administrator password.CONSOLEEnter a new administrator username or press Enter to use the default
adminusername.Enter a strong administrator password when prompted.
Output:
Search the
pkgrepository to verify the available Certbot Let's Encrypt client package version.CONSOLEOutput:
Install Certbot depending on the available version.
CONSOLEUse Certbot to generate a new Let's Encrypt SSL certificate using your virtual host domain. Replace
app.example.comwith your actual domain andadmin@example.comwith your active email address.CONSOLEOpen the
/etc/rc.conffile.CONSOLEAdd the following directives at the end of the
/etc/rc.conffile.INISave and close the file.
The above configuration enables the packet filter firewall to automatically start at boot with the following options:
pf_enable="YES": Enables the packet filter firewall.pf_rules="/etc/pf.conf": Sets/etc/pf.confas the active firewall configuration.pflog_enable="YES": Enables firewall logging.
View all network interfaces and note the main interface name to use in the firewall configuration.
CONSOLEOutput:
vtnet0is the public network interface name with the IP address192.0.2.100based on the above output.Create the
/etc/pf.conffirewall configuration file.CONSOLEAdd the following configurations to the
/etc/pf.conffile.INISave and close the file.
The above firewall configuration enables network connections to the following ports on the server:
22: SSH connections port.80: HTTP port.443: HTTPS port.8088: The default OpenLiteSpeed virtual host port.7080: The OpenLiteSpeed web administration port.
Test the
/etc/pf.conffile for configuration errors.CONSOLEStart the packet filter firewall.
CONSOLEThe above command may temporarily block your active SSH connection. Ensure to reconnect to the server when the firewall starts.
View the firewall status and verify that it's active.
CONSOLEOutput:
Create a Virtual Host Configuration
A virtual host configuration enables OpenLiteSpeed to serve web applications and services using a specific domain or address on your server. Follow the steps below to create a new OpenLiteSpeed virtual host configuration using your domain and serve a custom HTML web application on the server.
Navigate to the OpenLiteSpeed virtual host configurations directory.
CONSOLECreate a new
app.example.comvirtual host directory.CONSOLECreate a new
htmlsubdirectory in theapp.example.comdirectory to store the web application files.CONSOLEGrant the
lsadmOpenLiteSpeed user ownership privileges to the directory.CONSOLESwitch to the
app.example.com/htmldirectory.CONSOLERun the following command to create a new
index.htmlweb application file to display aGreetings from Vultrmessage.CONSOLE
Set Up the Virtual Host Information in the OpenLiteSpeed Web Administration Dashboard
Follow the steps below to set up the virtual host information using the OpenLiteSpeed web administration dashboard.
Access port
7080using your server's IP address to log in to the OpenLiteSpeed web administration dashboard.Enter the OpenLiteSpeed administrator credentials you created earlier to log in.
Click Virtual Hosts in the OpenLiteSpeed dashboard.
Click + within the Virtual Host List section to set up a new virtual host.
Add the following virtual host information to the respective fields.
- Virtual Host Name:
app.example.com - Virtual Host Root:
$SERVER_ROOT/conf/vhosts/app.example.com/ - Config File:
conf/vhosts/app.example.com/vhconf.conf - Follow Symbolic Link:
Yes - Enable Scripts/ExtApps:
Yes - Restrained:
Yes - External App Set UID Mode:
Server UID
- Virtual Host Name:
Click Save and click the CLICK TO CREATE option when prompted to create the virtual host configuration.
Click Save to apply the virtual host configuration changes.
Click the virtual host to open its management page.
Navigate to the General tab and modify the virtual host configuration with the following information.
- Document Root:
$VH_ROOT/html/ - Domain Name:
app.example.com - Domain Aliases:
app.example.com - Enable GZIP Compression:
Yes - Enable Brotli Compression:
Yes
- Document Root:
Click Save to apply the virtual host changes.
Click Listeners on the main navigation menu.
Click + to set up a new listener with the following details:
- Listener Name:
app.example.com - IP Address:
Any IPv4 - Port:
80 - Secure:
No
- Listener Name:
Click Save to apply the listener configuration.
Scroll to the Virtual Host Mappings section and click + to create a new configuration map.
Enter the following details to map the listener to a virtual host configuration.
- Virtual Host:
app.example.com - Domains:
app.example.com
- Virtual Host:
Click Save to apply the listener configuration.
Enable Secure HTTPS Connections
Follow the steps below to enable secure HTTPS connections to the virtual host using the Let's Encrypt SSL certificates you generated earlier.
Navigate to Listeners page and create a new listener with the following information:
- Listener Name:
app.example.com.https - IP Address:
ANYIPv4 - Port:
443 - Secure:
Yes
- Listener Name:
Navigate to the Virtual Host Mappings section and map your virtual host configuration with the following details:
- Virtual Host:
app.example.com - Domains:
app.example.com
- Virtual Host:
Click Save to apply the listener configuration.
Open the listener's configuration page and navigate to the SSL tab.
Enter the following Let's Encrypt SSL certificate paths to apply to your virtual host domain configuration.
- Private Key File:
/usr/local/etc/letsencrypt/live/app.example.com/privkey.pem - Certificate File:
/usr/local/etc/letsencrypt/live/app.example.com/fullchain.pem - Chained Certificate:
Yes
- Private Key File:
Click Save to apply the virtual host listener configuration changes.
Access your
app.example.comvirtual host domain in a new web browser window and verify that theGreetings from Vultrprompt displays.
Conclusion
You have installed OpenLiteSpeed on FreeBSD 14 from source code and enabled the webserver to automatically start at boot. You can create multiple virtual host configurations and listeners to deliver web applications on the server. For more webserver configuration options, please visit the OpenLiteSpeed documentation.


0 Comments
Be the first to comment and share your perspective with the community.