
How to Install OpenLiteSpeed Webserver on Rocky Linux 9

Introduction
OpenLiteSpeed is a free, open-source, and lightweight webserver developed by LiteSpeed Technologies. It's known for its high performance and low resource consumption, making it a popular choice for hosting web applications. OpenLiteSpeed is compatible with Apache configurations, supports multiple programming languages, and includes built-in security features and caching mechanisms.
This article explains how to install OpenLiteSpeed webserver on Rocky Linux 9 and create virtual hosts using the web administration console to deliver web applications.
Prerequisites
Before you begin:
- Deploy a Rocky Linux 9 instance on Vultr.
- Create a new domain A record pointing to the server IP address. For example,
app.example.com. - Access the server using SSH as a non-root user with sudo privileges.
- Update the server.
Install OpenLiteSpeed
The OpenLiteSpeed webserver package is not available in the default repositories on Rocky Linux 9. Follow the steps below to download the latest OpenLiteSpeed repository setup script to install the webserver using the DNF package manager.
Download the latest OpenLiteSpeed repository script.
console$ wget -O - https://repo.litespeed.sh | sudo bash
Install OpenLiteSpeed.
console$ sudo dnf install openlitespeed -y
View the installed OpenLiteSpeed version on your server.
console$ sudo /usr/local/lsws/bin/lshttpd -v
Output:
LiteSpeed/1.7.19 Open (BUILD built: Tue Apr 16 15:14:26 UTC 2024)
    module versions:
    lsquic 3.3.2
    modgzip 1.1
    cache 1.66
    mod_security 1.4 (with libmodsecurity v3.0.12)
    ```
Run the OpenLiteSpeed administrator password script to set up a new administrative user and password.
console$ sudo /usr/local/lsws/admin/misc/admpass.sh
Enter your desired username and password when prompted similar to the output below.
Please specify the user name of administrator.
This is the user name required to login the administration Web interface.

User name [admin]:

Please specify the administrator's password.
This is the password required to login the administration Web interface.

Password:
Retype password:
Administrator's username/password is updated successfully!
Disable the default
firewalldfirewall to temporarily enable Let's Encrypt validations and configure the webserver.console$ sudo systemctl stop firewalld
Access your server IP address using a web browser such as Chrome on port
8088to verify that the default OpenLiteSpeed virtual host web application displays.http://SERVER-IP:8088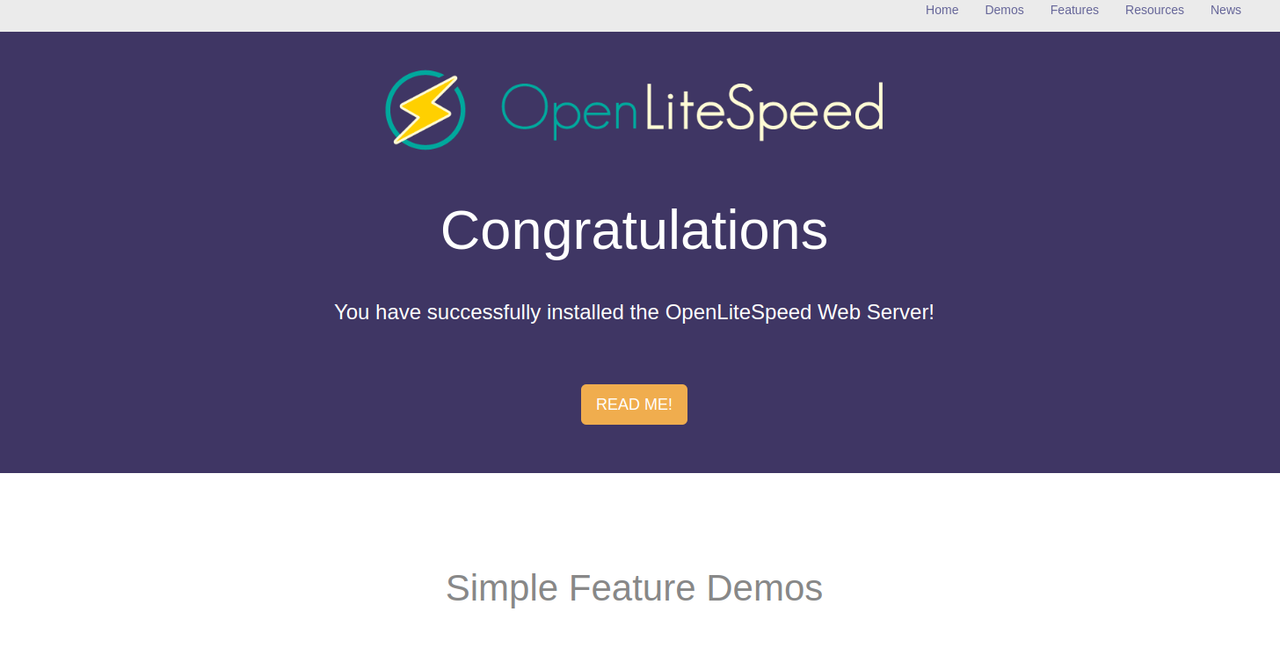
Manage the OpenLiteSpeed System Service
OpenLiteSpeed uses the lsws system service to manage the webserver processes using systemd. Follow the steps below to enable the OpenLiteSpeed service to start at boot time and manage the webserver processes.
Enable the OpenLiteSpeed service to automatically start at boot time.
console$ sudo systemctl enable lsws
Start the OpenLiteSpeed service.
console$ sudo systemctl start lsws
View the OpenLiteSpeed service status and verify that it's active.
console$ sudo systemctl status lsws
Output:
● lshttpd.service - OpenLiteSpeed HTTP Server
     Loaded: loaded (/usr/lib/systemd/system/lshttpd.service; enabled; preset: disabled)
     Active: active (running) since Thu 2024-06-27 09:53:53 UTC; 10min ago
   Main PID: 51515 (litespeed)
     CGroup: /system.slice/lshttpd.service
             ├─51515 "openlitespeed (lshttpd - main)"
             ├─51522 "openlitespeed (lscgid)"
             ├─51535 "openlitespeed (lshttpd - #01)"
             └─51536 "openlitespeed (lshttpd - #02)"

........ rockylinux systemd[1]: Starting OpenLiteSpeed HTTP Server...
Based on the above
active (running)message in the output, the OpenLiteSpeed service is active and running on your server.
Create a new OpenLiteSpeed Virtual Host
OpenLiteSpeed virtual hosts allow you to host multiple domains or subdomains to securely deliver web applications on your server. Follow the steps below to create a new OpenLiteSpeed virtual host for your domain app.example.com that serves an HTML web application and outputs the message Greetings from Vultr when accessed.
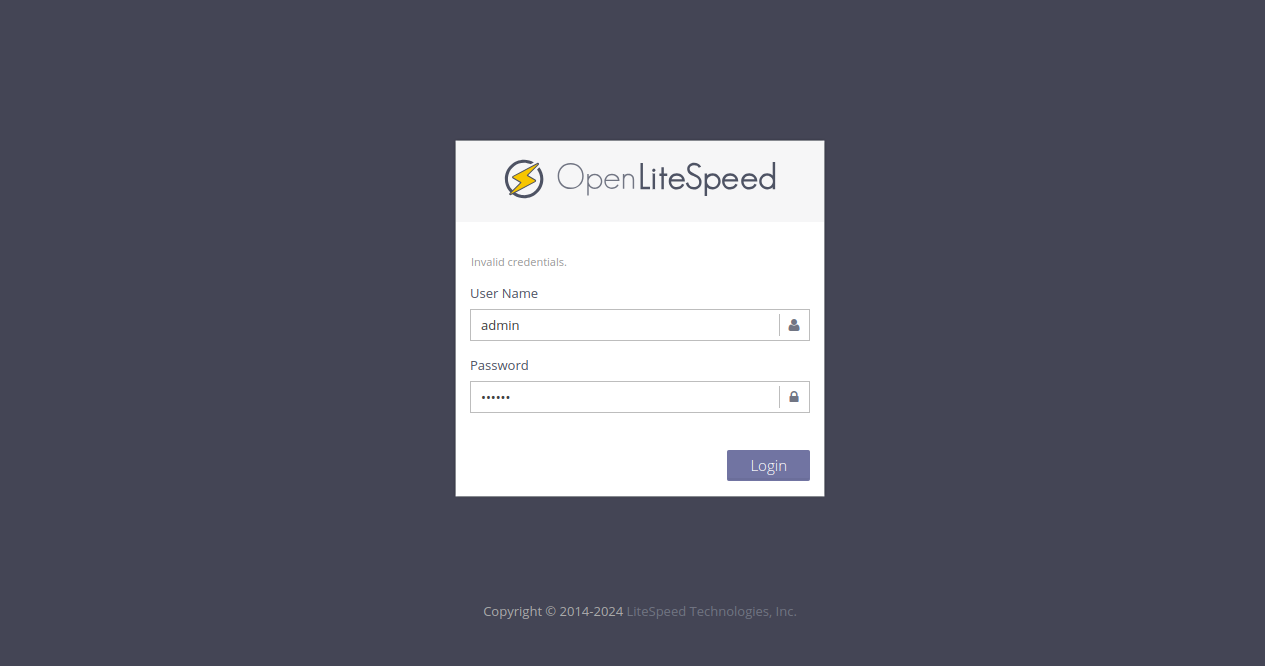
Access the OpenLiteSpeed web administration console using your server IP on the default port
7080in a new web browser window.http://SERVER-IP:7080Enter the administrative user and password you set earlier to access the WebAdmin console.
Click Virtual Hosts on the main navigation menu.
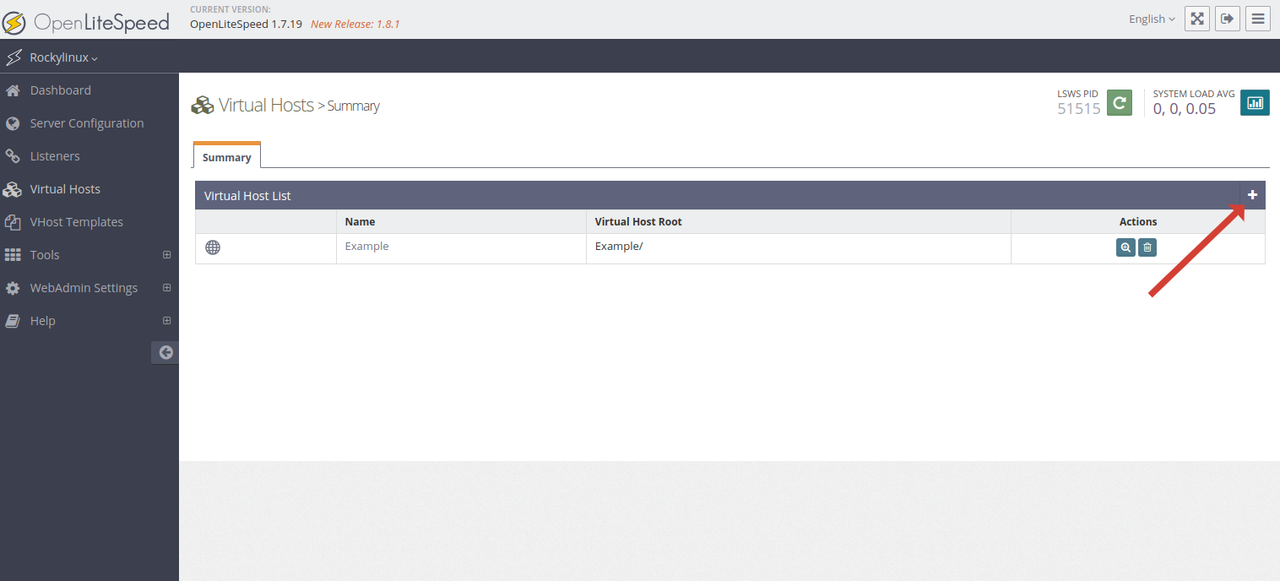
Click Add in the top right corner within the Virtual Host List section.
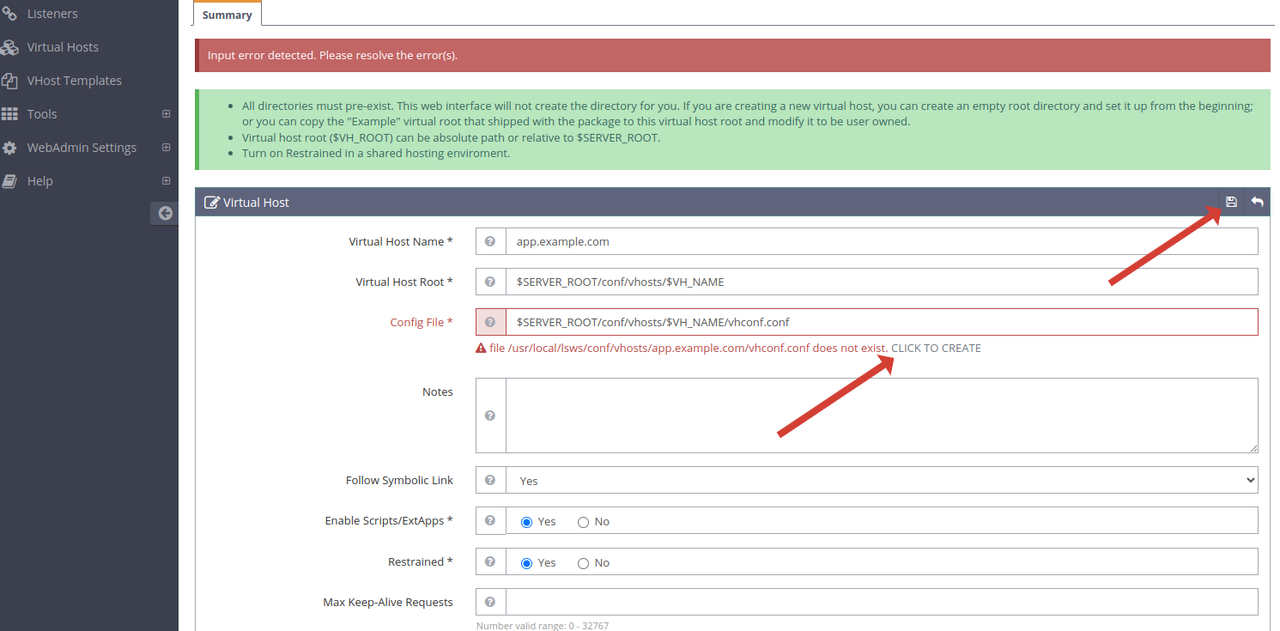
Enter the following virtual host details in the respective fields.
- Virtual Host Name:
app.example.com - Virtual Host Root:
$SERVER_ROOT/conf/vhosts/$VH_NAME/ - Config File:
$SERVER_ROOT/conf/vhosts/$VH_NAME/vhconf.conf - Follow Symbolic Link:
Yes - Enable Scripts/ExtApps:
Yes - Restrained:
Yes
- Virtual Host Name:
Click Save to save the new virtual host configuration. Then, when prompted to resolve errors, find and click CLICK TO CREATE to create a new configuration file and web root directory.
Click Save to apply the new virtual host configuration on your server.
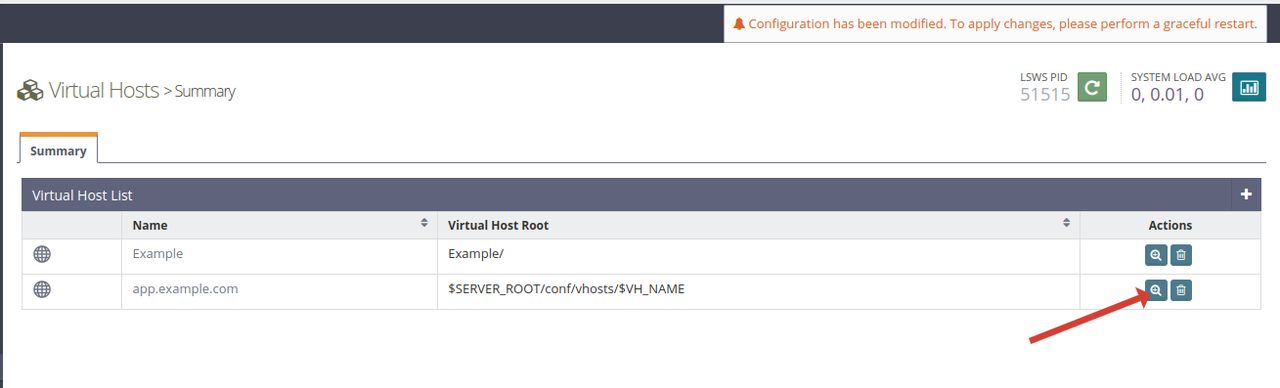
Verify that the new virtual host is available in your Virtual Host List section. Then, click View within the actions section to modify the virtual host configuration.
Click Edit within the General tab to modify the virtual host configuration.

Enter the following values in the respective fields to enable on your virtual host. Replace
app.example.comwith your actual domain.- Document Root:
$SERVER_ROOT/conf/vhosts/$VH_NAME/ - Domain Name:
app.example.com - Enable GZIP:
YES
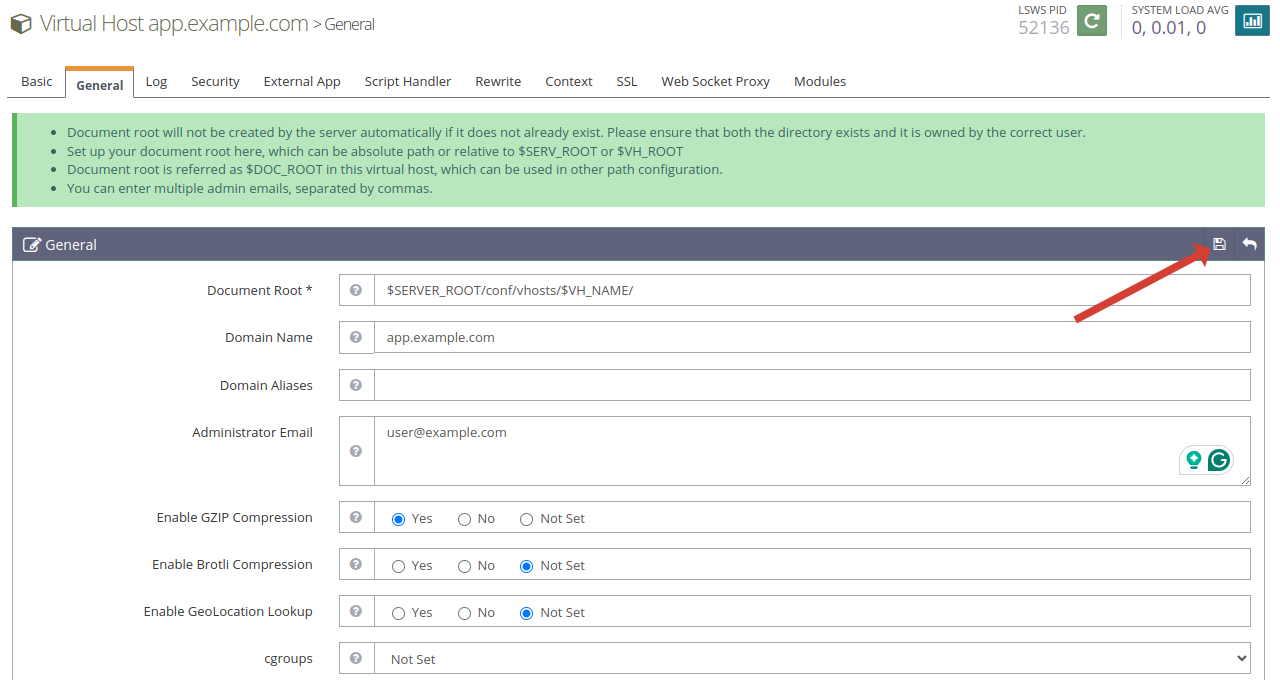
- Document Root:
Click Save to apply the new virtual host configuration changes.
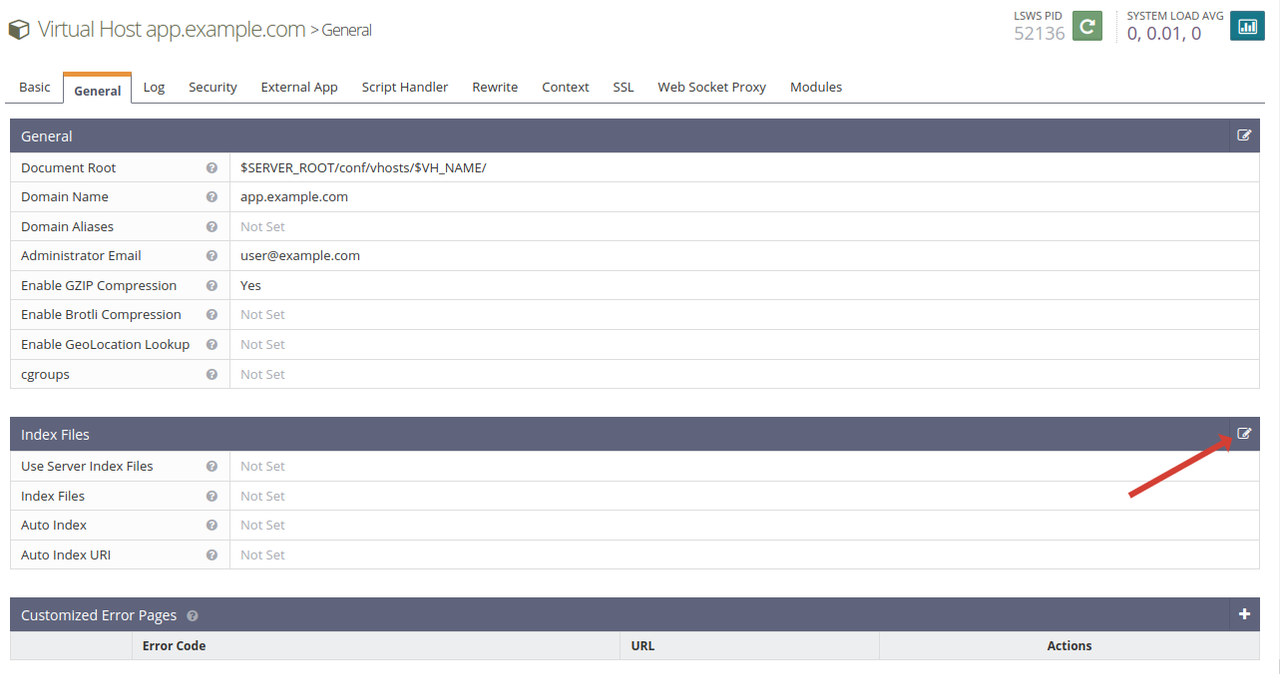
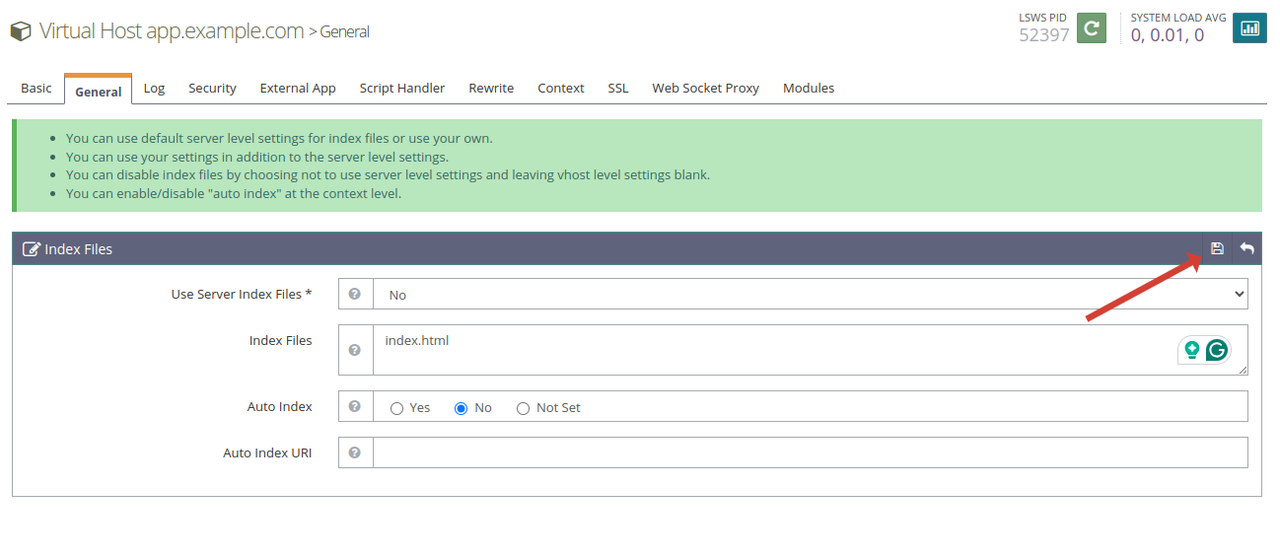
Click Edit within the Index Files section to set up your virtual host index information.
Enter the following values in the respective fields to set up the default virtual host web application file.
- Use Server Index Files:
No - Index Files:
index.html - Auto Index:
No
- Use Server Index Files:
Click Save to apply the new index page changes.
Navigate to the Log tab.
Click Edit within the Virtual Host Log section to modify the virtual host log information.
Enter the following details in the respective fields to set up logging.
- Use Servers Log:
Yes - File Name:
$SERVER_ROOT/conf/vhosts/$VH_NAME/error.log - Log LevelI:
ERROR - Rolling Size (bytes):
10M - Keep Days:
7 - Compress Archive:
Yes
- Use Servers Log:
Click Save to apply the log changes.
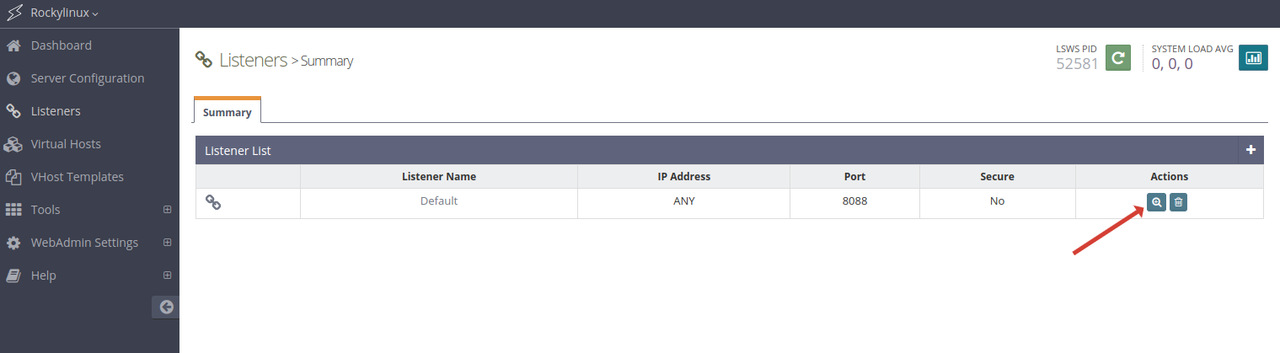
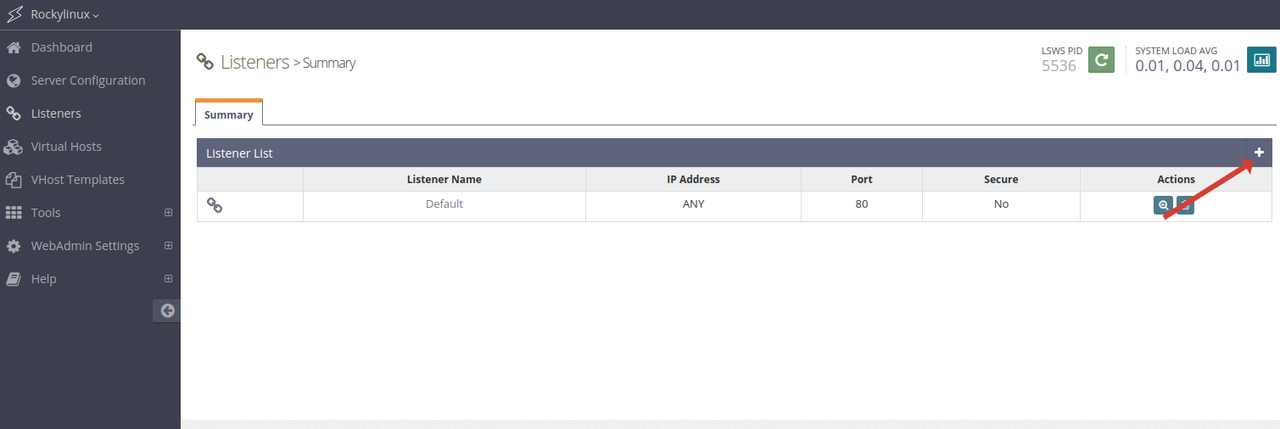
Navigate to Listeners on the main navigation menu.
Click Edit in the Actions section next to the Default listener to modify the default webserver configuration.
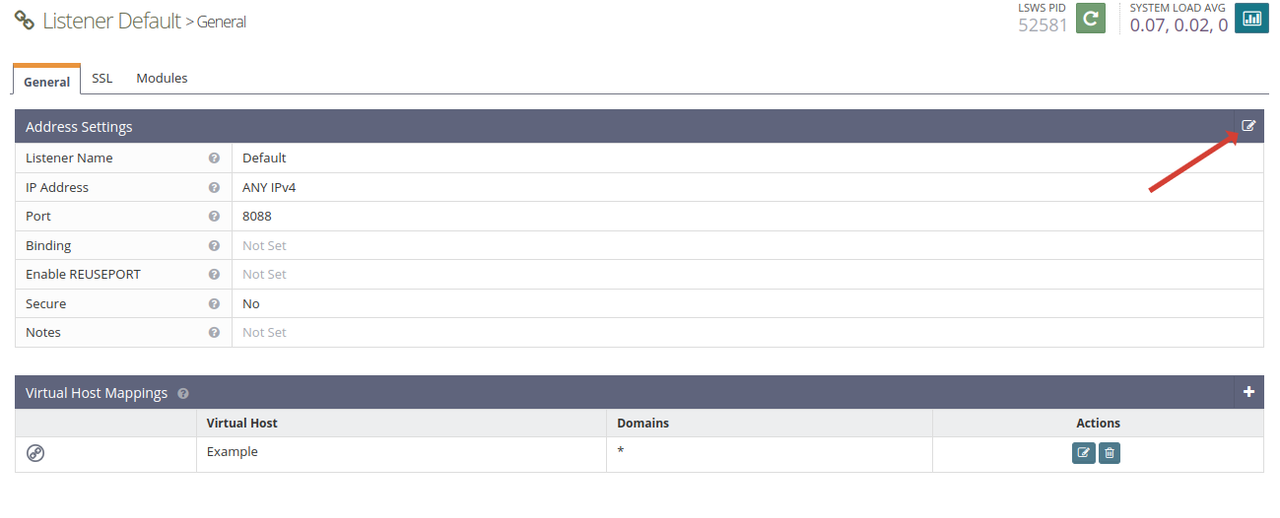
Click Edit within the Address Settings section to modify the default address and information.
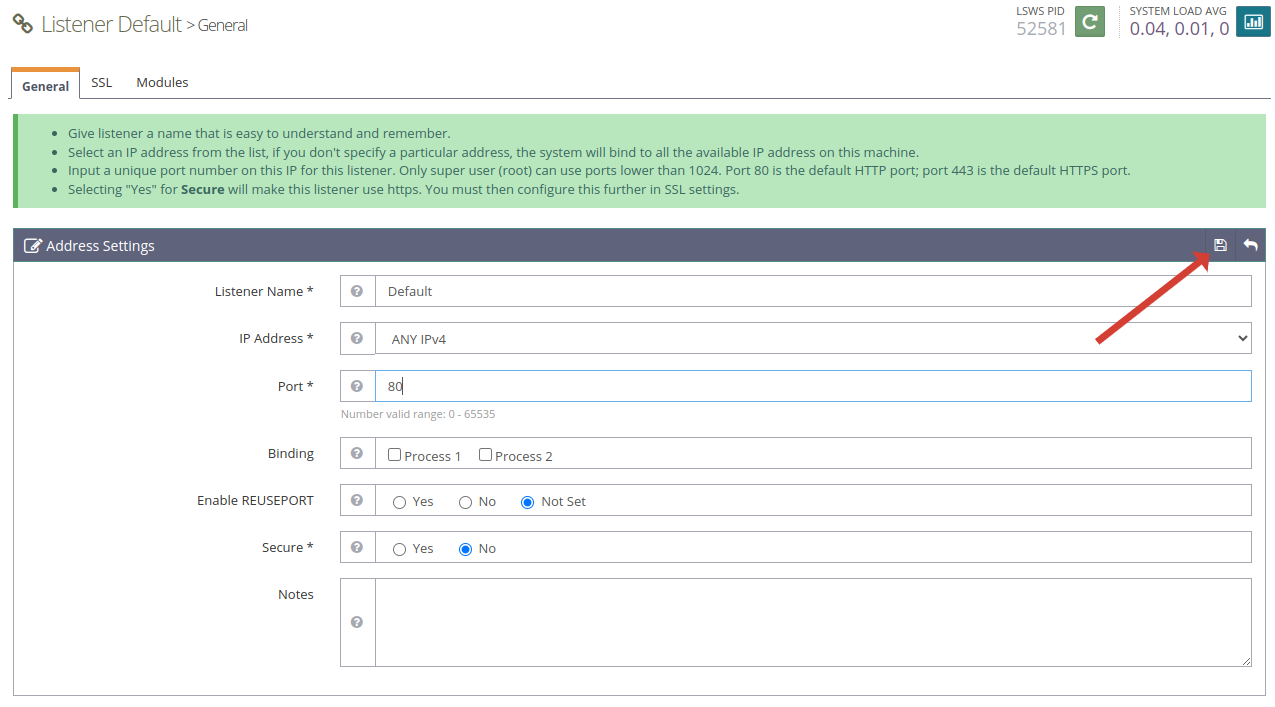
Change the default listening Port value from
8088to the HTTP port80.Click Save to apply the new listening address information.
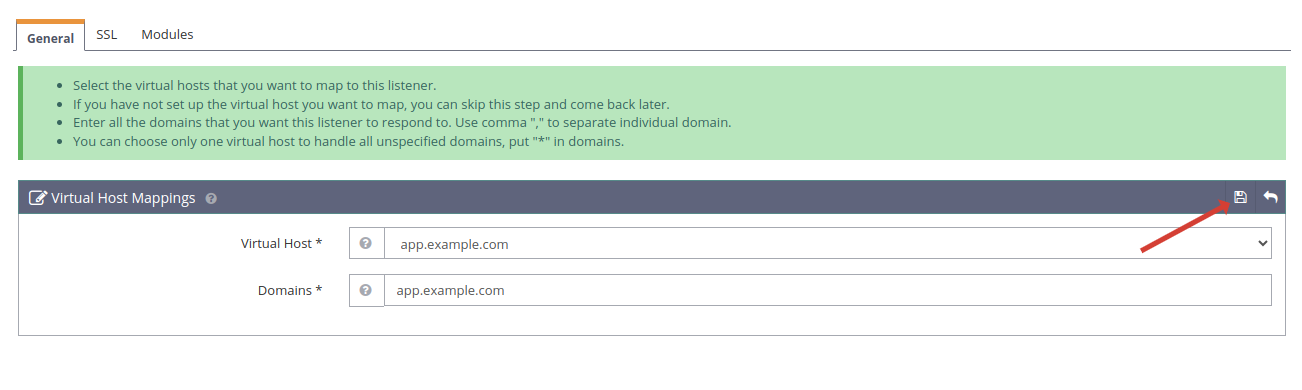
Find the Virtual Host Mappings section, and click the Edit icon next to the Example virtual host to modify the default domain.
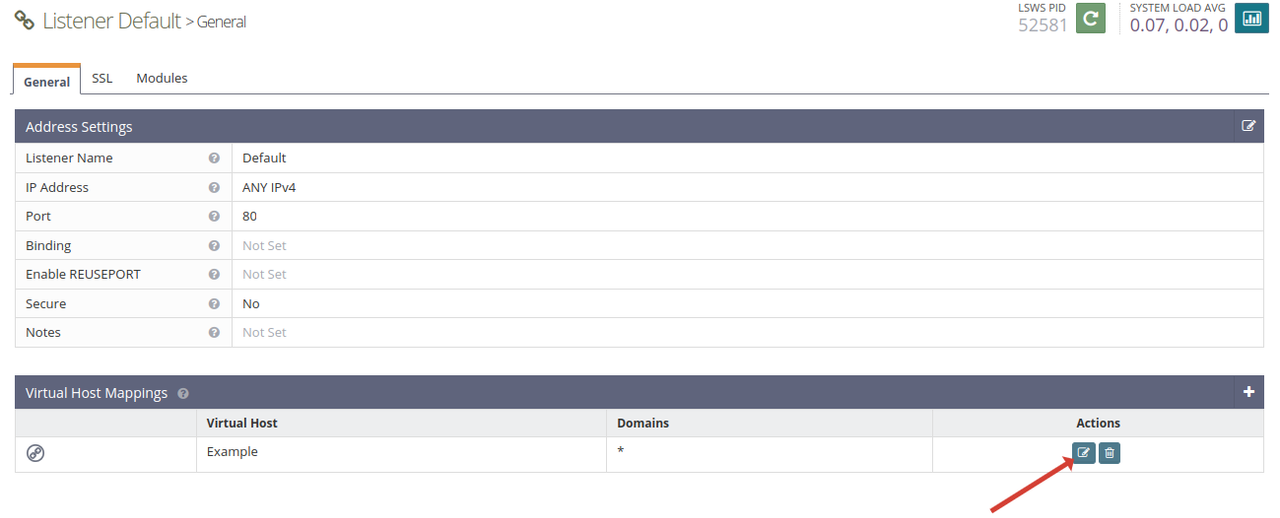
Enter the following values in the respective fields. Replace
app.example.comwith your actual domain.- Virtual Host: app.example.com
- Domains: app.example.com
Click Save to apply the new default virtual host domain.
Find LSWS PID in the top right corner of the console and click Graceful Restart to restart the OpenLiteSpeed webserver.
Click GO when prompted to restart the LiteSpeed service and apply your configuration changes.
Access your server SSH session.
console$ ssh user@SERVER-IP
Create a new
index.htmlweb application file in your virtual host's web root directory.console$ sudo nano /usr/local/lsws/conf/vhosts/app.example.com/index.html
Add the following contents to the file.
html<!DOCTYPE html> <html lang="en"> <head> <meta charset="UTF-8"> <meta name="viewport" content="width=device-width, initial-scale=1.0"> <title>Welcome</title> </head> <body> Greetings from Vultr </body> </html>
Save and close the file.
The above HTML application file displays a
Greetings from Vultrmessage when accessed in a web browser.Create a new error log file for your virtual host.
console$ sudo touch /usr/local/lsws/conf/vhosts/app.example.com/error.log
Grant the OpenLiteSpeed user full privileges to the virtual host web root directory.
console$ sudo chown -R lsadm: /usr/local/lsws/conf/vhosts/app.example.com/
Change the virtual host web root directory permissions to
755to grant the OpenLiteSpeed user read, write and execute privileges.console$ sudo chmod -R 755 /usr/local/lsws/conf/vhosts/app.example.com/
Access your domain in a new web browser window and verify that your HTML web application displays the message
Greetings from Vultr.http://app.example.com
Secure the OpenLiteSpeed Webserver
The OpenLiteSpeed webserver delivers all web applications using the default HTTP port 80 as defined in your listener configurations. Follow the steps below to generate new Let's Encrypt SSL certificates to secure the OpenLiteSpeed webserver with HTTPS traffic.
Install the Certbot Let's Encrypt client tool on your server.
console$ sudo dnf install certbot -y
Generate a new Let's Encrypt SSL certificate for your domain using the virtual host's web root directory. Replace
app.example.comwith your actual domain andadmin@example.comwith your email address.console$ sudo certbot certonly --non-interactive --agree-tos -m admin@example.com --webroot -w /usr/local/lsws/conf/vhosts/app.example.com/ -d app.example.com
Output:
Saving debug log to /var/log/letsencrypt/letsencrypt.log
Account registered.
Requesting a certificate for app.example.com

Successfully received certificate.
Certificate is saved at: /etc/letsencrypt/live/app.example.com/fullchain.pem
Key is saved at:         /etc/letsencrypt/live/app.example.com/privkey.pem
This certificate expires on 2024-09-25.
These files will be updated when the certificate renews.
Certbot has set up a scheduled task to automatically renew this certificate in the background.
Based on the above SSL certificate output, your new SSL certificate is available with the
/etc/letsencrypt/live/app.example.com/fullchain.pempath and the private key/etc/letsencrypt/live/app.example.com/privkey.pem. You can use the paths to integrate your SSL certificate with virtual hosts in the OpenLiteSpeed WebAdmin console.Access your OpenLiteSpeed web administration console.
http://SERVER-IP:7080Navigate to Listeners on the main navigation menu.
Click Add within the Listener List section to set up a new listener.
Click Edit within the Address Settings section to set up a new address and port to listen for incoming connections.
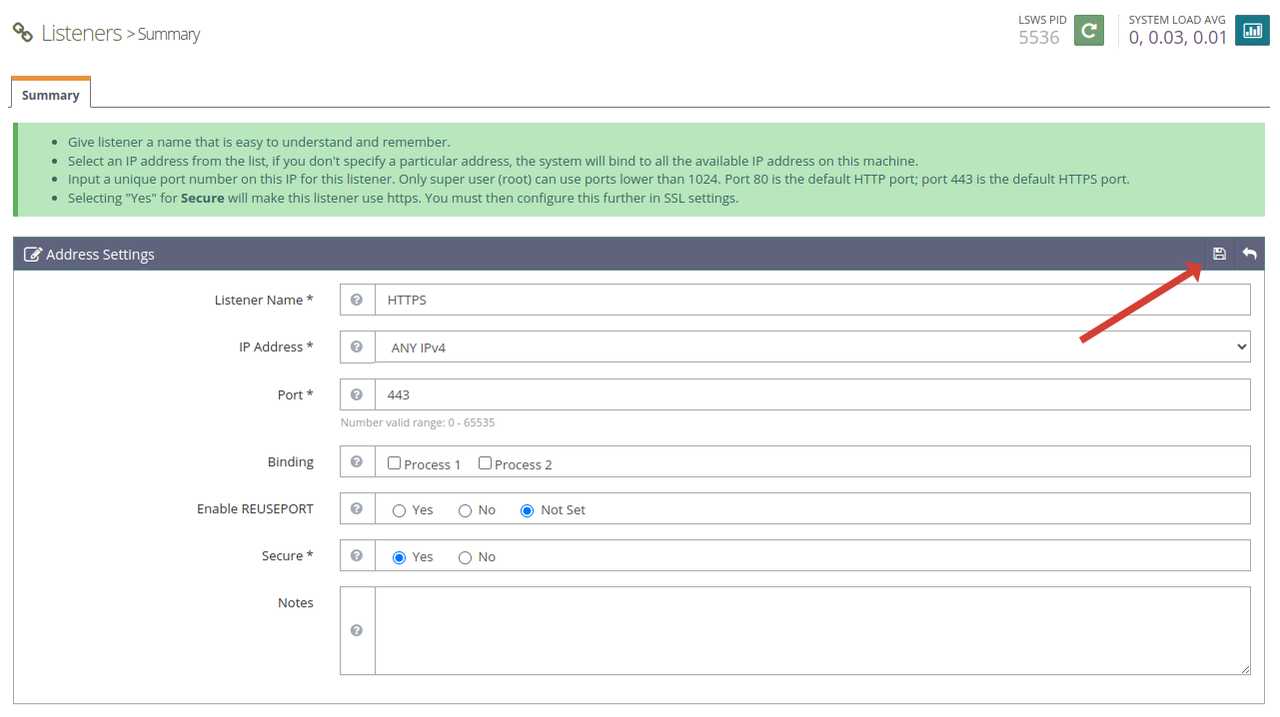
Enter the following values in the respective fields to set up a new HTTPS connections listener.
- Listener Name:
HTTPS - IP Address:
ANY IPv4 - Port:
443 - Secure:
Yes
- Listener Name:
Click Save to apply the new HTTPS configuration.
Find the Virtual Host Mappings section and click Add to map the listener with your default virtual host domain.
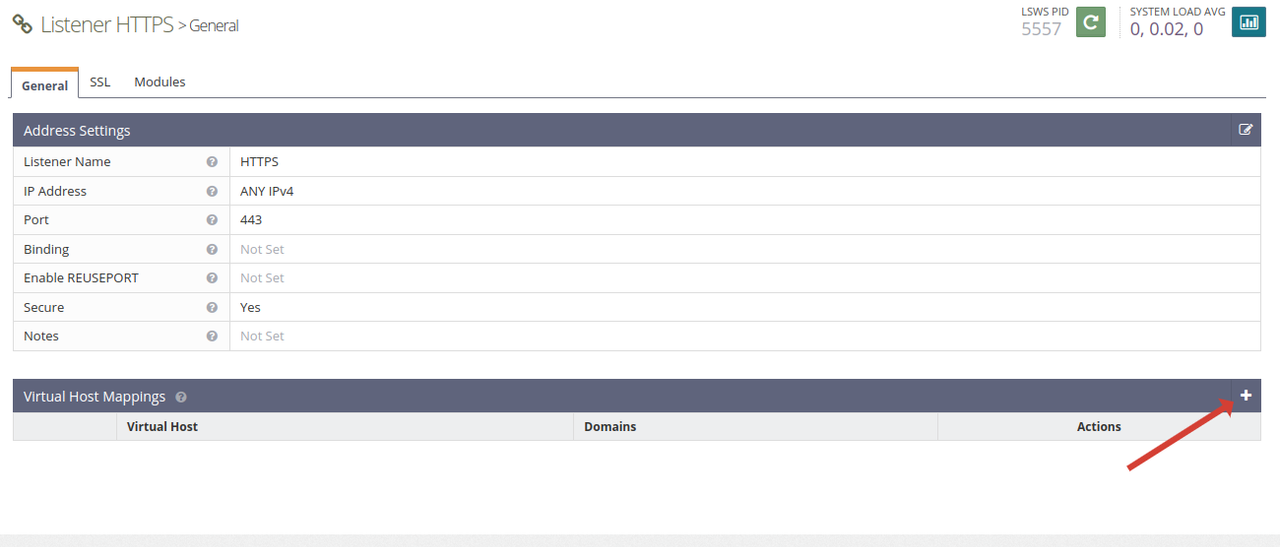
Enter the following values in the respective files to enable HTTPS on your main virtual host domain.
- Virtual Host:
app.example.com - Domains:
app.example.com
- Virtual Host:
Click Save to apply your new domain mapping changes.
Navigate to the SSL tab.
Edit the SSL Private Key & Certificate section to define your SSL certificate information.
Enter your Let's Encrypt SSL private key path
/etc/letsencrypt/app.example.com/privkey.pemin the Private Key File field.Enter your Let's Encrypt SSL certificate path
/etc/letsencrypt/app.example.com/fullchain.pemin the Certificate File field.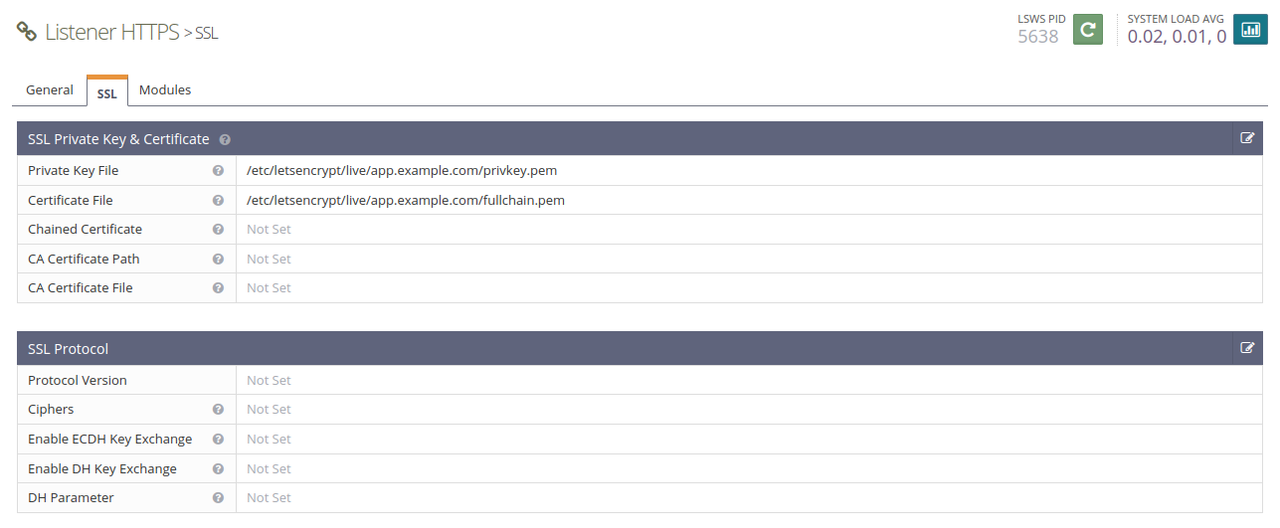
Navigate to Virtual Hosts on the main navigation menu to modify your existing virtual host information.
Edit your
app.example.comvirtual host.Click Rewrite within the virtual host configuration page to set up new rewrite rules.
Edit the Rewrite Control section and set Enable Rewrite to Yes. Then, click Save to apply the rewrite changes.
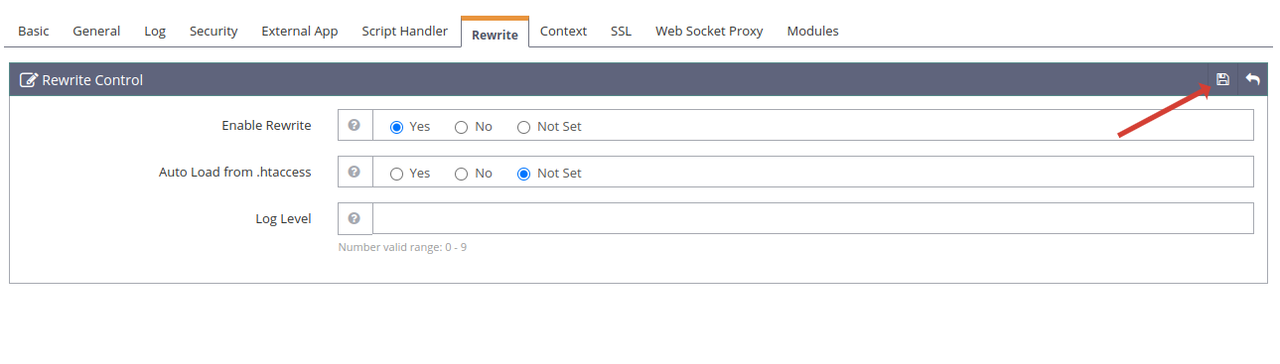
Find the Rewrite Rules section and click Edit to set up new rules.
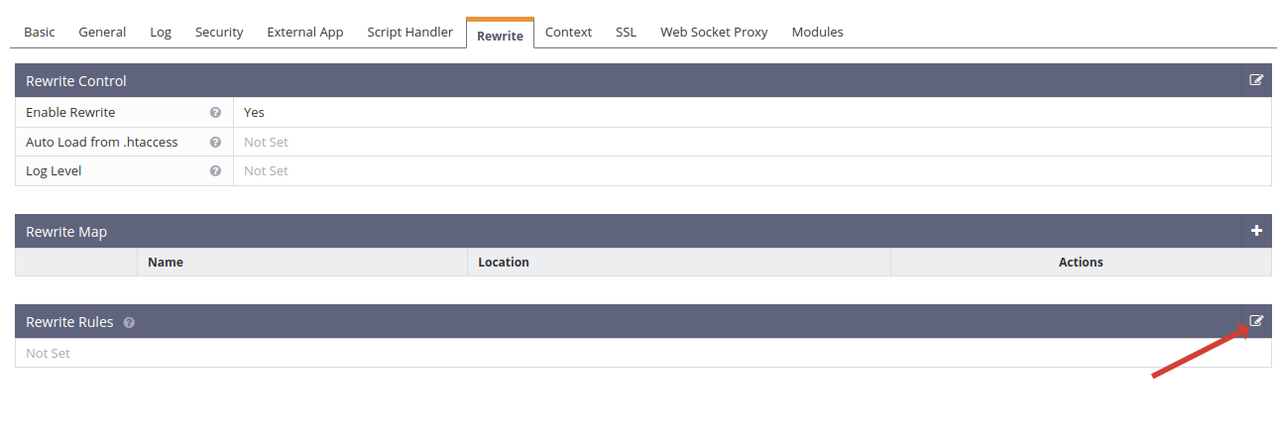
Add the following configurations within the Rewrite Rules field. Then, click Save to apply the new rules.
RewriteCond %{SERVER_PORT} ^80$
RewriteRule .* https://%{SERVER_NAME}%{REQUEST_URI} [R=301,L]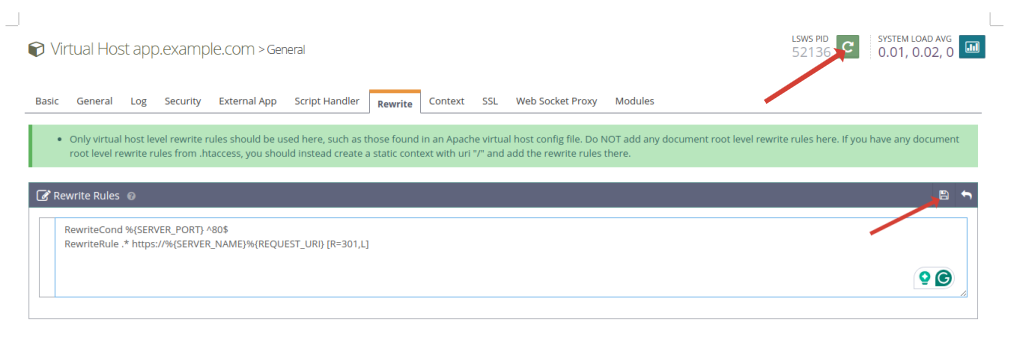
Click Graceful Restart in the top right corner of the console to restart the OpenLiteSpeed webserver and apply your configuration changes.
Access your domain in a new web browser window using HTTPS and verify that your connection is encrypted with a valid SSL certificate.
https://app.example.com
Set Up Firewall Rules
FirewallD is available and active on Vultr Rocky Linux 9 servers by default. It blocks all unpermitted network connections and requests on the server. Follow the steps below to set up new firewall rules to allow access to the OpenLiteSpeed web administration console, HTTP, and HTTPS connections on your server.
Start the
firewalldservice again.console$ sudo systemctl start firewalld
Allow the OpenLiteSpeed port
7080, HTTP port80, and HTTPS port443through the firewall.console$ sudo firewall-cmd --zone=public --permanent --add-port={80/tcp,443/tcp,7080/tcp}
Reload the
firewalldconfiguration to apply the new firewall rules.console$ sudo firewall-cmd --reload
View all allowed ports in the firewall table and verify that your permitted ports are available.
console$ sudo firewall-cmd --list-ports
Output.
80/tcp 443/tcp 7080/tcp 8088/tcp
Conclusion
You have installed the OpenLiteSpeed webserver on Rocky Linux 9 and created a new virtual host to deliver web applications on your server using the web administration console. OpenLiteSpeed supports multiple virtual hosts and domains you can configure on your server to enable secure encrypted connections using valid SSL certificates. For more information, visit the OpenLiteSpeed documentation.