How to Install RabbitMQ on Rocky Linux 9
Introduction
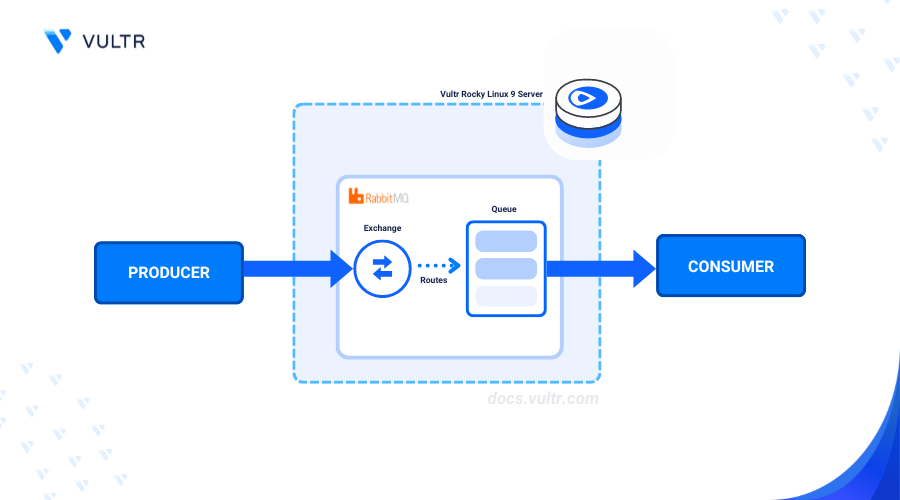
RabbitMQ is an open-source message broker that uses the Advanced Message Queuing Protocol (AMQP) to exchange messages between applications. RabbitMQ works as a distributed system that handles high-throughput workloads to efficiently improve applications' performance and stability.
In this article, you'll install RabbitMQ on Rocky Linux 9 and manage message queues on the server.
Prerequisites
Before you begin:
- Deploy a Rocky Linux 9 instance on Vultr.
- Create a new domain A record pointing to the instance's public IP address. For example,
rabbitmq.example.com. - Access the instance using SSH as a non-root user with sudo privileges.
- Update the instance.
Install RabbitMQ on Rocky Linux 9
RabbitMQ is not available in the default package repositories on Rocky Linux 9. Follow the steps below to install the RabbitMQ repository information and dependency packages.
Import the RabbitMQ primary signing keys.
CONSOLEImport the Erlang signing keys.
CONSOLEImport the RabbitMQ server signing keys.
CONSOLECreate a new
/etc/yum.repos.d/rabbitmq.repoRabbitMQ repository file using a text editor likenano.CONSOLEAdd the following contents to the file.
INISave and close the file.
The above configuration enables access to the RabbitMQ and Erlang repositories for Rocky Linux 9.
Update the server's package information index to apply the new repository.
CONSOLEInstall the
socatandlogrotateRabbitMQ dependency packages.CONSOLEInstall RabbitMQ and Erlang.
CONSOLEEnable the RabbitMQ service to automatically start at boot.
CONSOLEStart the RabbitMQ service.
CONSOLEView the RabbitMQ service status and verify it's running.
CONSOLEOutput:
The RabbitMQ service is active and running on your server based on the
active (running)message in the above output.
Configure RabbitMQ
RabbitMQ uses a web console to manage application processes on the server. Follow the steps below to create a new RabbitMQ user, install rabbitmqadmin, and run the web console on the default port 15672.
Get the latest RabbitMQ server version and assign the value to a new
LATEST_VERSIONvariable.CONSOLEDownload the latest
rabbitmqadminversion from the RabbitMQ GitHub repository.CONSOLESet the execute permissions on the
rabbitmqadminbinary.CONSOLEMove the
rabbitmqadminbinary to the/usr/local/bindirectory to enable system-wide access to the tool.CONSOLEEnable the RabbitMQ management plugin.
CONSOLECreate a new RabbitMQ user and set a strong password for the user. Replace
exampleuserandstrong_passwordwith your desired user details.CONSOLEGrant the user access privileges to the RabbitMQ console.
CONSOLEAssign the user to a specific role, such as
administrator.CONSOLE
Secure RabbitMQ
By default, RabbitMQ creates a guest user with full administrative privileges. Disable the user and enable secure access to the RabbitMQ console using valid SSL certificates to enable encrypted HTTPS connections. Follow the steps below to configure Nginx as a reverse proxy for RabbitMQ, disable the default guest user, and generate trusted Let's Encrypt SSL certificates to secure the RabbitMQ console.
Disable the RabbitMQ
guestuser.CONSOLEStart the default
firewalldutility.CONSOLEAllow network connections to the HTTP port
80through the firewall to enable Let's Encrypt validations.CONSOLEAllow network connections to the HTTPS port
443through the firewall.CONSOLEReload
firewalldto apply the configuration changes.CONSOLEInstall Nginx.
CONSOLECreate a new virtual host for RabbitMQ. For example,
rabbitmq.conf.CONSOLEAdd the following contents to the file. Replace
rabbitmq.example.comwith your domain name.NGINXSave and close the file.
The above Nginx configuration creates a new reverse proxy connection to the RabbitMQ port
15672and serves the web console using therabbitmq.example.comdomain on the HTTP port80.Test the Nginx configuration for errors.
CONSOLEEnable Nginx to connect to localhost ports through the default SELinux configuration.
CONSOLERestart Nginx to apply the new changes.
CONSOLEInstall the Certbot Let's Encrypt client tool and plugin for Nginx.
CONSOLEGenerate a new SSL certificate for your virtual host domain. Replace
rabbitmq.example.comwith your domain andhello@example.comwith your active email address.CONSOLETest the Certbot automatic SSL certificate renewal process.
CONSOLERestart RabbitMQ to apply the new changes.
CONSOLE
Access RabbitMQ
Follow the steps below to test access to the RabbitMQ CLI and web console on your server.
Create a new queue in RabbitMQ to store and manage messages.
CONSOLEPublish a new message to the queue.
CONSOLERetrieve and view a message from the queue.
CONSOLEOutput:
Access your domain using a web browser such as Chrome to manage queues using the RabbitMQ web console.
Enter the administrative user's details you created earlier and click Login to acccess the web console.
Expand the Nodes group to view your RabbitMQ node information.
Navigate to the Queues and Streams tab to manage RabbitMQ queues.
Conclusion
You have installed RabbitMQ on a Rocky Linux 9 and enabled access to the web console. RabbitMQ securely handles message exchanges between microservices. For more information and advanced configuration options, visit the RabbitMQ Documentation.


0 Comments
Be the first to comment and share your perspective with the community.