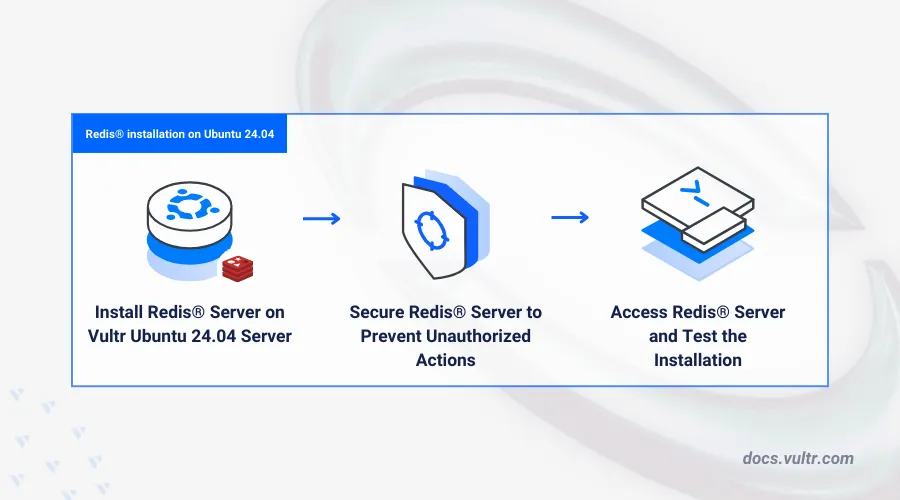
Introduction
Redis® (Remote Dictionary Server) is an open-source, in-memory key-value data store that works as a database, cache, or message broker. It integrates with modern web applications to improve performance and reduce server load by storing repeated queries, such as database queries, in memory. On Ubuntu 24.04, Redis® benefits from the system’s stability, security updates, and package management, making it a reliable choice for high-performance caching and real-time data processing.
This article explains how to install Redis® on Ubuntu 24.04 and access the database to integrate it with other applications on your server. If you're using a different system such as Ubuntu 20.04, Debian 10, or CentOS 8 and want to install Redis®, check out our guides on Installing and Configuring Redis® on Ubuntu 20.04, and Installing Redis® from Source on Debian 10.
Prerequisites
Before you begin:
Access the server using SSH as a non-root user with sudo privileges.
Install Redis® on Ubuntu 24.04
Redis® is available in the default package repositories on Ubuntu 24.04. Follow the steps below to install the latest Redis® package on your server.
Update the server's package index.
console$ sudo apt update
Install Redis® on Ubuntu 24.04.
console$ sudo apt install redis-server
View the installed Redis® version on your server.
console$ redis-server --version
Output.
Redis server v=7.0.15 sha=00000000:0 malloc=jemalloc-5.3.0 bits=64 build=d81b8ff71cfb150e
Configure Redis® on Ubuntu 24.04
Redis® listens for connection requests on the default localhost port 6379 on your server. In the following steps, configure Redis® to increase the default database limit and accept connections on your localhost 127.0.0.1 address.
Open the main Redis® configuration file using a text editor such as
nano.console$ sudo nano /etc/redis/redis.conf
- Find the following
binddirective and verify that your localhost IPV4127.0.0.1and IPV6::1values are available.
inibind 127.0.0.1 -::1
- Find the
portdirective and verify the default Redis® port or modify it to a custom TCP port available on your server.
iniport 6379- Find the following
daemonizedirective and verify that it's set toyesto enable the Redis® service on your server.
inidaemonize yesSave and close the file.
- Find the following
Enable the Redis® server to automatically start at boot time.
console$ sudo systemctl enable redis-server.service
Start the Redis® service.
console$ sudo systemctl start redis
View the Redis® server status and verify it's running.
console$ sudo systemctl status redis
● redis-server.service - Advanced key-value store
    Loaded: loaded (/usr/lib/systemd/system/redis-server.service; enabled; preset: enabled)
    Active: active (running) since Thu 2024-06-27 15:28:45 UTC; 1h 21min ago
      Docs: http://redis.io/documentation,
            man:redis-server(1)
  Main PID: 16918 (redis-server)
    Status: "Ready to accept connections"
      Tasks: 5 (limit: 2269)
    Memory: 3.3M (peak: 3.8M)
        CPU: 8.034s
    CGroup: /system.slice/redis-server.service
            └─16918 "/usr/bin/redis-server 0.0.0.0:6379"
Secure Redis®
Redis® does not require authentication by default which enables unrestricted access for system users to available databases on the server. In the following steps, enable authentication to secure your Redis® server and only accept authorized user access.
Open the main Redis® configuration file.
console$ sudo nano /etc/redis/redis.conf
- Find the following
requirepassdirective, uncomment it, and replacefoobaredwith a strong password of your choice.
inirequirepass strong-passwordSave and close the file.
The above configuration enables authentication on your Redis® server using the specified user password. Uncomment the
aclfiledirective to enable multiple users with unique passwords authorized to access your Redis® server.- Find the following
Restart the Redis® server to apply your configuration changes.
console$ sudo systemctl restart redis
Access the Redis® Server
The Redis® server accepts connection requests using the redis-cli utility or compatible application modules on your server. In the following steps, access the Redis® server and test access write sample data to the default database to test your server configurations.
Connect to the Redis® server.
console$ redis-cliTest access to the server without authentication.
127.0.0.1:6379> pingVerify that your request fails with the following output:
(error) NOAUTH Authentication required.Log in to the Redis® server using a valid password set in your configuration. Replace
strong-passwordwith the actual password you set earlier.console127.0.0.1:6379> auth strong-passwordOutput:
OKTest access to the database server again.
console127.0.0.1:6379> pingOutput:
PONGSelect a database to use on your server. For example
1.127.0.0.1:6379> SELECT 1Create a new sample key
testkeywith a value such asGreetings from Vultr!.console$ 127.0.0.1:6379[1]> set testkey "Greetings from Vultr!"
Output:
OKQuery the key value from the database.
console$ 127.0.0.1:6379[1]> get testkey
Output.
"Greetings from Vultr!"Exit the Redis® CLI.
console$ 127.0.0.1:6379[1]> exit
Conclusion
You have installed Redis® on your Ubuntu 24.04 server and configured it to accept secure connection requests. You can integrate your Redis® server with your existing web applications to work as a database or cache to optimize your application and server performance. For more information and usage options, visit the official Redis® documentation.